Printing
The printing section manages all configurations related to how and what is printed at an individual site level, including header and footer information for printed materials.
Printing Topics
Settings
The following table outlines each setting and its corresponding functionality.
| Setting | Description | Additional Information |
|---|---|---|
| Bill / Receipt Group |
This setting is assigned a print stream which in turn is mapped in print groups to determine where bills and receipts will be printed |
This configuration also requires additional setup in:
|
| Report Print Group |
This setting is assigned a print stream which in turn is mapped in print groups to determine where reports will be printed |
This configuration also requires additional setup in:
|
| EFT Print Group |
This setting is assigned a print stream which in turn is mapped in print groups to determine where EFT receipts will be printed |
This configuration also requires additional setup in:
|
| Ticketing Print Group |
This setting is assigned a print stream which in turn is mapped in print groups to determine where cloak room tickets will be printed |
This configuration also requires additional setup in:
|
| SOAP Print Group |
This setting is assigned a print stream which in turn is mapped in print groups to determine where other printed materials will be printed |
This configuration also requires additional setup in:
|
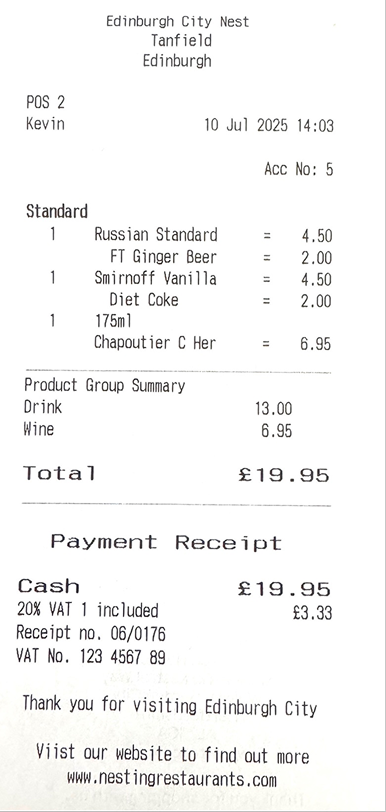
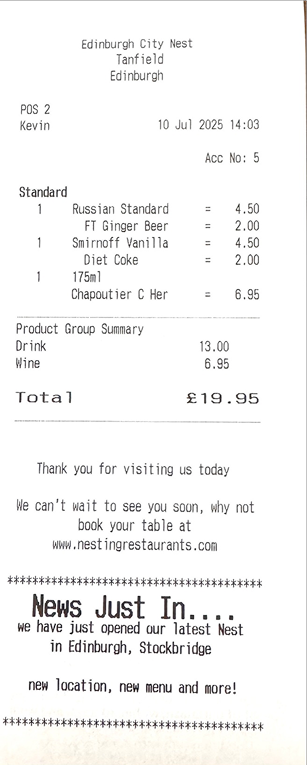
| Printer Header Lines 1-3 |
Header text shown at the top of bills / receipts / correction tickets when printed |
|
| EFT Header Lines 1-3 | Header text show at the top of EFT receipts when printed | |
| Ticketing Header | Header text shown on at the top of cloak room tickets when printed |
This configuration also requires additional setup in:
|
| VAT Number | VAT number printed on receipts | |
| Terminal Reports IP Address | IP address of the Aztec Site / Site Master PC | |
| Promotional Savings on Bill | When enabled this setting will print savings related to promotions | 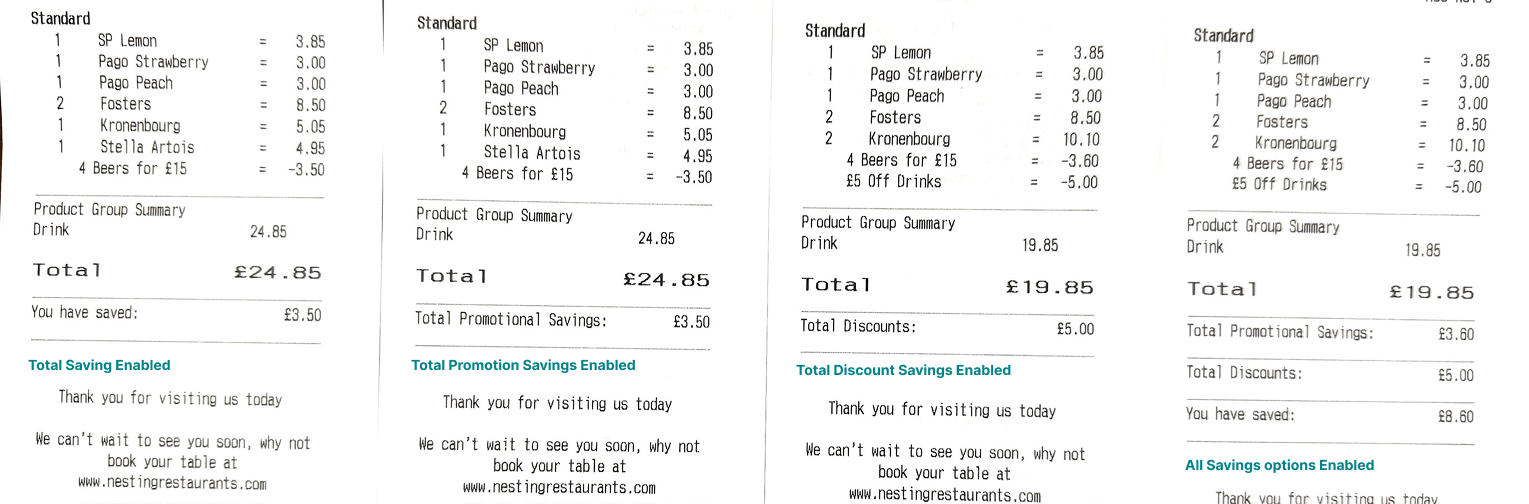
|
| Discount Savings on Bill | When enabled this setting will print savings related to discounts | |
| Total Savings on Bill |
When enabled this setting will print total savings for promotions and discounts |
|
| Compact Bill Lines if Same |
When enabled this setting will consolidate products by quantity if they are the same to reduce space on printed bills / receipts |
|
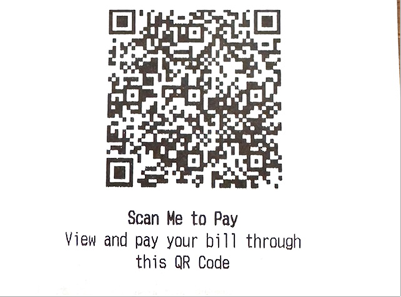
| Print QR Code for Bill Payment | ||
| Prompt to Print Payment Slip |
When this setting is set the payment slip will either Always Print, Never Print, Prompt for Print |
This setting is subject to different payment providers ability to provide this functionality, in some instances Zonal have no control over what is printed |
Receipt Footer
The receipt footer will be included at the bottom of printed receipts.
Follow these steps to configure the receipt footer:
-
Click into the Receipt Footer section
-
Add the required 7 lines of customised text
Bill Footer
The bill footer will be included at the bottom of printed bills.
Follow these steps to configure the bill footer:
-
Click Edit Bill Footer
-
Enter the Bill Footer Text against the available 15 lines with the following configurations
-
Bold
-
Double Width
Only 20 characters can be added to lines with the double width setting -
Double Height
-
Text Alignment
Data can be pasted from the clipboard using the 'Paste from Clipboard' button and to check the format use the 'Preview' button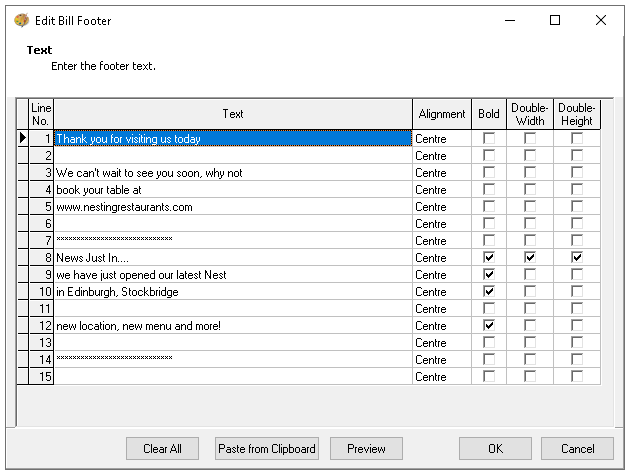
-
-
Click OK
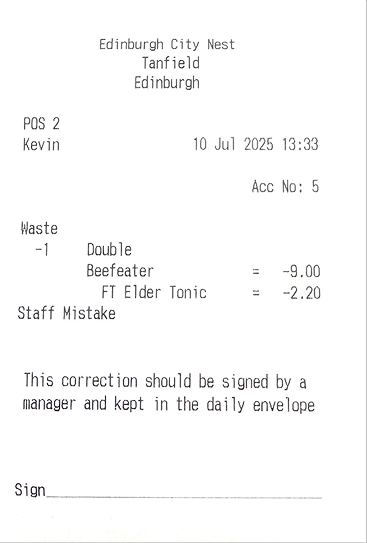
Correction Ticket Footer
The correction ticket footer will be included at the bottom of all corrections that have been configured to print a ticket.
-
Click into the Correction Ticket Footer section
-
Add the required 6 lines of customised text
QR Code Footers
Follow these steps to configure QR code footers:
-
Click Configure Footer QR Code
-
Set the check box for Print QR Code on | Bill Footer / Receipt Footer
Both Bill & Receipt can be selected -
Choose the QR Code Size from the drop down
Zonal recommends using medium as the most optimal size -
Enter a QR Code URL (optional) - use Dynamic fields from the drop down to be included into the URL
-
Site ID
-
Sales Area ID
-
Account ID
-
Table Number
-
Account Number
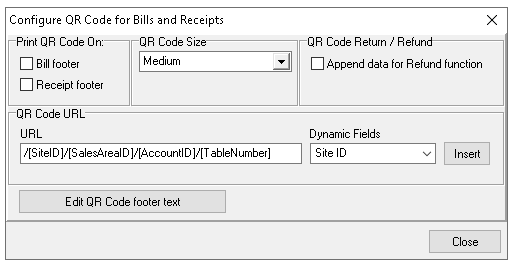 For more information on URLs for Pay My Bill click here where a customised QR codes can be created which will take the guest directly to the table to complete payment
 -
-
Click Edit QR Code Footer Text against the available 4 lines with the following configurations which will be printed below the QR code
-
Bold
-
Double Width
Only 20 characters can be added to lines with the double width setting -
Double Height
-
Text Alignment
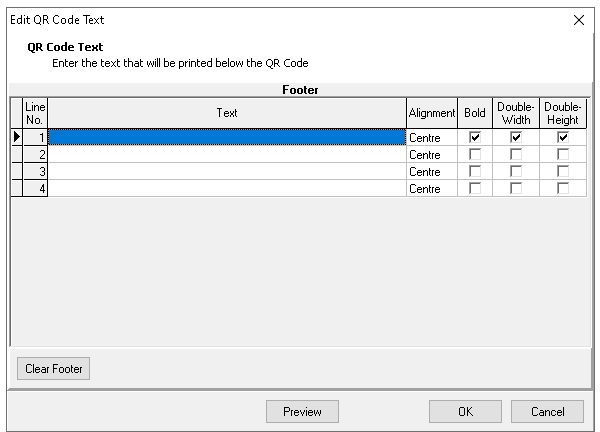 Use the Preview option to check the setup
 -
-
Click OK
-
Click Close