
Acquire - Remember your delivery exceptions!
Written by Emma Portsmouth, Customer Success Consultant at Zonal
March 14th 2024
As Easter approaches, we find ourselves needing to negotiate the first long bank holiday of the year. This requires forward thinking to ensure operators don't get caught out by a suppliers limited hours.
The Customer Success team have put together 5 simple steps which can be shared with Acquire users, to ensure they first off know how to do create an exception rule to a delivery schedule, and also remind them to take action.
How to create an exceptions to a delivery schedule
-
Log into Acquire Head Office
-
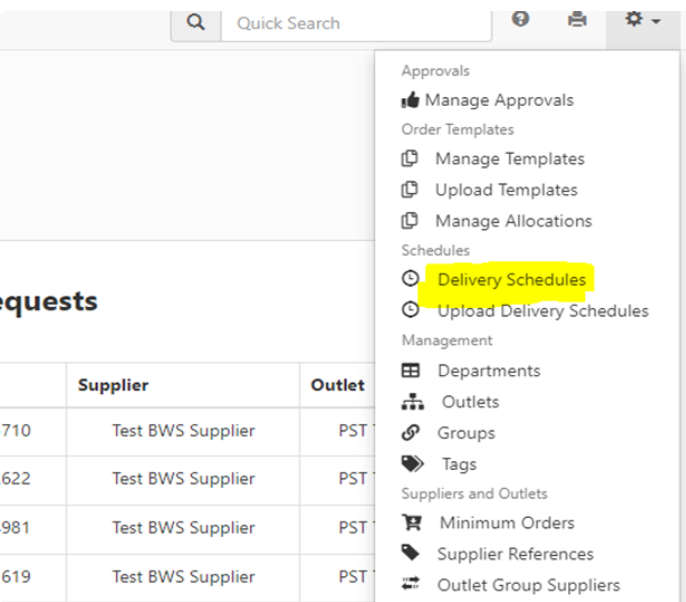
Select Admin Functions from the tool bar at the top of your screen.
-
Select Delivery Schedules
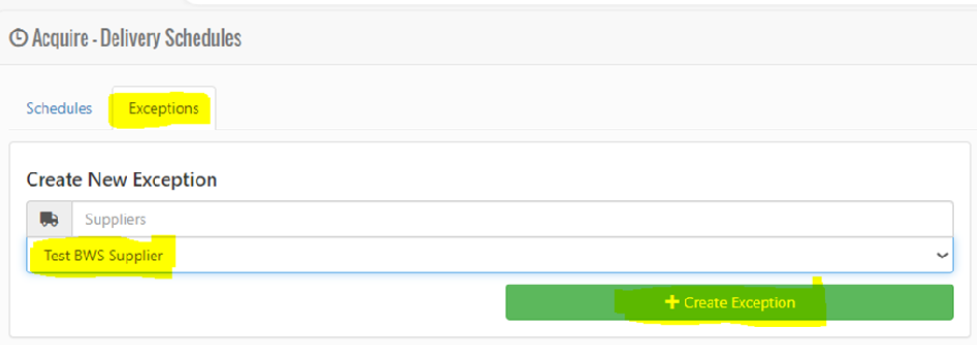
- Select the Exceptions tab. Then select the Supplier you would like to add the exception to.
- Next, select the green Create exception button.
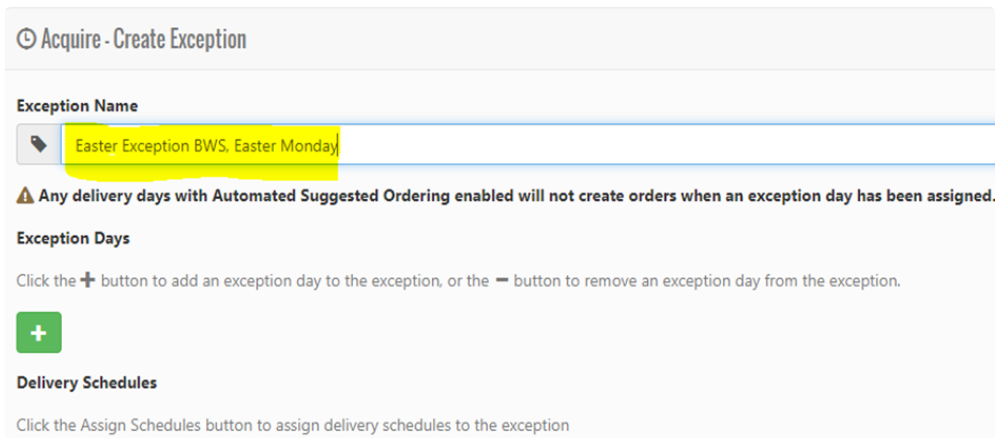
- Give your Exception a name (we would recommend that you include the supplier’s name and the exception day within the name).
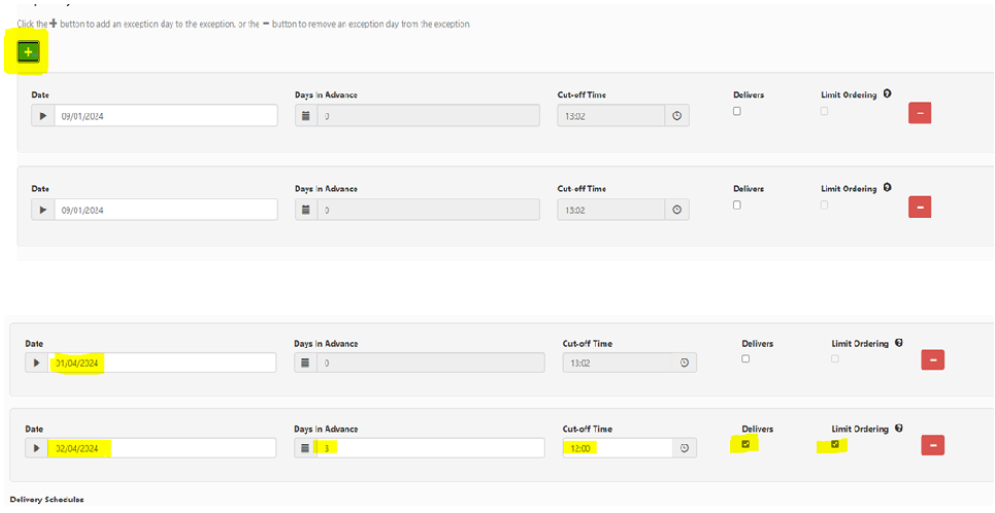
- Click the green plus (+) icon twice and you will see two date fields appear.
- In the top date field, you will need to enter the Date that you want the exception to apply to, i.e., a change to the standard delivery schedule. This is the only information you need to fill out on this date field. You need to ensure that you do not tick the delivers box, as this is the date the supplier will not be delivering to you on, i.e., Easter Monday.
- On the bottom date field, you will need to enter the new delivery date that has been allocated for this time period. You will then need to tick the Delivers tick box, this will allow you add an additional day outside of your normal schedule.
- Enter how many Days in advance this order needs to be placed by to ensure delivery on this exception date.
- Enter the Cut off time. If your Supplier will only allow 1 order to be placed per site prior to cut off time you will also need to select Limit Ordering, if the Supplier will allow multiple orders prior to cut off time, you will not need to select this.
- Then select the green Assign Schedules button, this will open your Assign Delivery Schedules to an Exception page.
- Select the delivery schedule that you would like this exception to apply to by ticking the box on the right-hand side and press ok.
- Your exception has now been added to the chosen existing schedule.
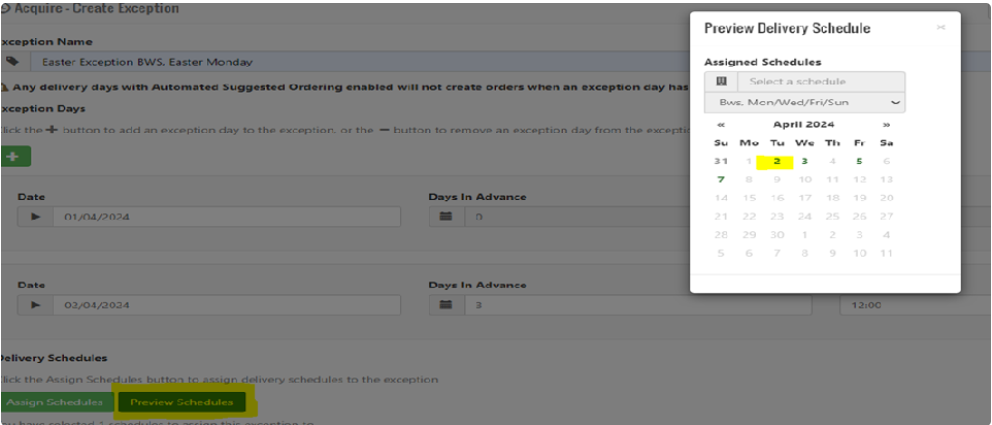
- You can view the changes to the schedule by selecting Preview Schedules; this will then display the delivery schedule calendar indicating the actual delivery date for the exception.

Sites can now configure their delivery exceptions to avoid confusion.
We hope these 5 steps have been helpful, and a quick reminder of the key areas that a user needs to take in to account when using the Acquire solution.
If you have any users of our systems querying steps to complete tasks, let us know and we'll be happy to assist with guidance or further recommendations.