
How To - Getting To Know the Kitchen Screen Layout
Customer orders are displayed in the kitchen using a standard format. This format contains key information for kitchen and wait staff.
Example order windows are shown below:
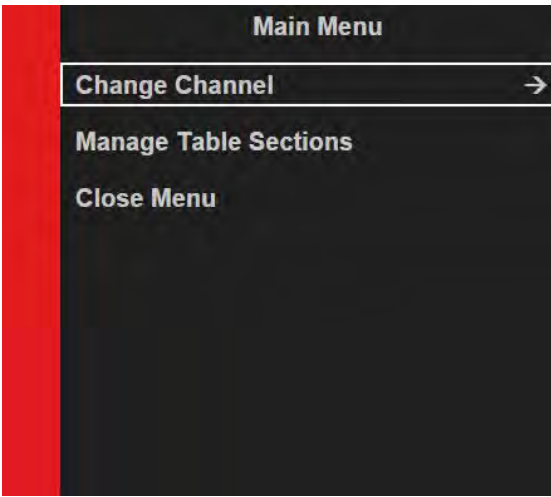
- Press the Menu button on the screen’s bump bar
- The main menu is displayed on the right-hand side of the screen.
- With Manage Table Sections selected, press the Bump button.
-
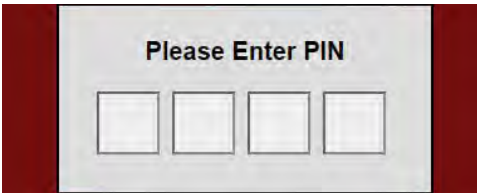
The user will be prompted to enter their access PIN. This PIN is the one set up in Aztec for the user to obtain access to the POS.
- Enter a valid PIN.
-
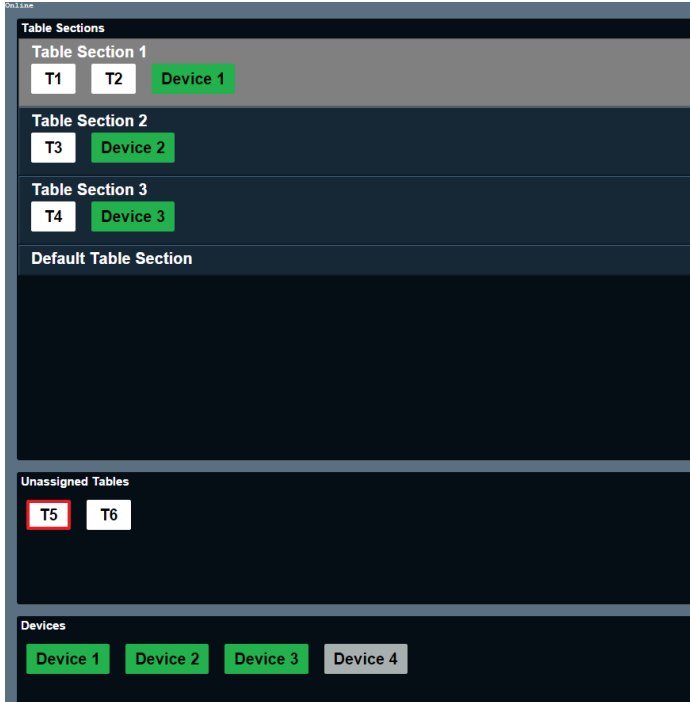
The Table Sections window is displayed.
- Use the Order Up and Order Down arrows to select the table section to which you want to assign a table or a paging device.
- Select Alt View to skip to the Unassigned Tables section.
- Use the Item Up and Item Down arrows to navigate through the list of tables and highlight the required table.
- Press the Bump button to assign the table to the selected table section.
- Select Alt View to skip to the Devices section.
- Use the Item Up and Item Down arrows to navigate through the devices and highlight the device you want to select.
- Press the Bump button to assign the device to the selected table section
-
To test the link to a paging device:
-
Highlight any device in any section and perform a long-press bump.
-
The paging device selected will be activated briefly as a test.
-
The test routine can be performed on both active and inactive devices.
-
All calibration changes are retained after a system restart
A paging device can be assigned to more than one table section, but a table can only be assigned to one.