Correction Methods
Depending on your configuration you may have a number of correction methods setup on your system. When performing a correction, it is important to use the correct method so that reporting and stocks are correctly handled.
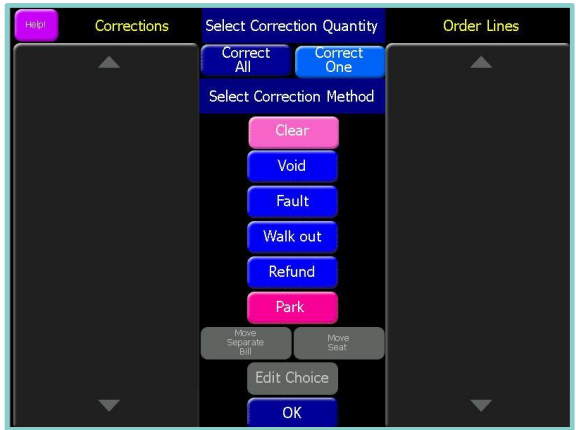
The screenshot below shows an example of a correction screen that is commonly used, followed by an explanations of the options available.
| Correction Name | Description | Action |
|---|---|---|
| Clear | Allows users to remove an item from an unsaved order | No effect on stock as the order has not been yet saved or paid |
| Void | Should be used to remove an item(s) from a saved or paid account – used to correct a mistake in a transaction | This will return the item back into stock |
| Fault | Should be used to remove an item(s) from a saved or paid account – used to correct an item that has something wrong with it and cannot be re- sold | This will waste the item from stocks |
| Walk out | Should be used to remove an item(s) from a saved account where a customer has walked out without paying | This will waste the item from stocks |
| Refund | Should be used when refunding an item(s) from a paid account – this item cannot be re-sold | This will waste the item from stocks |
| Park | Park will remove an item(s) from an account but will not correct the item it will be left as a park account in the pickup account screen | No effect on stocks – item should be corrected from the employees park account screen by the appropriate correction method |
| Move Separate Bill | Allows an order on a separate bill to be moved to another bill or table bill | No effect on stocks as this is moving items |
| Move Seat | Allows an order on a seat to be moved to another seat or table bill | No effect on stocks as this is moving items |
| Edit Choice | Allows an item that had a choice to be corrected | No effect on stocks as this is a choice correction |
Any of the correction methods can be set to be the default method, normally clear is set to be the default correction. This can be identified by going into the correction panel and seeing which option is switched on.
Each correction method type can also have up to 16 correction reasons which can be used for reporting if required.
To configure correction reasons complete the following steps:
-
Log onto the Aztec Shell
-
Select Theme Modelling
-
Select Site Setup, and double click the site name
-
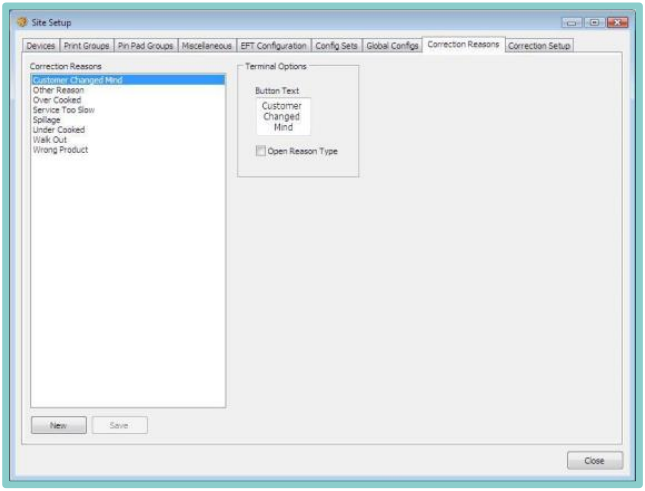
Select the Corrections Reasons tab
-
Click New, enter a name and click OK
-
Enter in the button text name as you require it to appear on the PoS when using this correction method
-
When complete select Save.
-
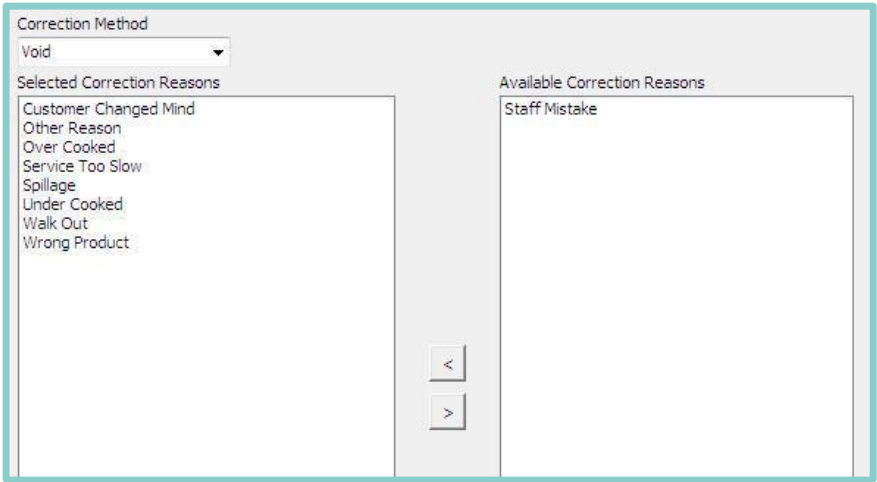
Select the Correction Setup tab, and choose the requires correction type from the drop – down
-
Finally, using the arrows, move the reason from the right to the left to join any other correction types