How To - Entering a Stock with Zones
To enter a stock with Zones:
-
Login to the Aztec Shell.
-
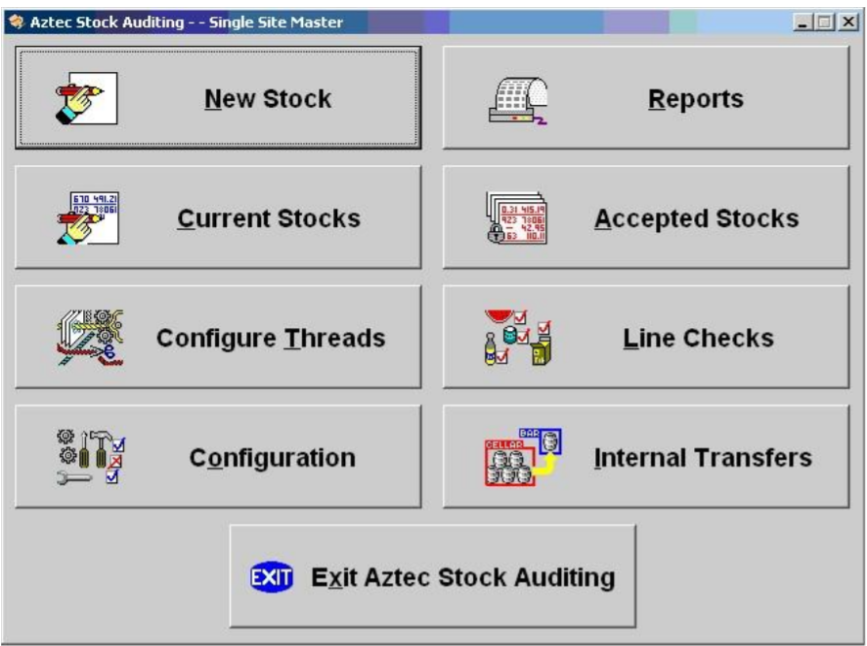
Select the Stocks module from the icons displayed.

-
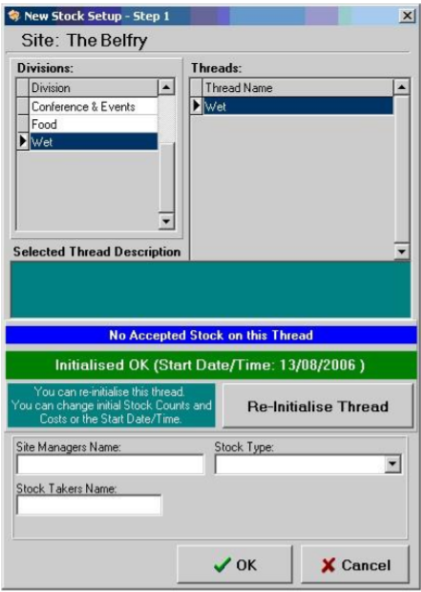
Select the option for New Stock then, from the divisions shown in the top left corner, select the Wet division, which will then display information about the last excepted stock on this thread.
A thread is the type of stock audit that you are completing in most cases the thread name will be Wet, however it could also be manager or auditor depending on your system setup.
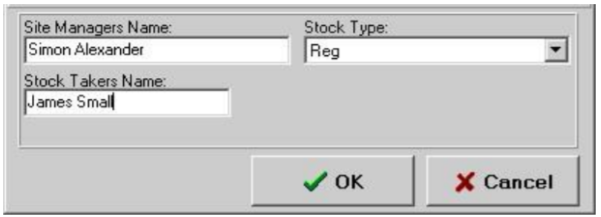
- The next screen will ask you to fill out the Managers Name, Stock Takers Name and to select from the drop down the type of Stock Type.
-
After this information has been completed press the OK button
-
The next screen will take you to an area within which you are required to select the stock period dates.
The start date is always greyed out as this will be the closing date of the previous stock period / the opening date of this stock period.
On this screen you can select any end date if it is within the last audited business day as displayed on the screen. So, for example you may be late in entering your stock so would have the ability to back date the End Date field to when you counted the stock.
-
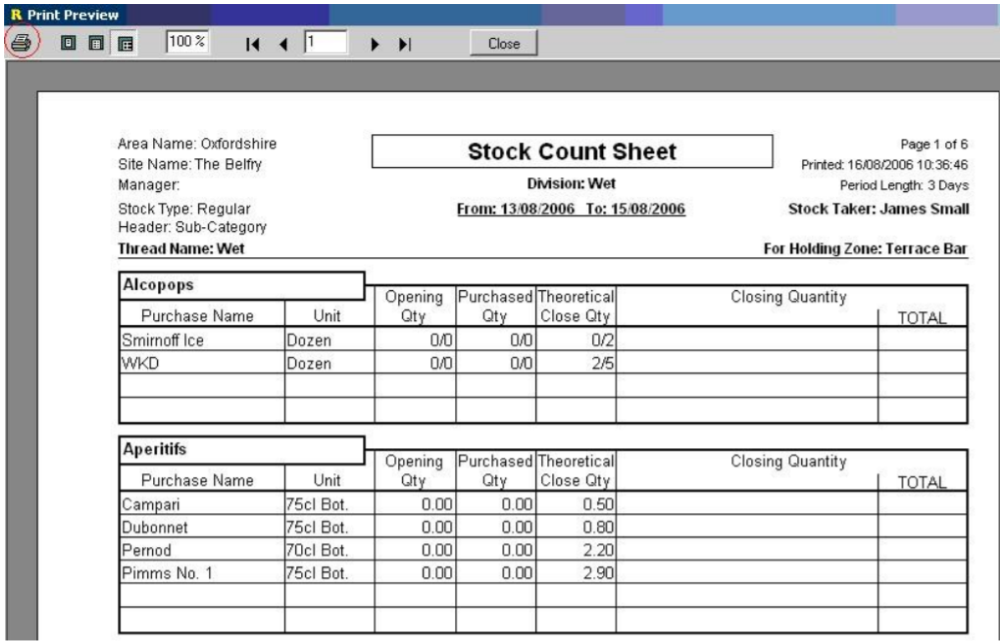
After clicking OK, a confirmation box appears asking if you wish to print the count sheets for the current stock. Select either Yes or No.
When clicking the Yes option, the count sheet will firstly appear on the screen giving you the option to print using the print button as indicated below. You will notice that on the first count sheet it shows that this is a count sheet for your first holding zone.
Each time you click on the Close button it will then produce the count sheets for the next holding zone until all zones are printed.

-
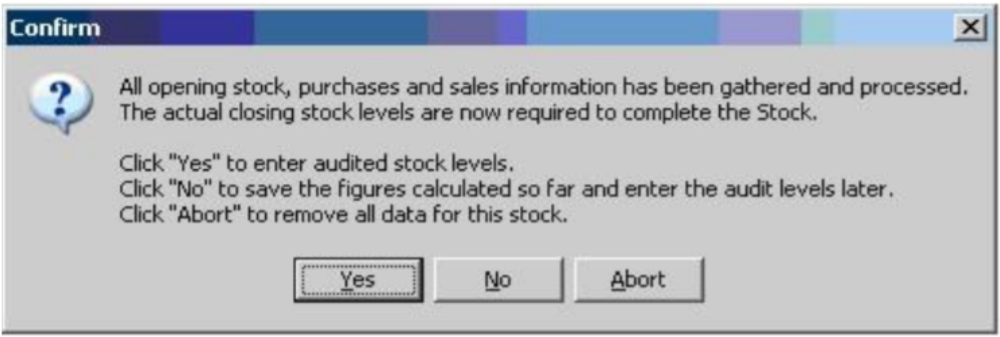
After all the count sheets have been printed or the No option was selected the next confirmation box to be displayed requires one of three options to be selected as show below. If you are going to now count your stocks, select the No option and this will then allow you to continue with this stock audit after completing the count. If you already have the count figures, select Yes.
-
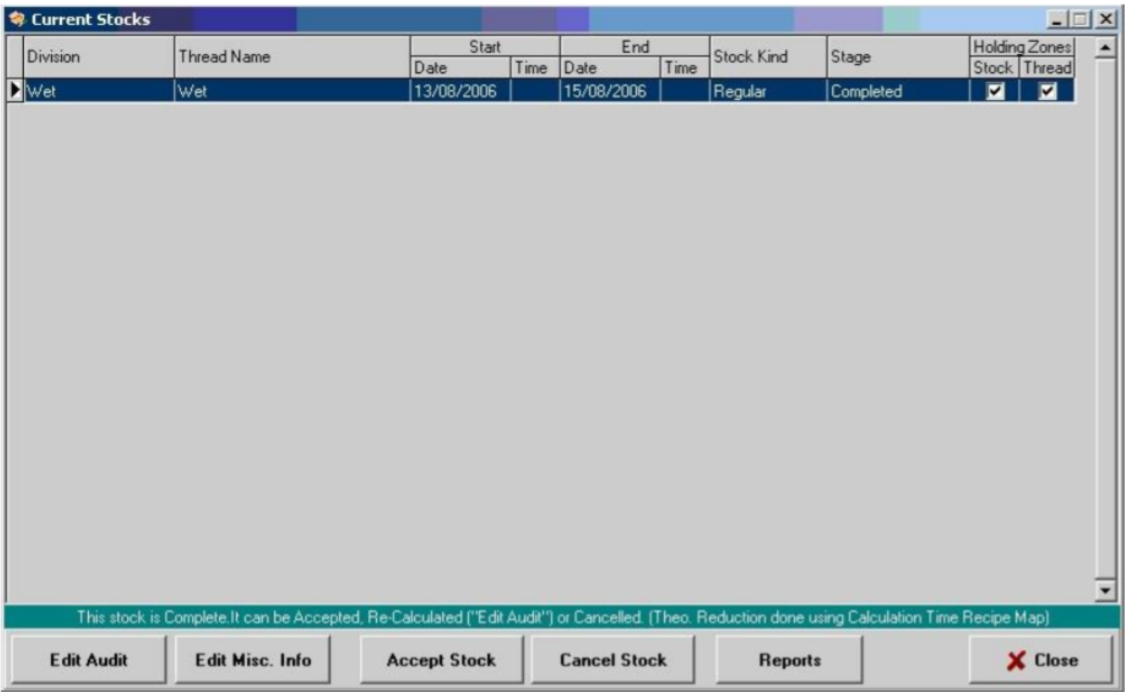
If you must go and count your stocks when coming back into the stock module select the button for current stocks and the stock that you have just started will be displayed, then select the option to Enter Audit.

-
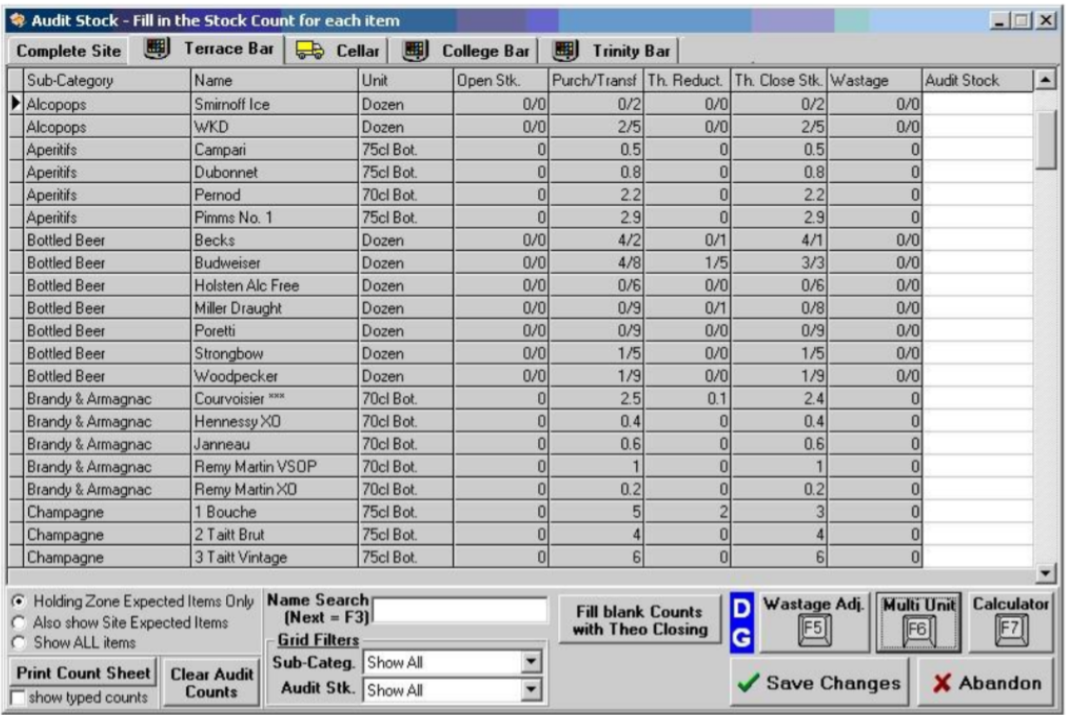
The Audit screen will now appear requiring you to enter the Audit Stock column the count figures for each area. Initially the Complete Site tab is displayed at the top however this is a read only screen for viewing only.
-
Work your way across each tab entering in the count figures for each holding zone including the cellar.
-
Open Stk - Shows what the holding zone opened its stock period with.
-
Purch / Transf - Shows any purchases or stock transfers either from the cellar or other holding zones.
-
Th. Reuct - Shows what the system has sold through the holding zone.
-
Th. Close Stk - Shows what the value the system should be closing at.
-
Wastage - Shows any wastage that has been recorded through any of the holding zones.
-
If any of the products are displayed in red or green this provides information about this product.
Red indicates that there has been no stock movement on this product in any zone
Green Indicates that there has been stock movement but in another holding zone.
-
The order in which the count sheets are produced are the order in which Aztec requires the count to be entered.
-
Each of the products are displayed next to their subcategory along with their stock unit which is how the system wants you to enter the stock count figures, for example:
-
75cl bottle - Counted in tenths of a bottle 1.5 = 1 and ½ bottles.
-
Gallons - Counted in the number of gallons.
-
Dozens - Counted in dozens and bottles 1 dozen and 8 bottles would be entered as 1/8.
-
-
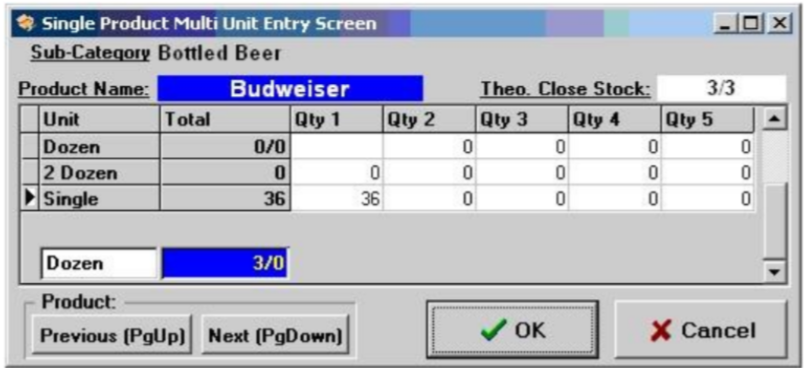
When the physical count is done you may count the number of bottles in a bar rather than how many dozens of an item you have. If this is the case the system will can be used to automatically work out this for you by pressing the Multi Unit button or pressing F6. In this screen you can enter either in dozens, 2 dozen (e.g., an entire case) or by single bottle. This system will then calculate this all back into dozens for you, of course if you can count and work out dozens you can just enter this information from the initial stock audit screen.

-
Waste is recorded in two ways: either Front of House or Back of House depending on how you wish to record wastage on site. If these are any items that have been wasted through front of house i.e., through a terminal using the fault correction method, these will be displayed in the wastage column.
-
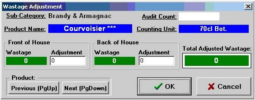
If you wish to wish to waste an item through the back of house option, for example if a bottle of brandy was dropped, highlight the product line in the correct holding zone and press the Wastage button or press F5.
-
If any Front of House wastage has come through this will be displayed and can be edited if required. Enter any figures required against Back of House and press the OK button to complete.
-
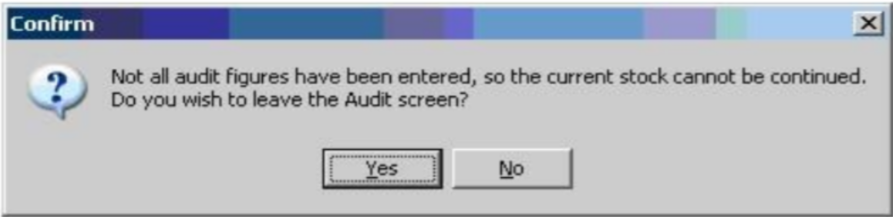
When you are happy that all the stock count figures have been entered and any wastage has been recorded you can move on to the stock reports. Remember that if there any products that you DO NOT have in stock, they must be recorded with a 0 against them. If you do not do this a confirmation box will appear as shown below:

-
If this box does appear select the No option and then, using the Grid Filters Audit Stk drop down, select No Audit Entry - this will then display any items that do not have a count figure against them.
If you have not finished entering your count information but need to complete other work, select Yes to leave the audit screen.
-
Once you have entered any final missing counts press the Save Changes button and then say Yes to proceeding with the stock.
-
If configured to do so, the Nominal Price screen will be displayed – nominal prices are the average cost of the product line based on it is opening and closing price during the stock period. The system will populate the prices based on the three criteria below.
-
Use the tariff price for this product as currently set on the terminal. This will only be available for standard lines products where the ingredient is the same as the priced sold item.
-
Use the price as entered by the last auditor for this product (if any).
-
If none of the above rules provide a price the field will be left empty.
-
-
The next screen to appear will be the Miscellaneous Stock Figures screen where you can make monetary allowances against your stock, and can also add any stock notes as applicable to record any special information that might be required in the future.
-
Allowances can be made against each of the holding zones as required. When this is completed or if you wish to bypass this screen press Save Changes & Exit.
The system will then prompt “Stock complete, go to Current Stocks to view reports.”
-
Go back to the current stocks menu option and choose to view reports.
-
Once you have viewed your reports you may select the option to Accept Stock which will confirm that everything is correct with your stock audit.
-
If there any discrepancies, you may check purchases and transfers and make any amendments to these as required.