
How To - Portion Types
Each product within the Product Modelling module can, as standard, have up to 9 portions associated to it, allowing you to sell one product with multiple sizes, e.g., a bottle of wine served in two different glass sizes.
You can have up to 20 Portions on a product, including the Standard Portion.
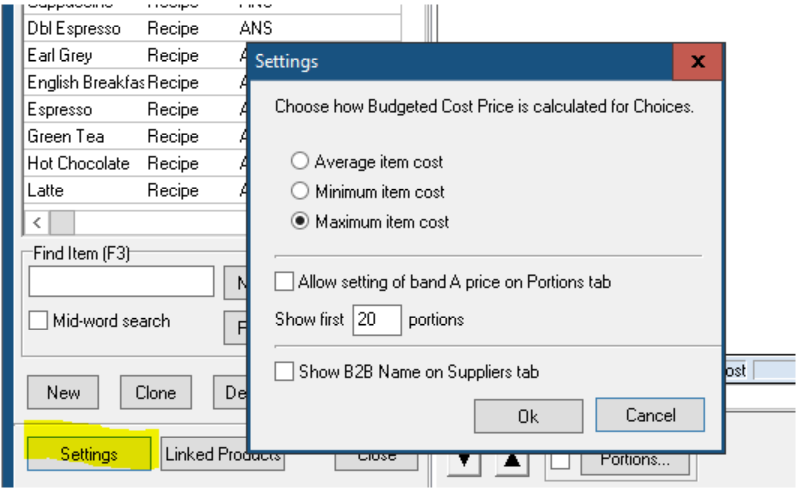
To increase the Portions from 9 to 20, go to Products Modelling --> Settings --> Change Portion number
-
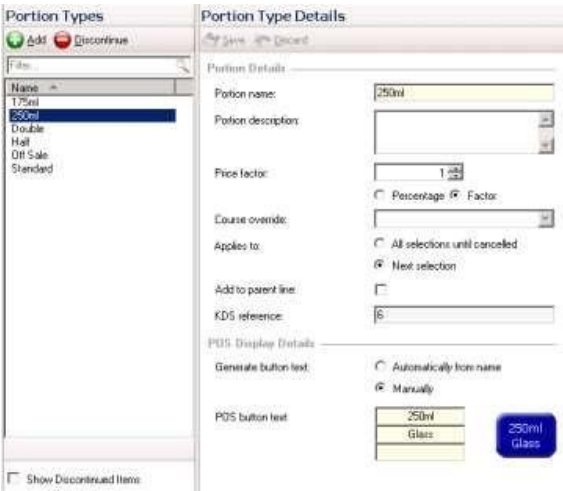
Select Portions Types and click the green Add button.
-
The following fields can be filled out against the new portion type:
-
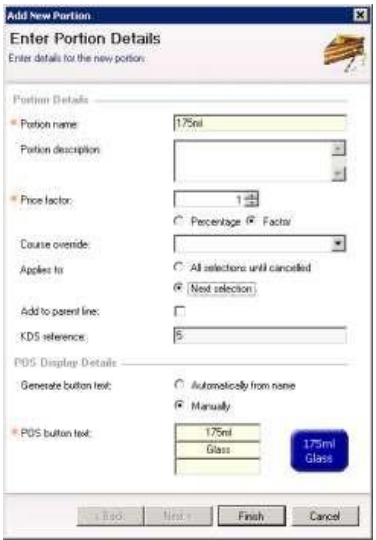
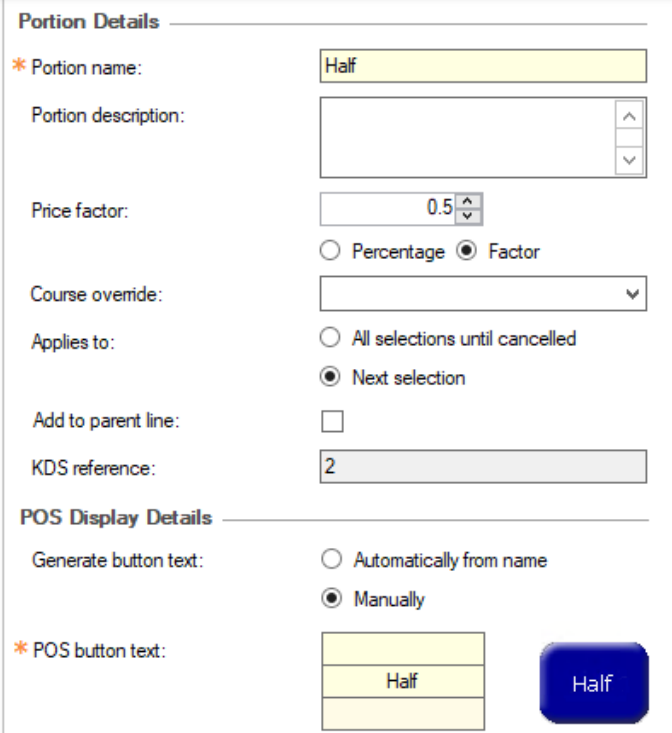
Portion Name – used to define what that portion is going to be for example 175ml Glass
-
Please note: portion order cannot be changed, so if you set up 250ml before 175ml, it will show in this order in the Price Matrix
-
-
Portion Description – used to as description field if required
-
Price Factor – can be used in conjunction with percentage / factor options to allow different prices to be applied depending on the portion.
-
The majority of times it is easier to leave the price factor to be 1 and apply the price in the price matrix ie; Double Portion is ‘2’ and Half is ‘0.5’
-
-
Course Override
-
If a portion called “As Main Course” is to be created, and where a certain dish can be produced in a larger portion as a main course, the normal course of the dish may need to be overridden to allow the "As Main Course" portion to print in a different section of the order ticket, e.g, move a starter to print in the main courses so that the kitchen will produce the dish at the correct time.
-
-
Applies to all selections until cancelled - will keep the button switched on until pressed again
-
Applies to next selection - will only order that item with that portion if an additional one is required the portion button would need to be pressed again
-
Add to Parent Line – is used for rollup pricing where the main product will show the total price not the item added as a portion
-
Generate Button Text – allows you to change the description of the button that will appear on a theme panel design
-
-
Once the required information has been entered click the Finish button.
-
If a portion is no longer to be used it can be discontinued by clicking the Discontinue button at the top of the screen.
To view discontinued portion types tick the Show Discontinued Items check-box at the bottom of the screen.