Creating an Invoice from the Deliveries page
-
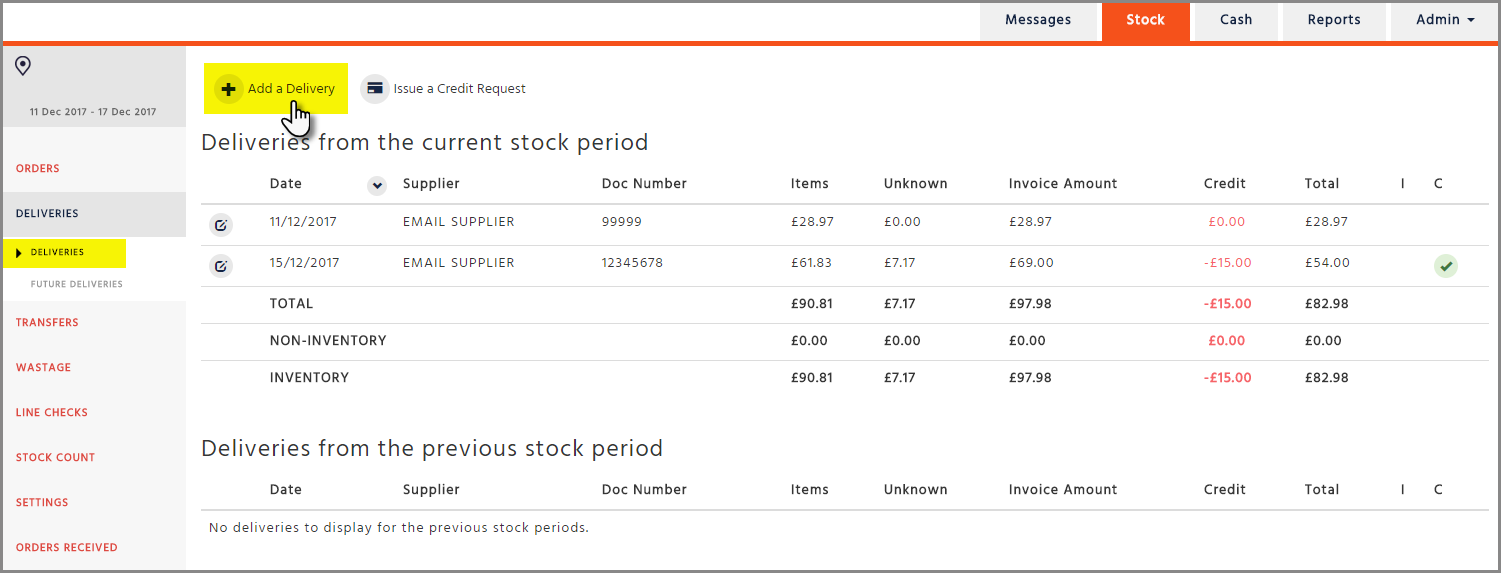
Go to Deliveries page and select the ‘Add a Delivery’ button
-
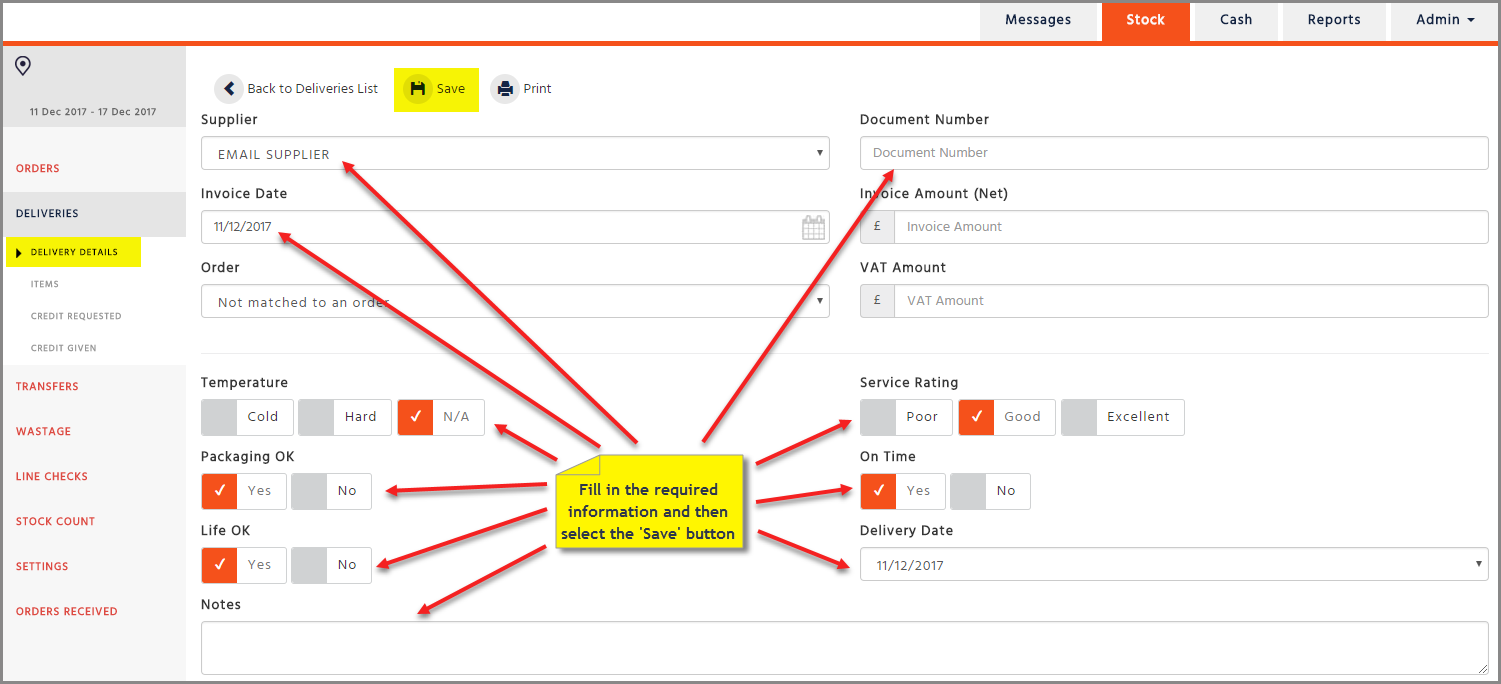
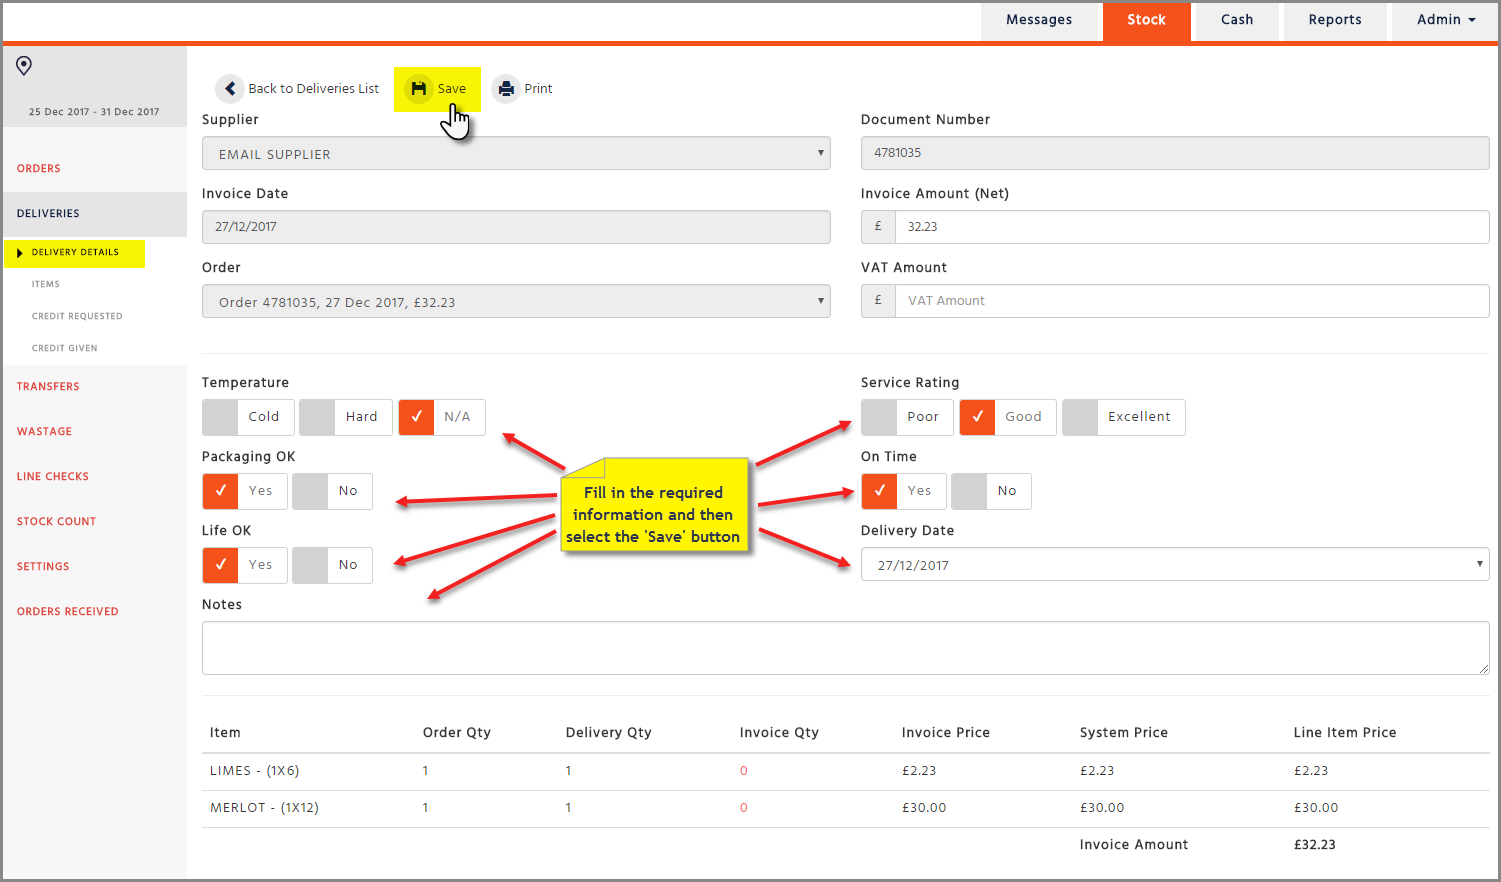
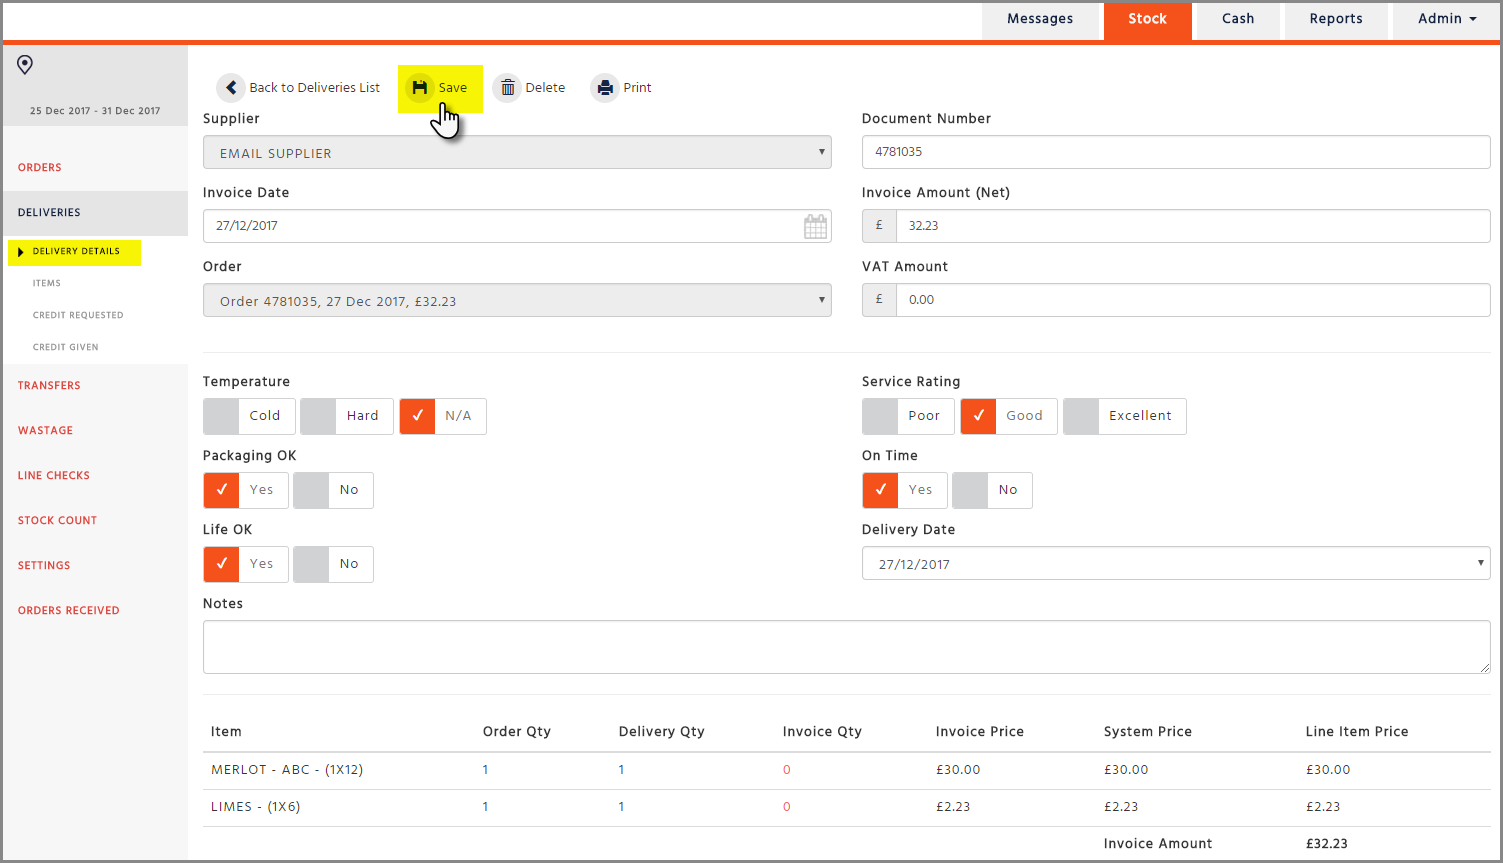
Fill in the required information (‘Supplier’, ‘Invoice Date’, ‘Document Number’, ‘Temperature’, ‘Packaging OK’, ‘Life OK’, ‘Service Rating’, ‘On Time’, ‘Delivery Date’ and if required ‘Notes’) then select the ‘Save’ button
-
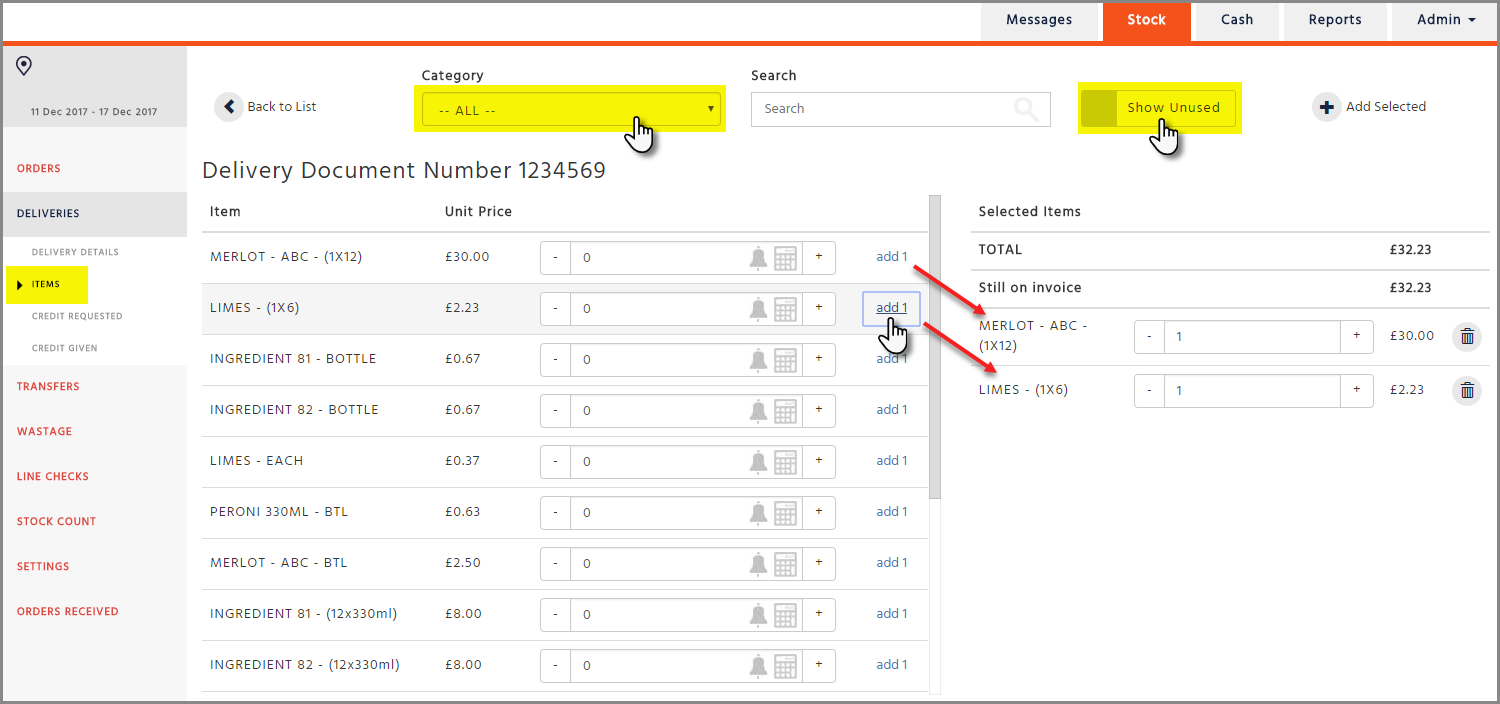
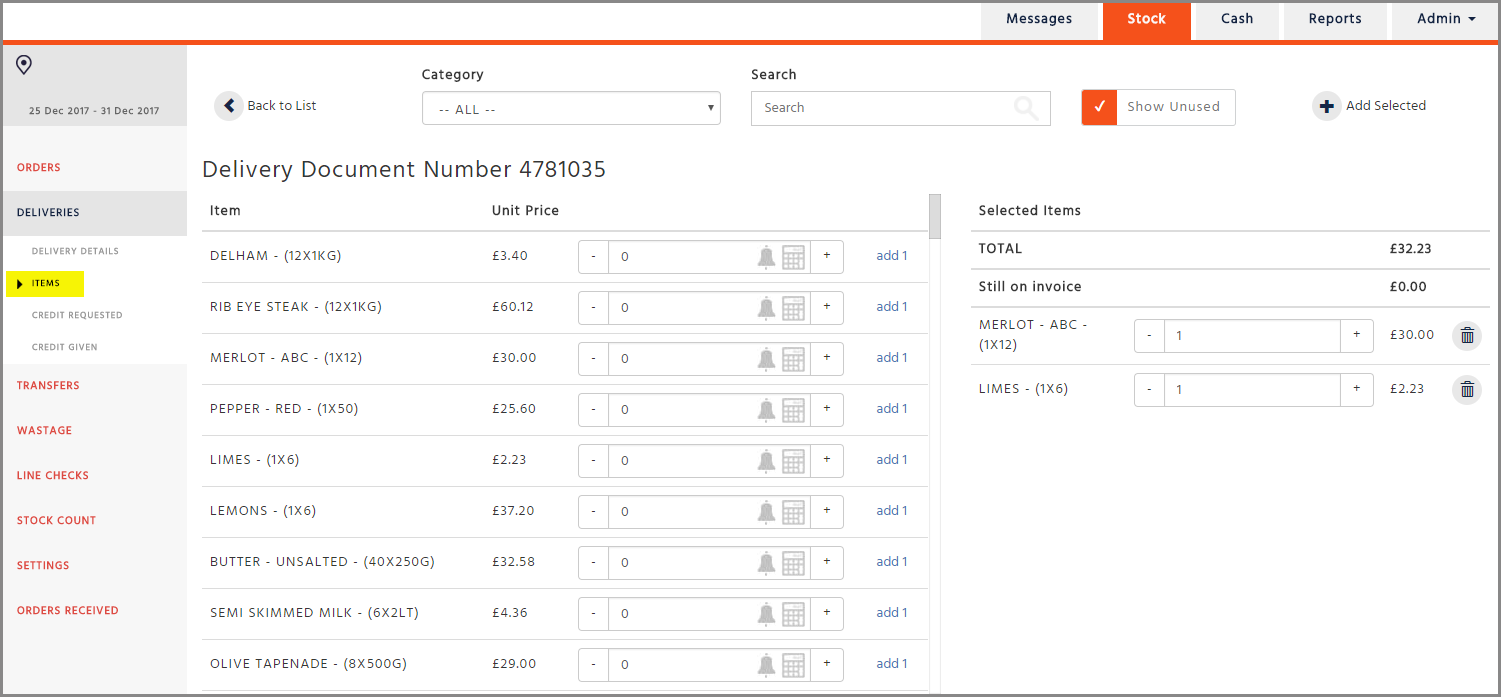
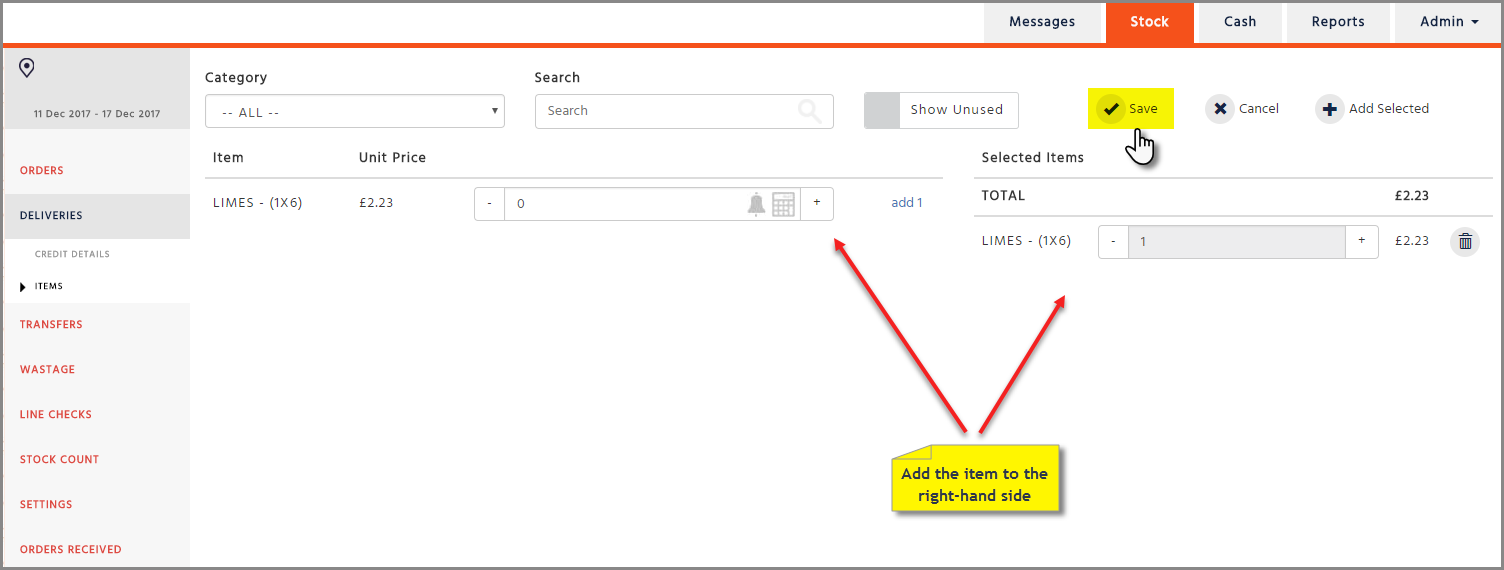
Select the category then select the items from the left-hand side by clicking on the ‘Add’ button, or enter a numerical value in the box provided and then select the ‘Add’ button. The selected items will show on the right-hand side and the list is automatically saved
In order to see all the items, you need to select the ‘Show Unused’ box because the new products and the items that haven’t been ordered for the last 2 weeks will not show on the list
-
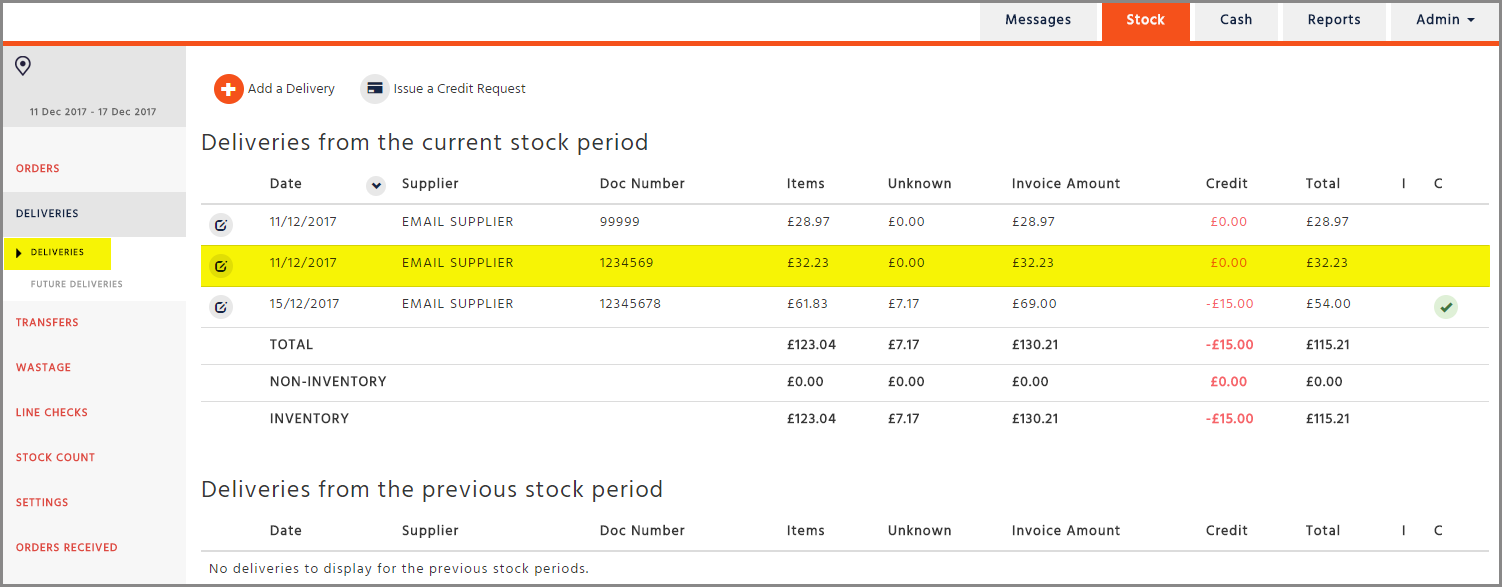
Go back to Deliveries where you should be able to see your invoice now
Creating an Invoice from an Order
-
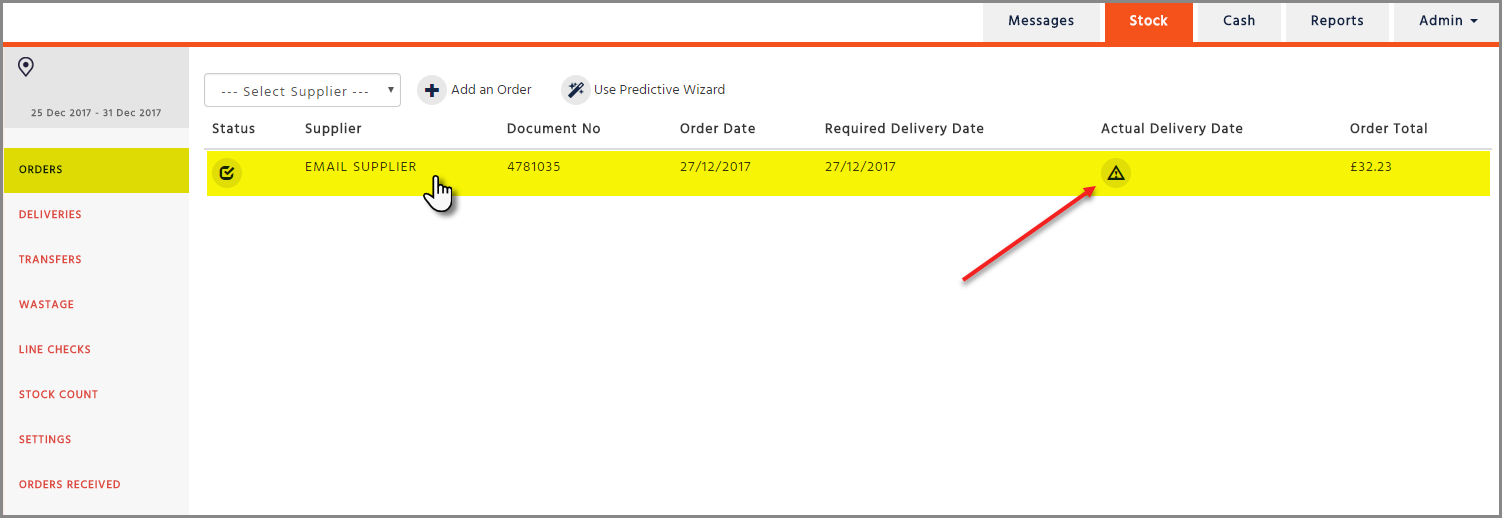
Go to the Orders page and select an order with the warning triangle in the ‘Actual Delivery Date’ column
-
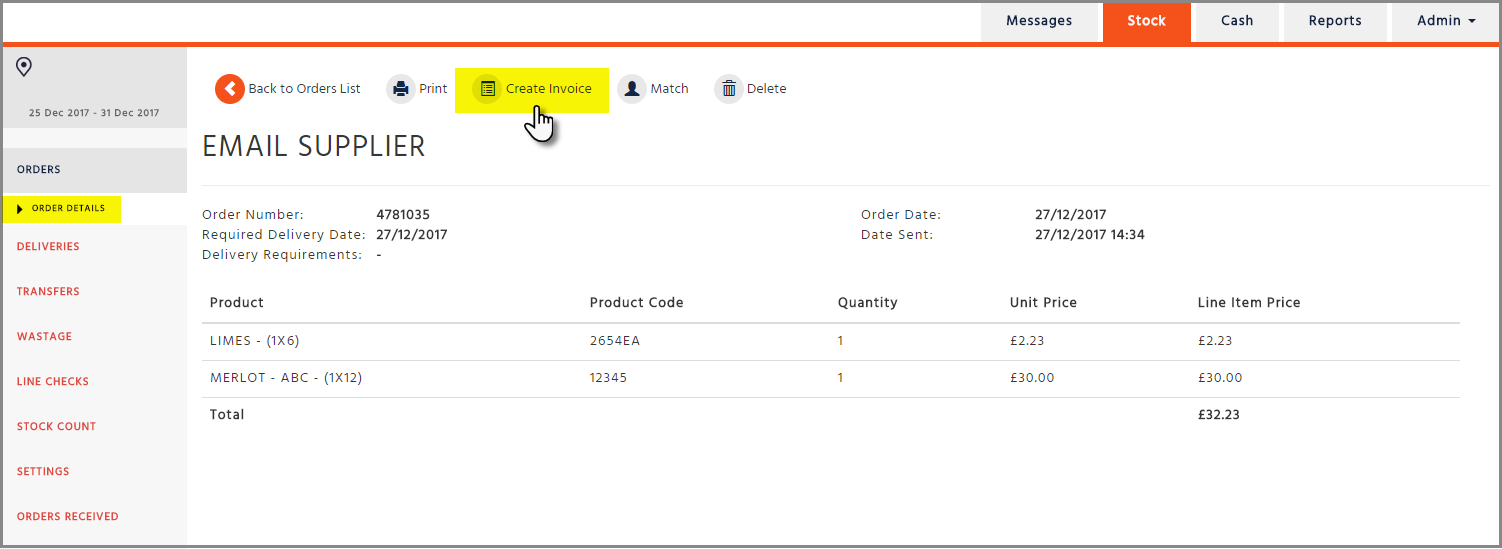
After selecting the order, click on the ‘Create Invoice’ button
-
Fill in the required information (‘Temperature’, ‘Packaging OK’, ‘Life OK’, ‘Service Rating’, ‘On Time’, ‘Delivery Date’ and if required ‘Notes’) then select the ‘Save’ button
-
Once this information is saved the system will take you to the ‘Items’ page. Please check if any amendment needs to be made and make sure that the items declared on the right-hand side are the items that have actually been delivered to you
-
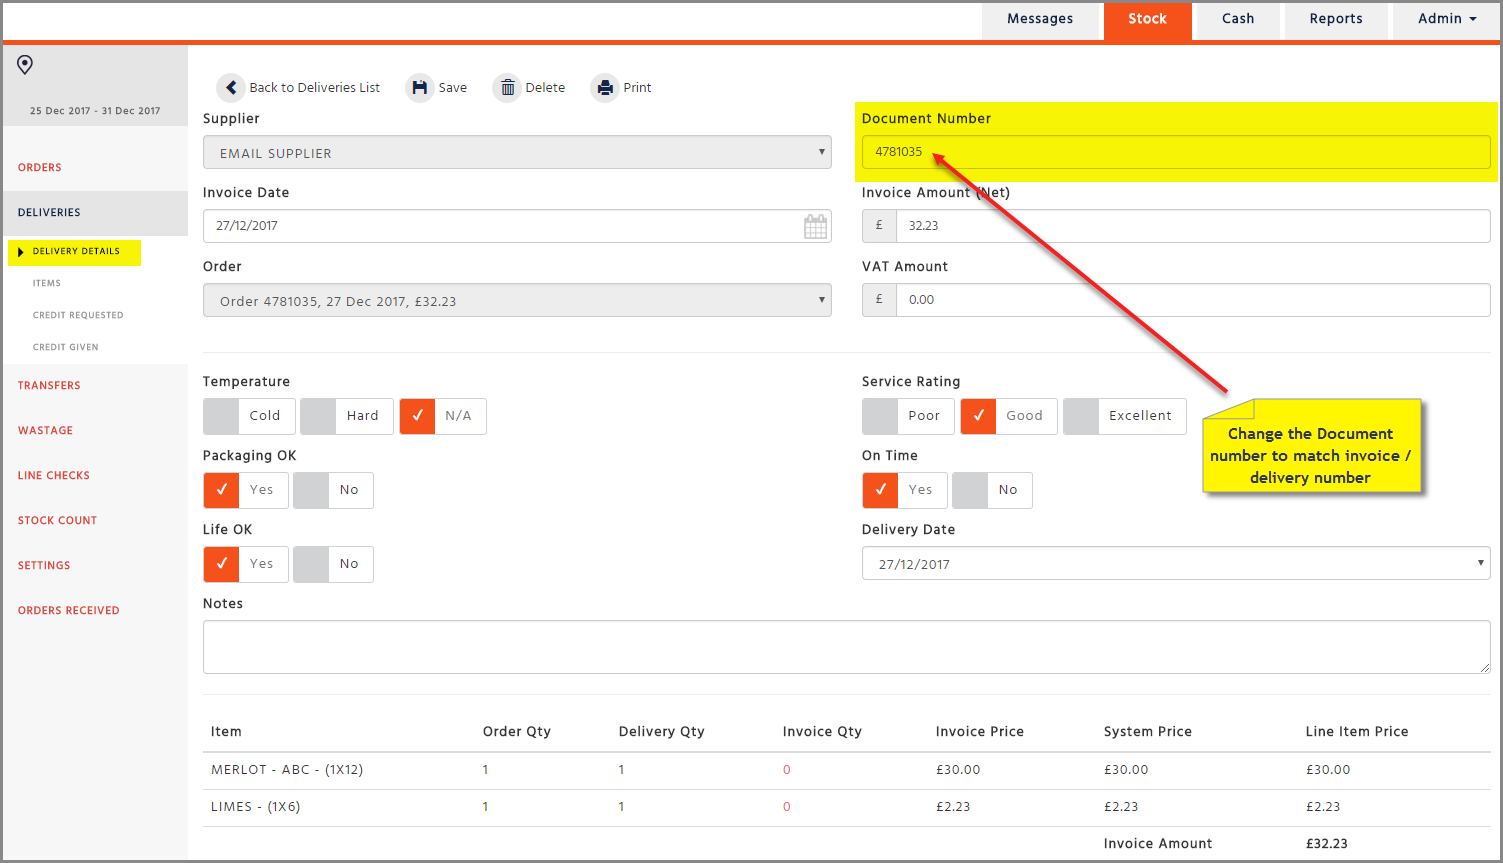
When you are happy with declared items please go back to the Delivery Details page where you will be able to change the document number and match it to your paper invoice / delivery number
-
Once completed click on the ‘Save’ button
Electronic Invoices
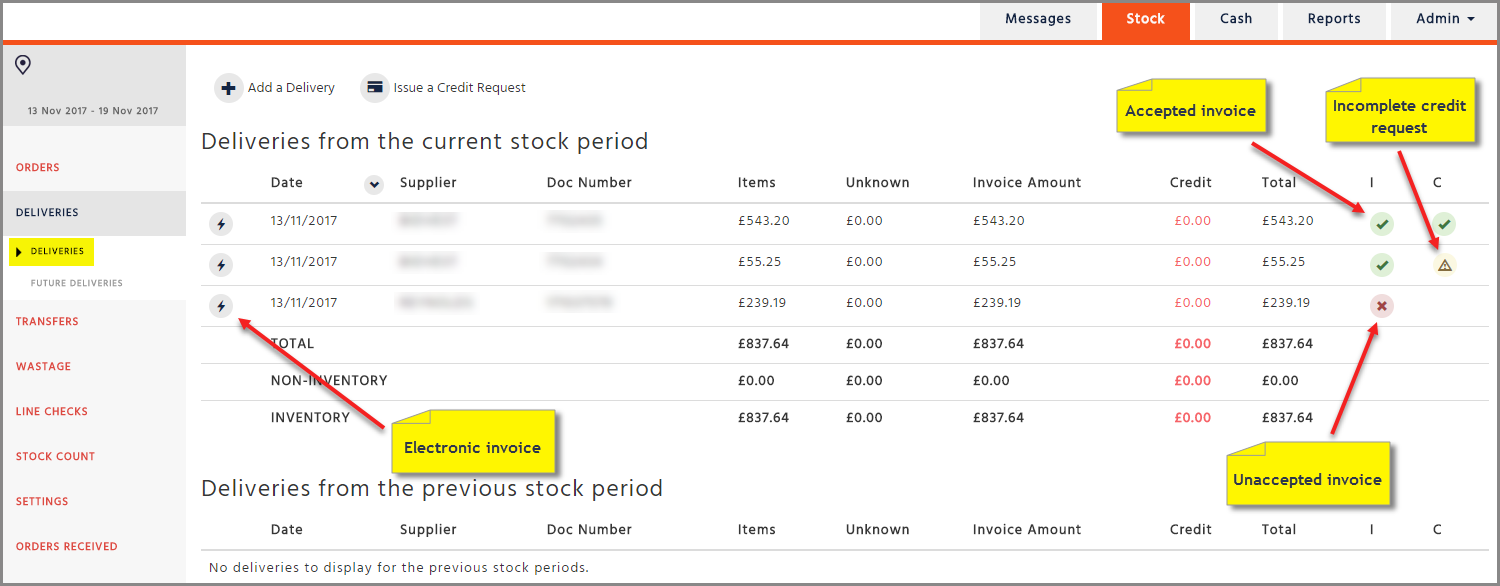
An electronic invoice appears automatically in the Deliveries page.
It appears with a lightning icon and with a red cross until you have accepted it.
The accepted invoice appears with a green tick.
Accepting a Delivery
To accept an electronic invoice, click on the invoice and once the new page is loaded, fill in the required information ( ‘Temperature’, ‘Packaging OK’, ‘Life OK’, ‘Service Rating’, ‘On Time’ and if required ‘Notes’) then select the ‘Accept’ button.

Deferring a Delivery
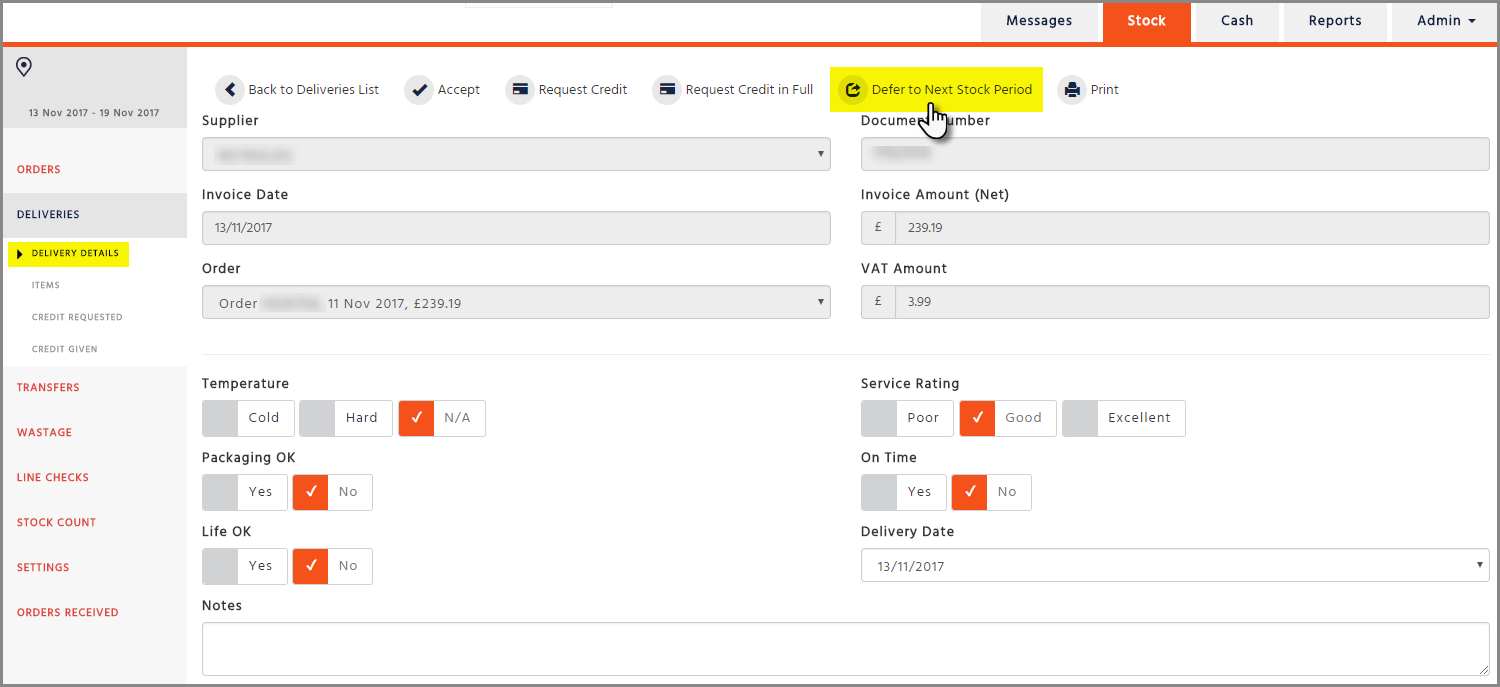
There are times when you need to move an invoice between stock periods. For example, if the invoice was received into the current stock period, but belongs to the next stock period, then it can be moved by clicking on the ‘Defer to Next Stock Period’ button.
-
Select the invoice from the Deliveries page and click on the ‘Defer to Next Stock Period’ button
-
A pop-up message will inform you that are about to move the invoice to the next stock period, select ‘Defer Delivery’ to confirm or ‘Don’t Defer’ to abort the action

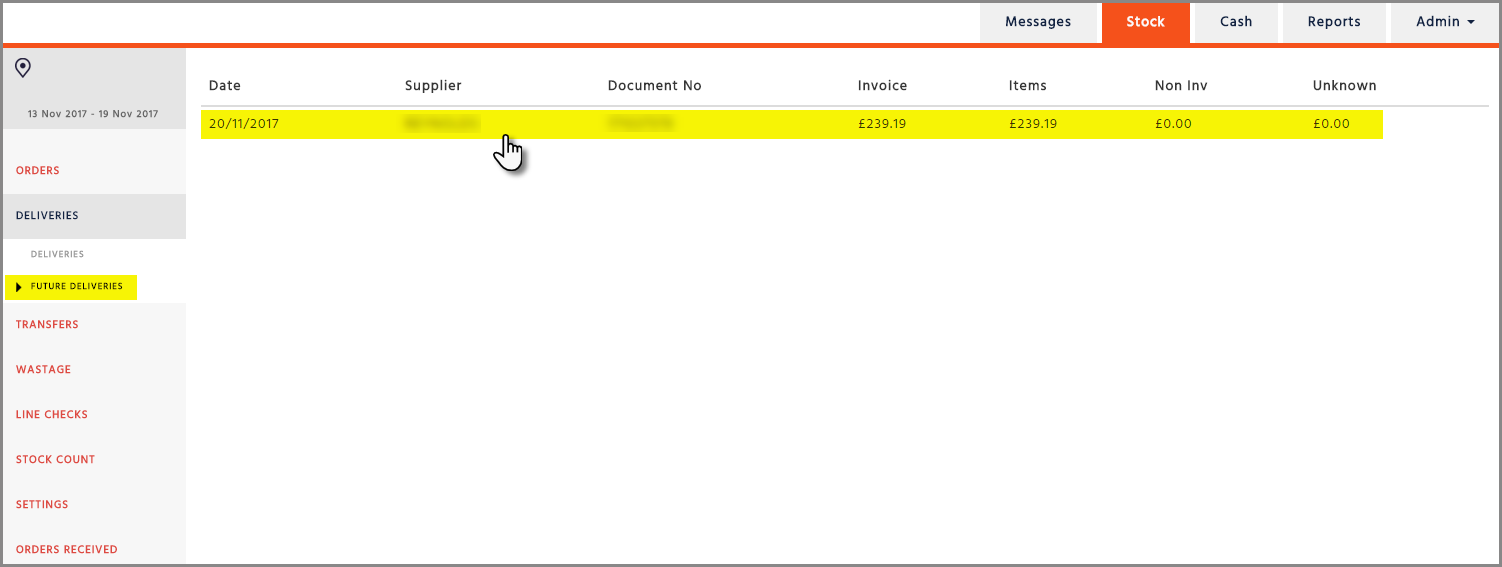
All Electronic invoices can also be moved from the next stock period to the current stock period.
-
Go to the Future Deliveries page and click on the required invoice
-
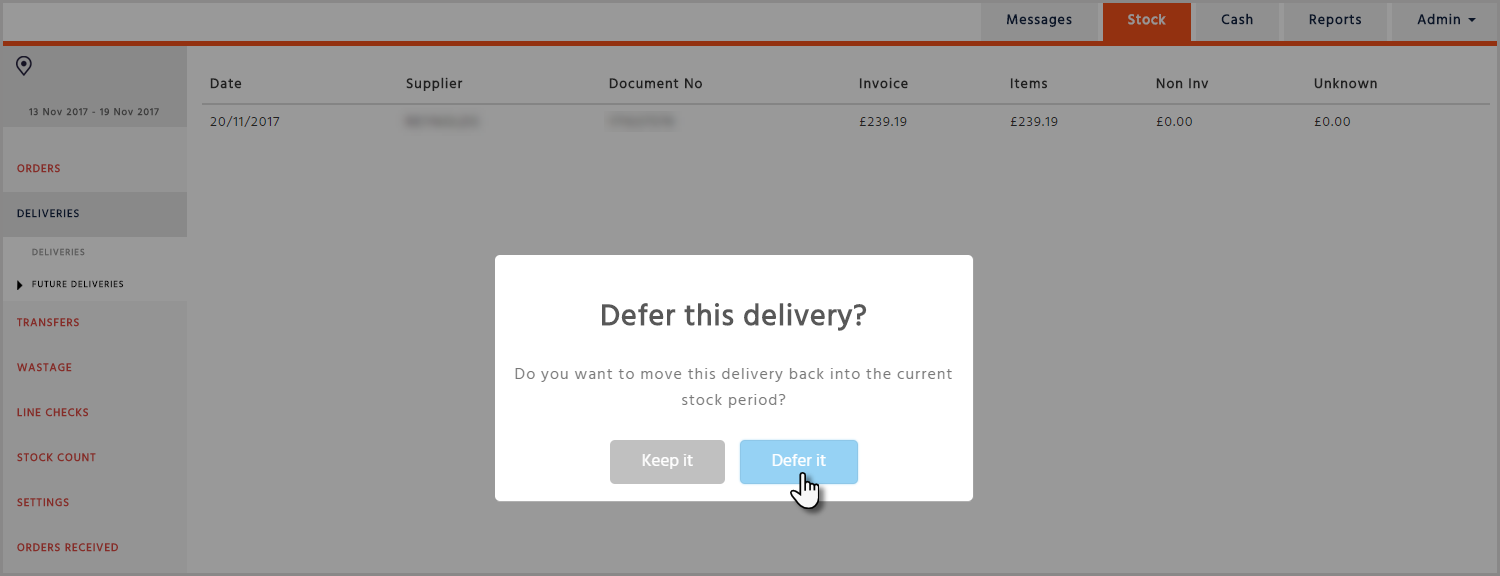
A pop-up message will ask you if would like to move the invoice to the current stock period. Click ‘Defer it’ to confirm or ‘Keep it’ to abort the action.
Credits
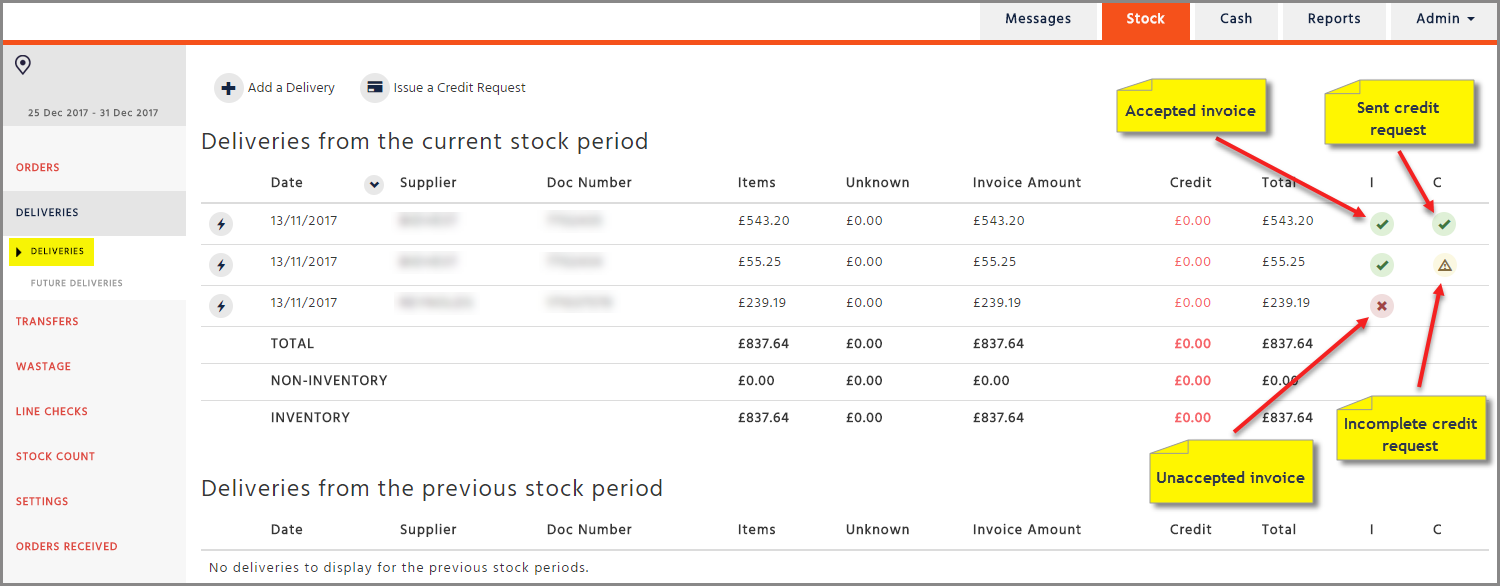
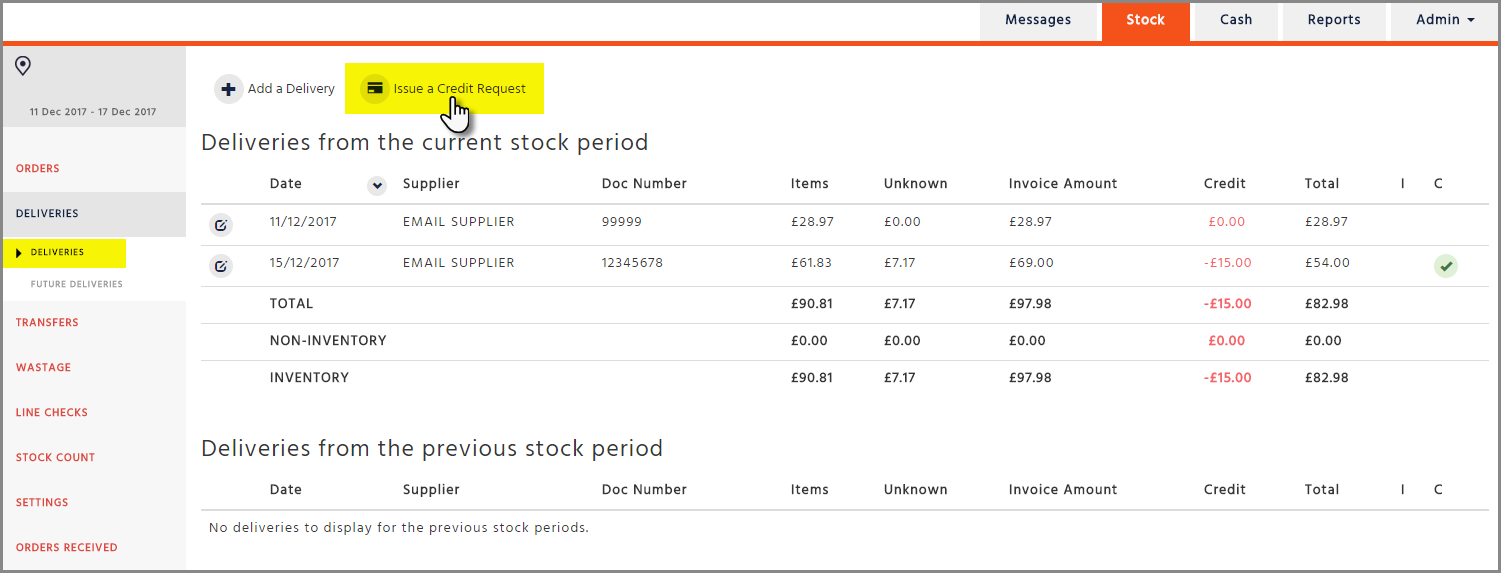
Both electronic invoices and credit notes appear on the same list on the Deliveries page.
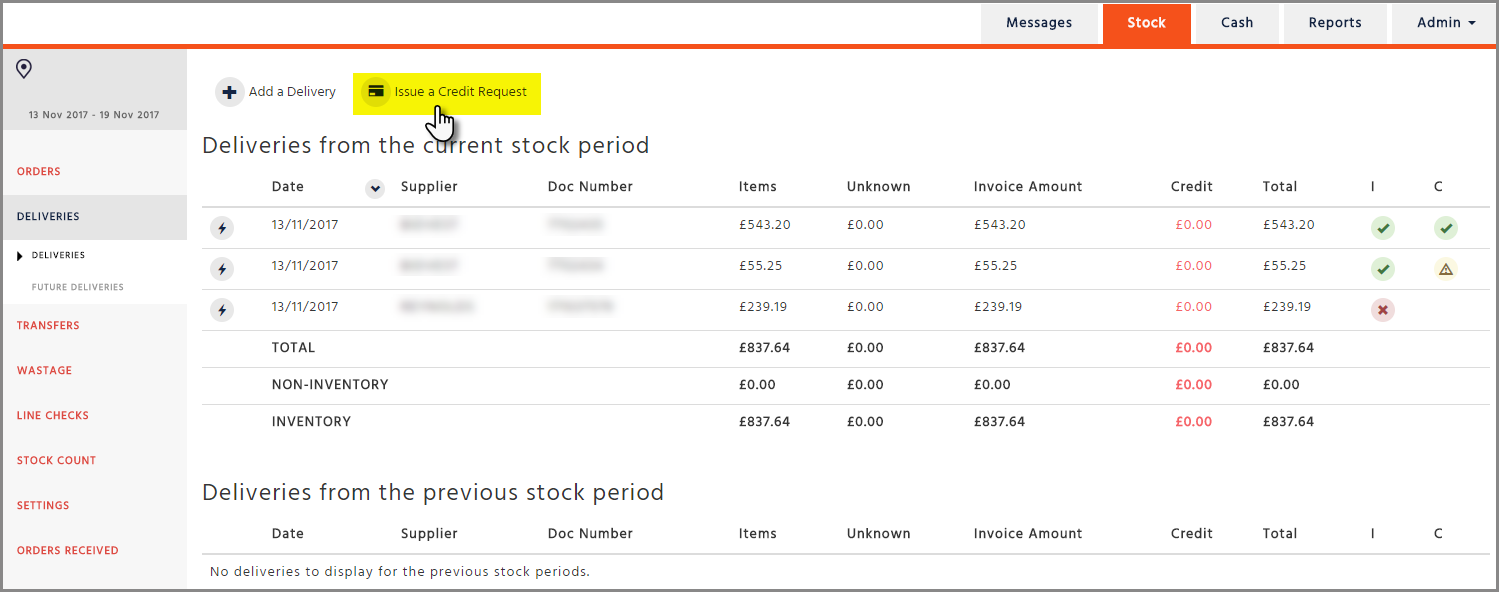
In the ‘I’ column a green tick shows invoices that have been accepted.
A red cross shows invoices that have not been accepted.
In the ‘C’ column a green tick shows credits that have been completed and sent to a supplier.
A yellow warning triangle shows the incomplete credit requests.
Creating a Credit for an Electronic Invoice – Method 1
-
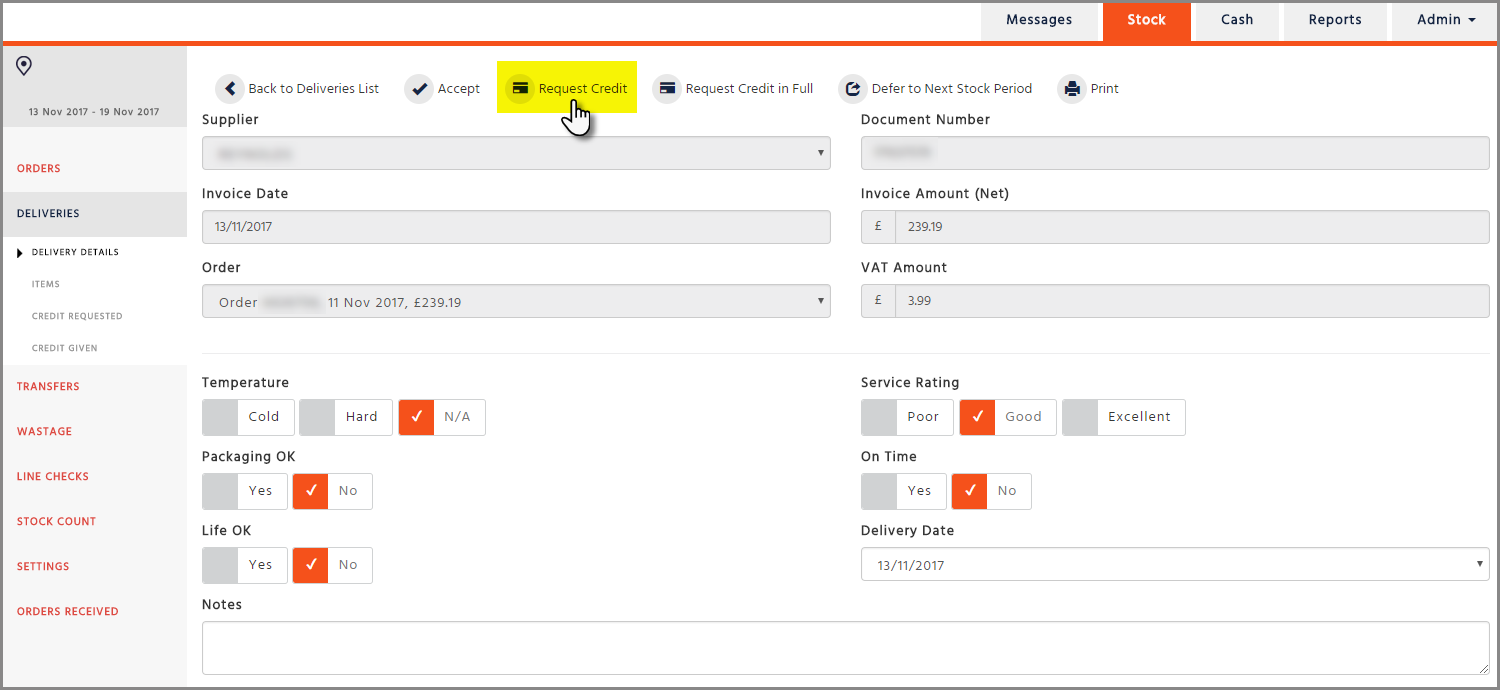
Click on the electronic invoice and select the ‘Request Credit’ button for individual items. This will take you to the Credit Details page
-
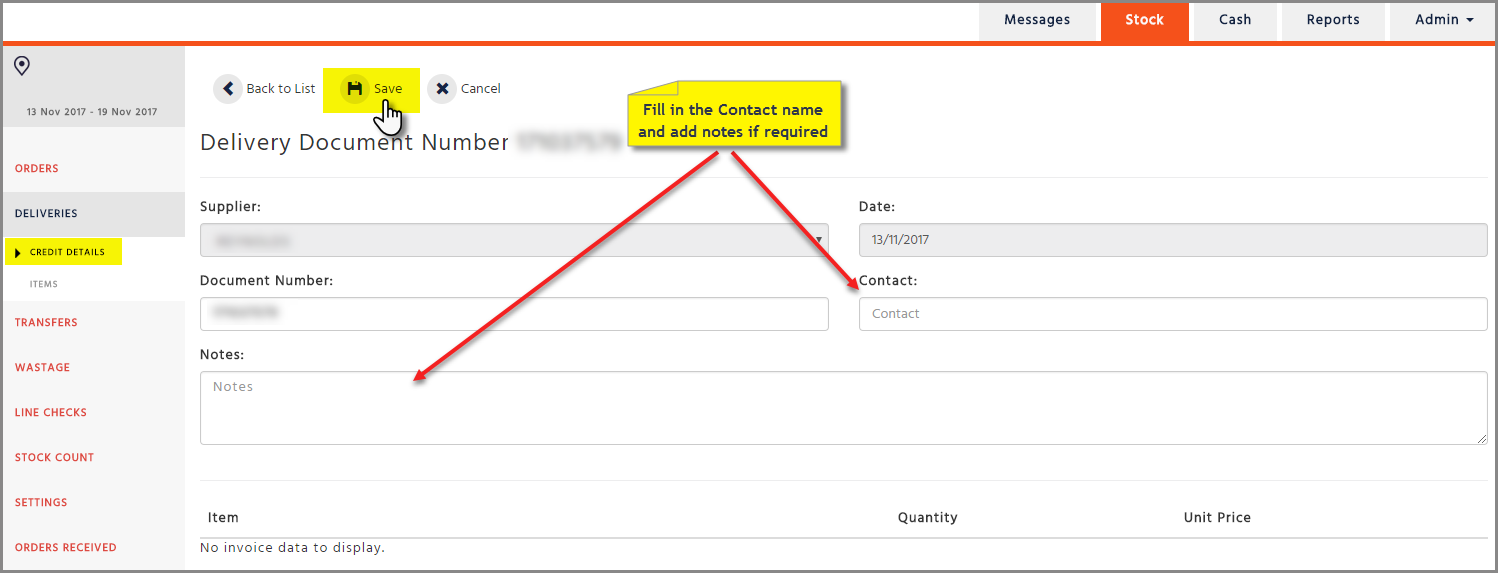
Add the contact name and notes or any other required information and select the ‘Save’ button. This will take you to the Items page
-
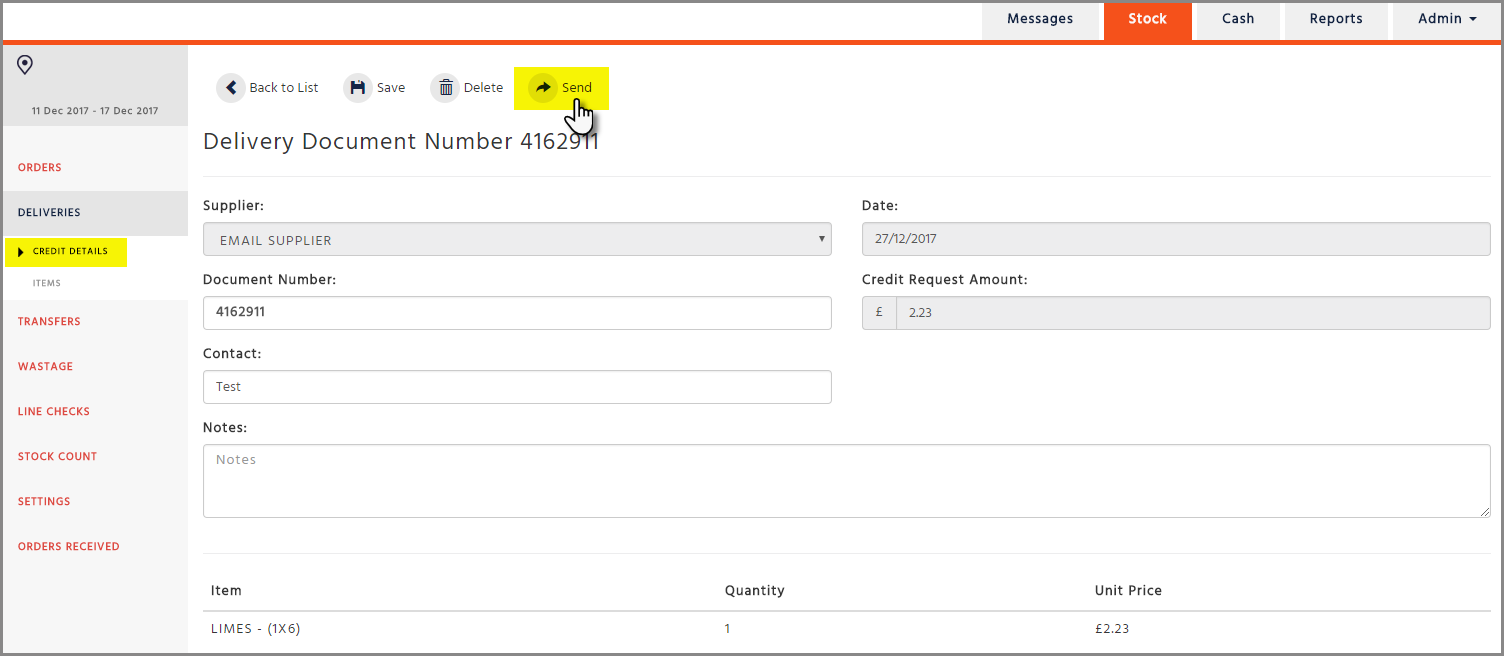
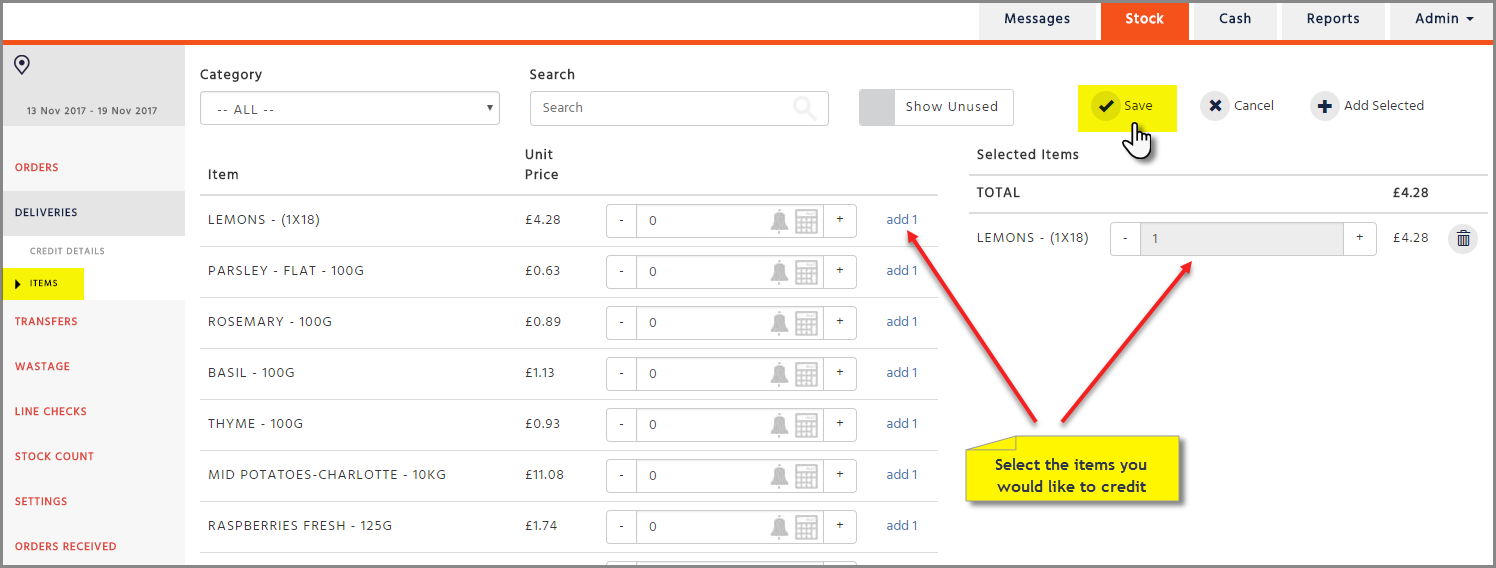
Select the items that you would like to credit and click on the ‘Save’ button. This will take you back to the Credit Details page
-
Click on the ‘Send’ button to send the credit request to the supplier

Creating a Credit for an Electronic Invoice – Method 2
-
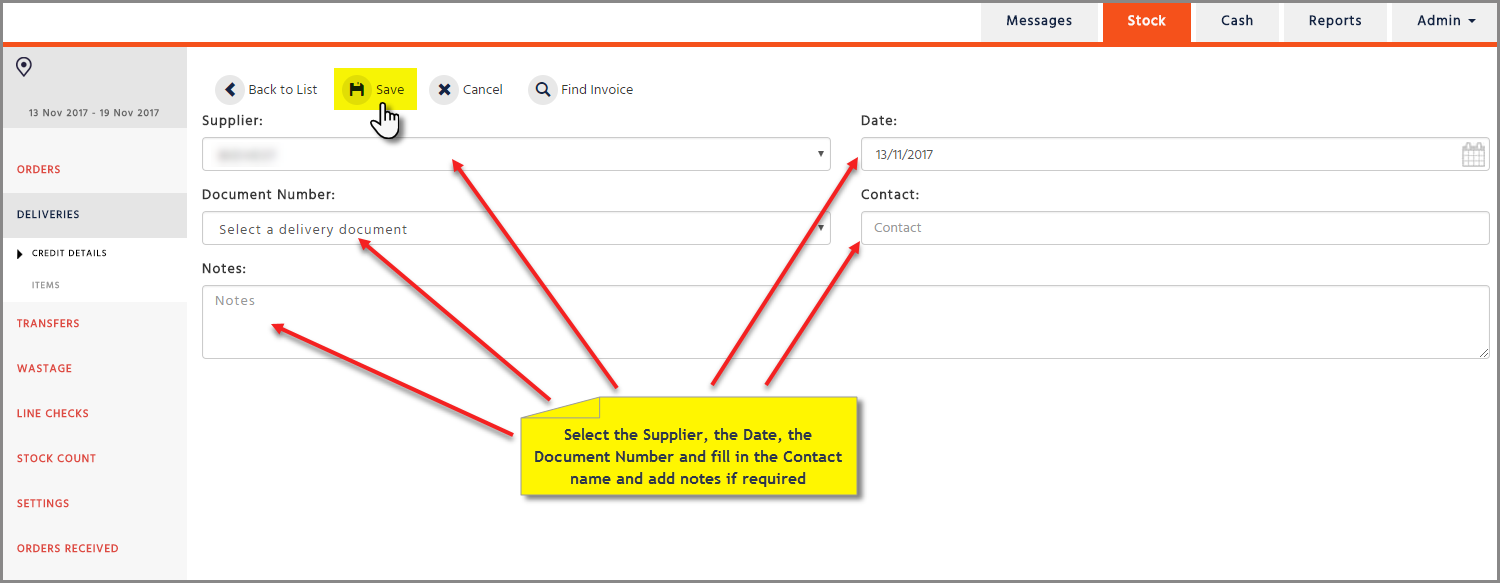
Go to Deliveries page and click on the ‘Issue a Credit Request’ button
-
Select the Supplier, the Date of the invoice, the Document Number, add a Contact Name, Notes and click on ‘Save’, this will take you to the ‘Items’ page
-
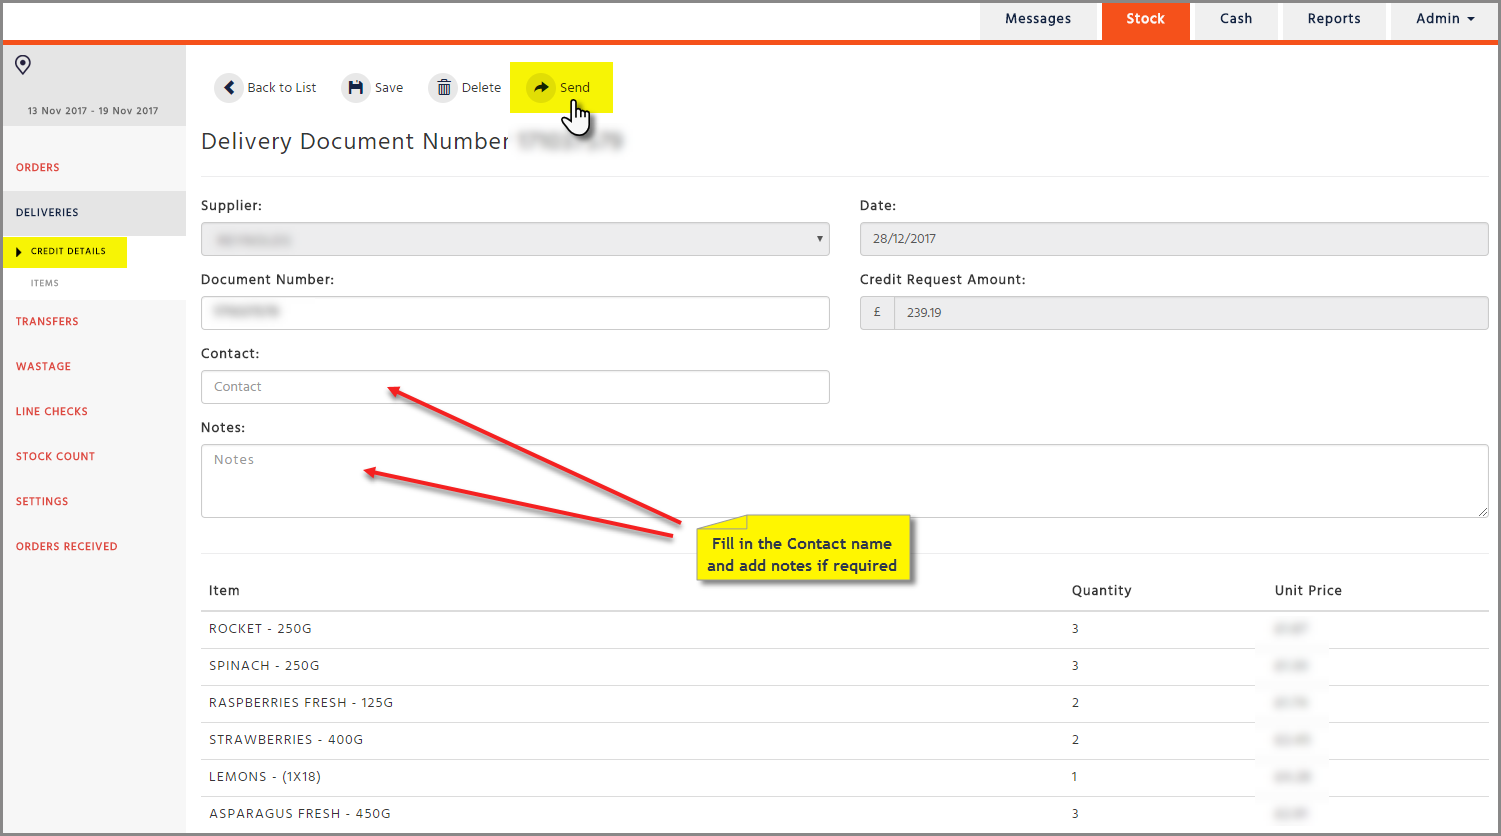
Select products that you would like to credit and select ‘Save’, this will take you to the ‘Credit Details’ page
-
Click on the ‘Send’ button to send the credit request to the supplier
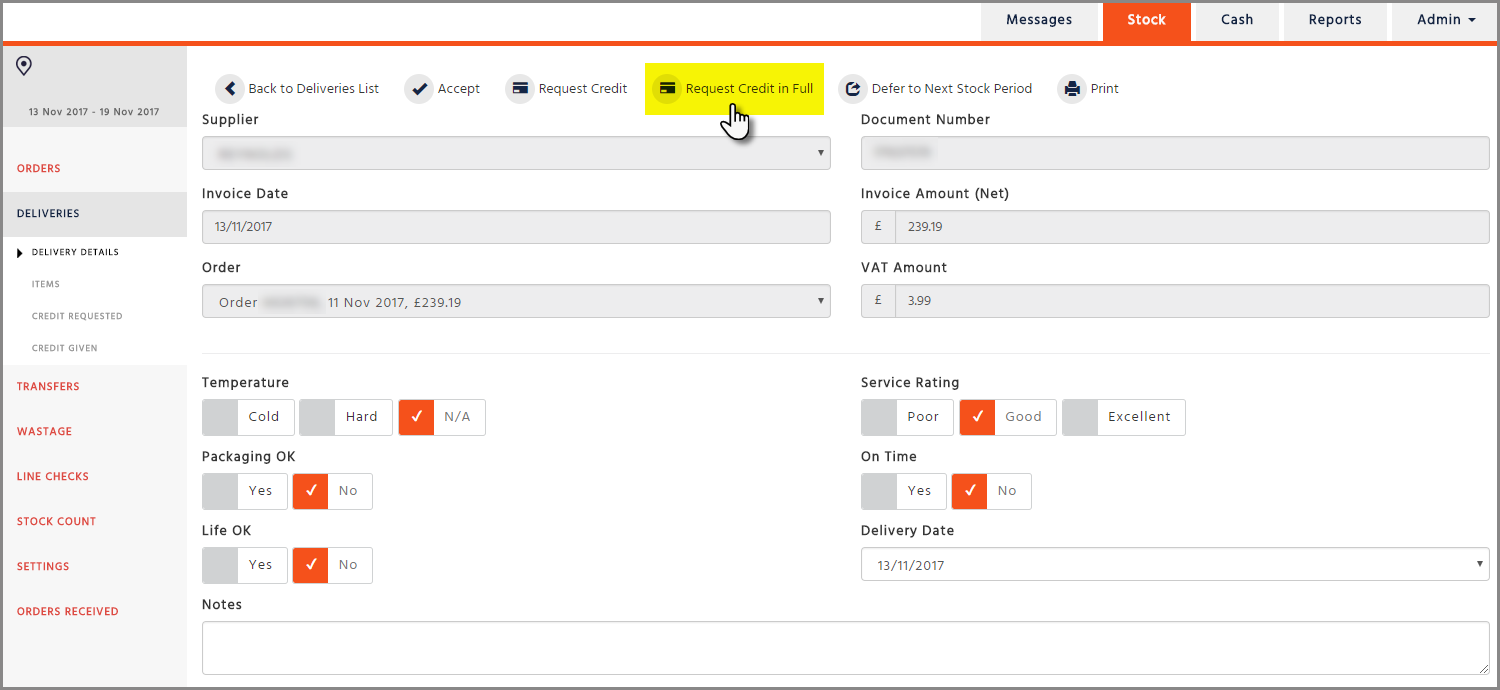
Crediting an Electronic Invoice in Full
-
Click on the electronic invoice and select the ‘Request Credit in Full’ button. This will take you to the Credit Details page
-
Add the contact’s name and any notes then click on the ‘Send’ button to send the credit request to the supplier
Creating a Credit for Invoices from Previous Stock Periods
If you need to create a credit for an item that was delivered in a previous stock period, you will now be able to find the last 5 invoices of the item you wish to credit.
Example: You would like to create a credit for a cos lettuce that was delivered 6 months ago, but you do not know the delivery document it was last delivered on or the date.
-
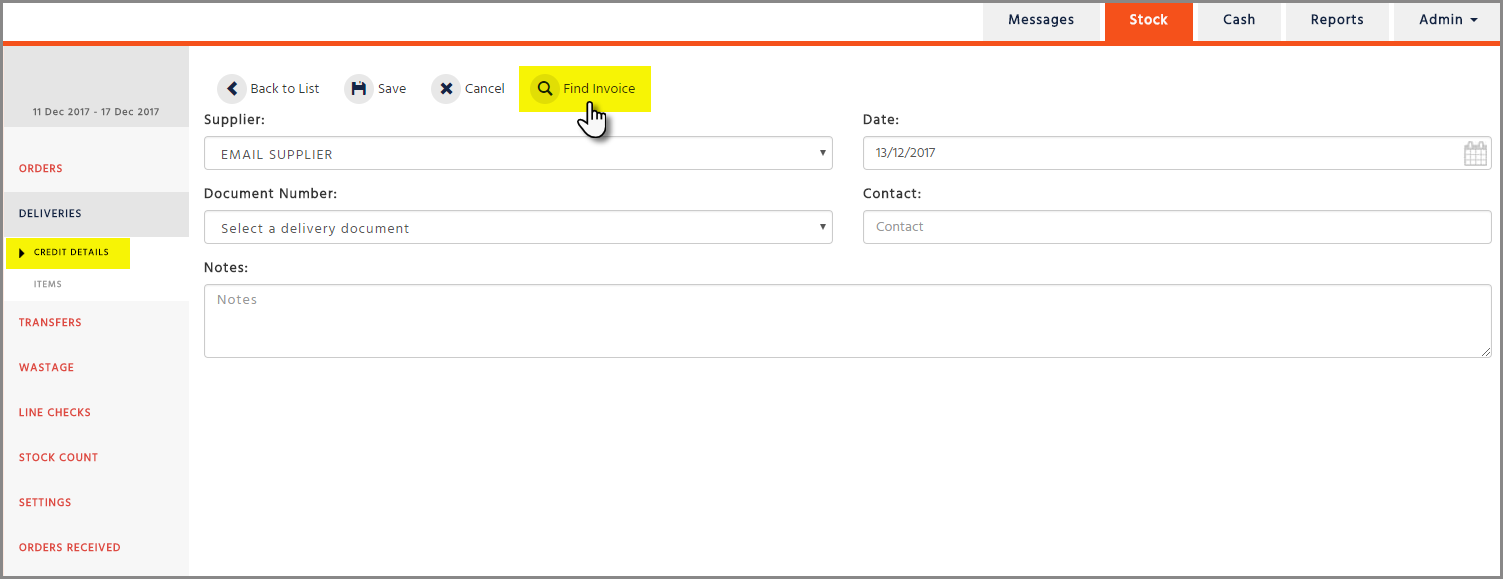
Go to the Deliveries page and select the button called ’Issue a Credit Request’
-
Select the ‘Find Invoice’ button
-
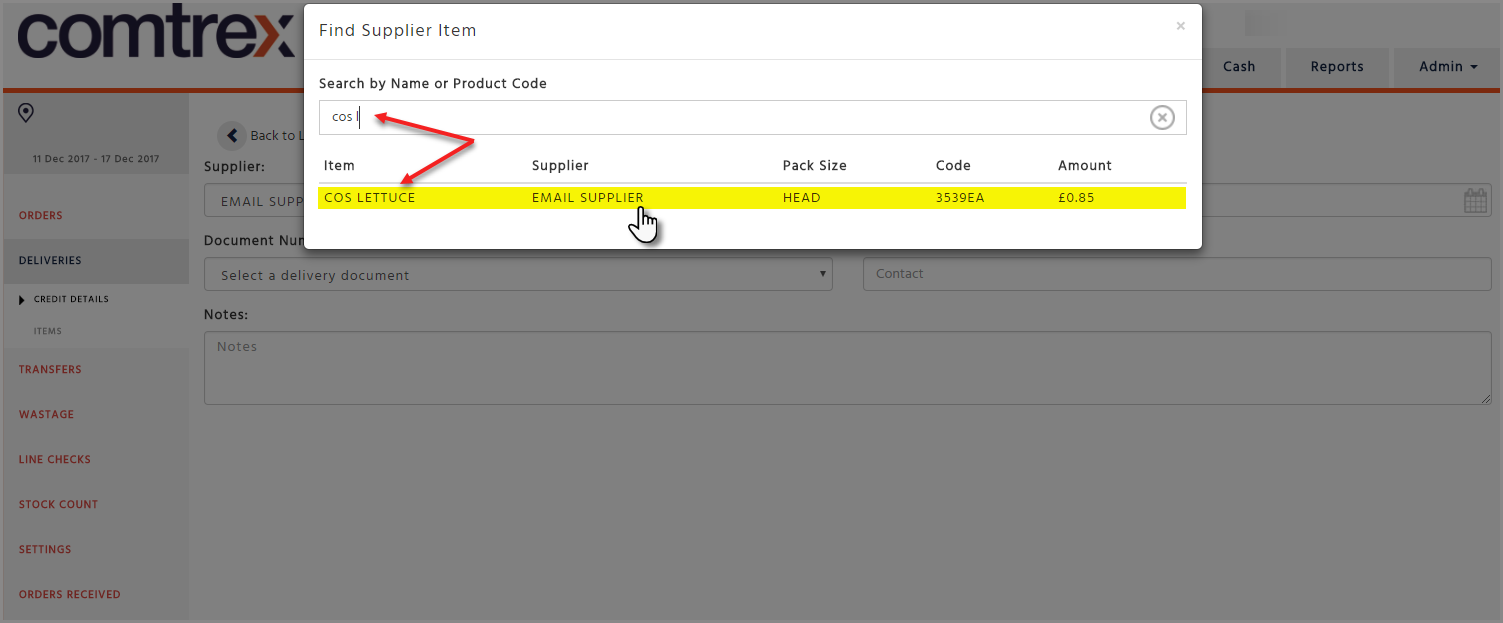
Search for the item that you would like to credit and select it, this can be completed by entering a Product name or the Product code
-
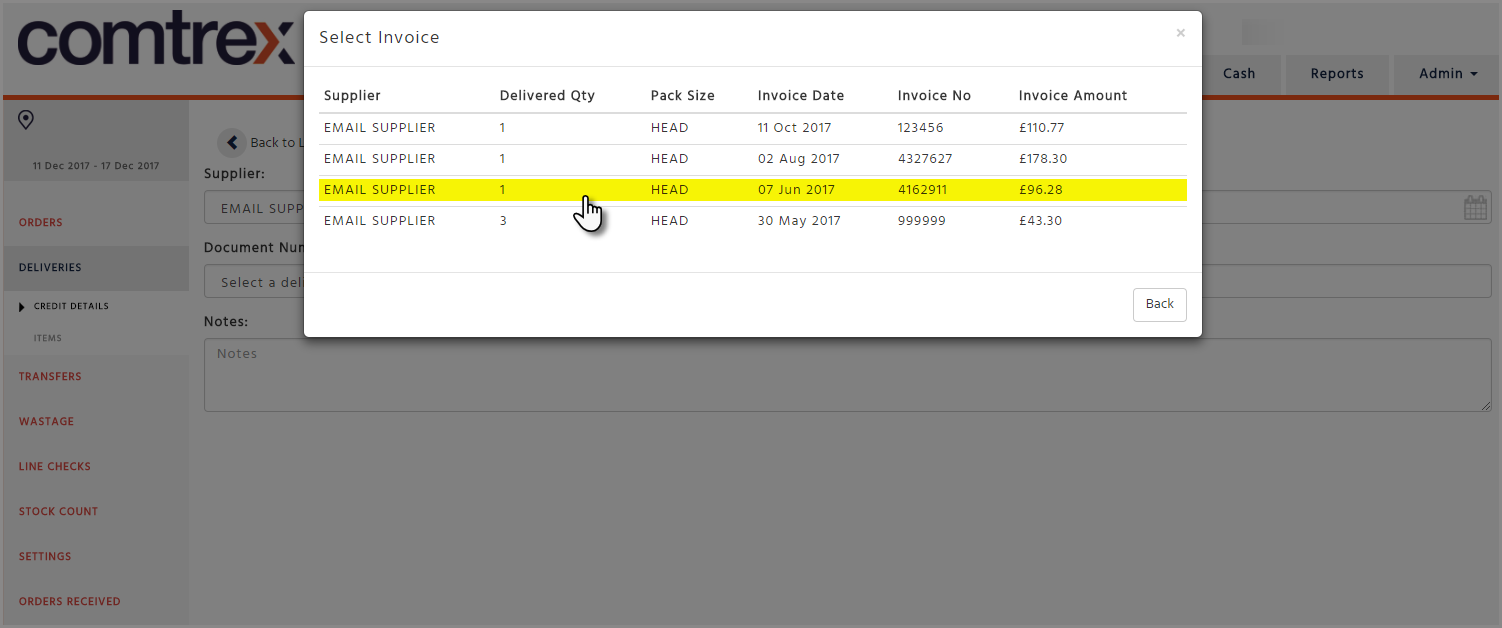
Select the invoice you would like to attach the credit to. The last 5 Deliveries which include that item will appear
-
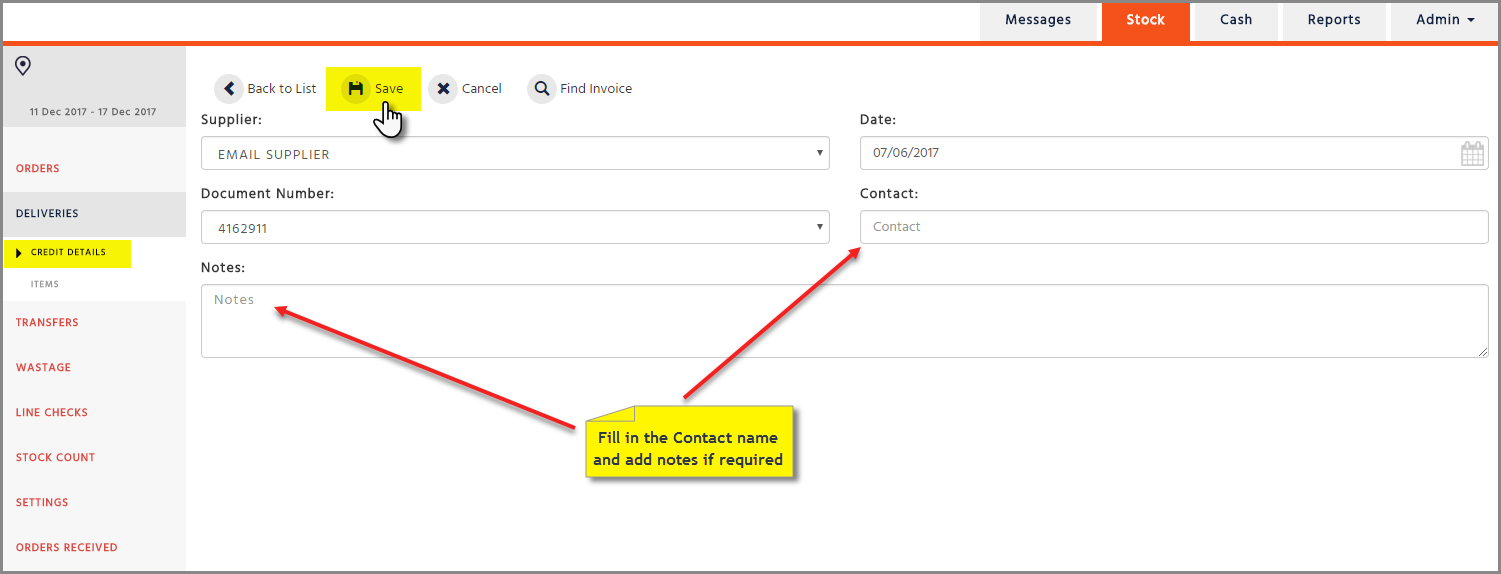
The Supplier, Date and Invoice number fields will automatically be filled in for you. Fill in the Contact name and add Notes where needed, then select the ‘Save’ button
-
Create credit by adding items from the left to the right-hand side, then select the ‘Save’ button and you will be re-directed to the ‘Credit Details’ page
-
Review your credit and select the ‘Send’ button