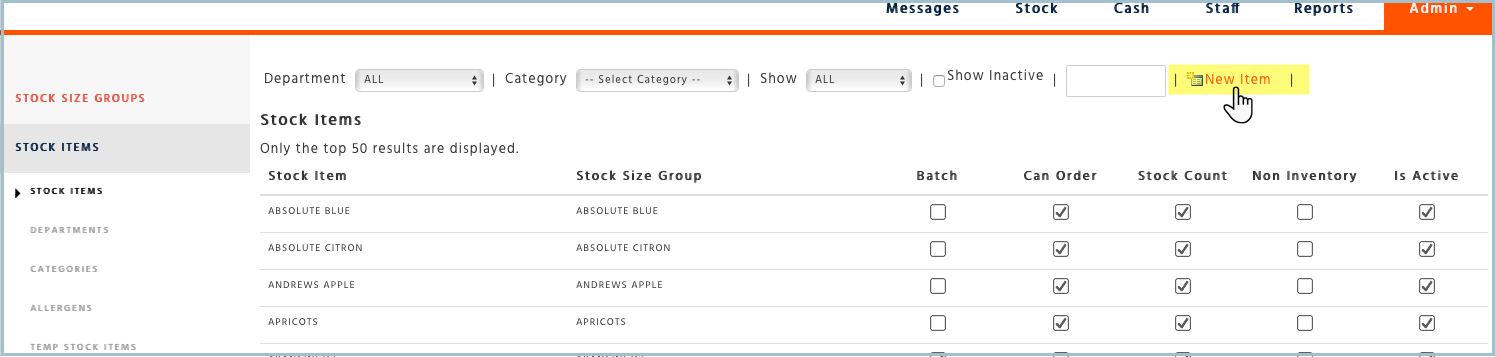
Log on to the Enterprise portal and select Stock Admin from the menu. Select ‘New Item’.
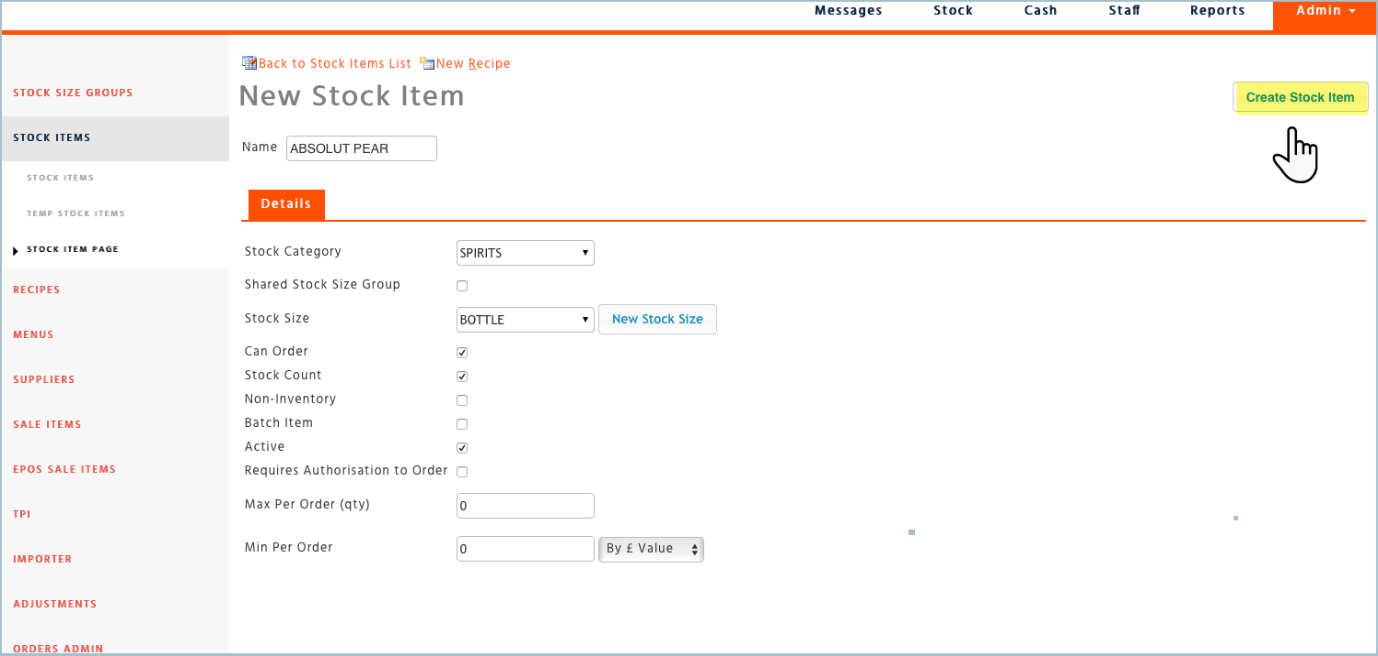
Details Page
-
Enter the stock item name in the ‘Stock Item’ field
-
Select ‘Stock Category’ such as Frozen, Dry Goods, Sundry etc.
-
See below for ‘Shared Stock Size Group’.
-
Select ‘Stock Size’ such as Each or Kg – this should be a very generic size relating to the product, if the product usually comes in grams then keep the stock size as a kg etc. This is to allow for changes to future pack sizes. The reason for this will become clearer when adding pack size multiples to the ‘Supplier Products’ below.
-
Select ‘Can Order’ if you would like the product to be available to order this will need to be flagged in three more places for sites to be able to see the product on the order sheet, in ‘Supplier Products’ and ‘Order and Stock List’ explained later in this manual and on the Suppliers page dealt with in the ‘Creating a New Supplier’ manual.
-
Select ‘Stock Count’ if you would like to include the product in your stock count
-
Non-Inventory should be flagged if the product is an Ancillary item which you wouldn’t usually include in your stock count such as tablecloths, signs, A-boards etc
-
Leave ‘Batch Item’ blank as this is dealt with in the ‘Stock Items – Batches’ manual.
-
‘Active’ should automatically be selected
-
If any authorisation requirements are needed for a particular product, please contact us otherwise leave the ‘Requires Authorisation to Order Field’ blank
-
‘Max and Min Per Order’ – enter an amount here if a cap is required to be placed on ordering of a particular product, for example, if the pack size in ‘Supplier Products’ is ordered as a ‘(1x10) and a site is only allowed to order 2 packs at a time then the numerical value of 20 would be entered here
-
When happy with all of the details select ‘Save’ – please note that once you save the details page the ‘Shared Stock Size Group’ and ‘Stock Size’ fields cannot be edited. All other fields can be amended after saving the details page
Shared Stock Size Group
This is a tool that can be used if there are multiple products that need to be set up that are generally the same, for instance, if various soft drinks required setting up and they were all 1.5 litres and the pack sizes and dispense sizes are the same then one stock size group could be set up which will populate the pack size and dispense size information automatically into the ‘Size Multiples’ page simply by selecting the ‘Shared Stock Size Group’ field followed by the ‘Stock Size’.
Please note: A shared stock size group should only be set up for products that will use the same generic stock size and the same size multiples. If the pack sizes or generic stock sizes are likely to change in the future the products should not use a shared stock size group.
To do this go to ‘Stock Size Groups’ on the left-hand side menu and select ‘New Stock Size Group’ or search for a stock size group previously created in the search box or by selecting one from the list.
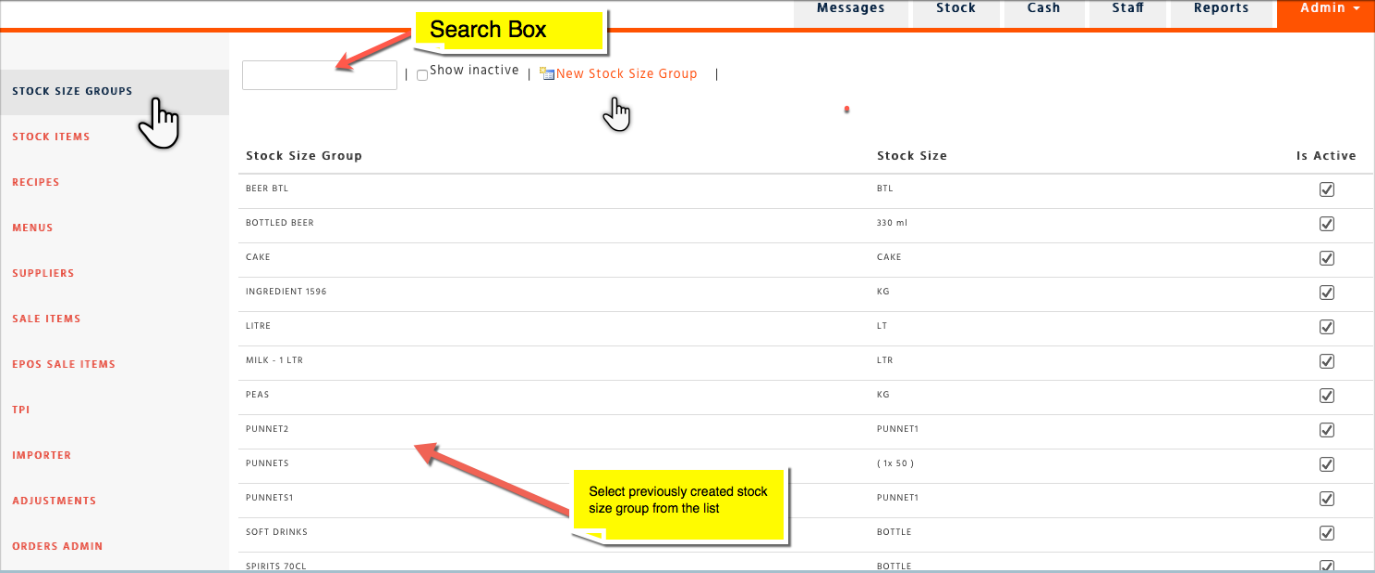
For the purposes of this example select ‘New Stock Size Group’. Enter the ‘Stock Size Group’ such as Soft Drinks, the generic Stock Size such as LTR for litre, flag ‘Active’ and select ‘Save’.

Add the ‘Size Multiples’ in the same way when adding a new stock item.
Size Multiples
Next the pack sizes and dispense sizes need to be created for the new stock item. Select ‘Size Multiples’ and then enter new pack size.
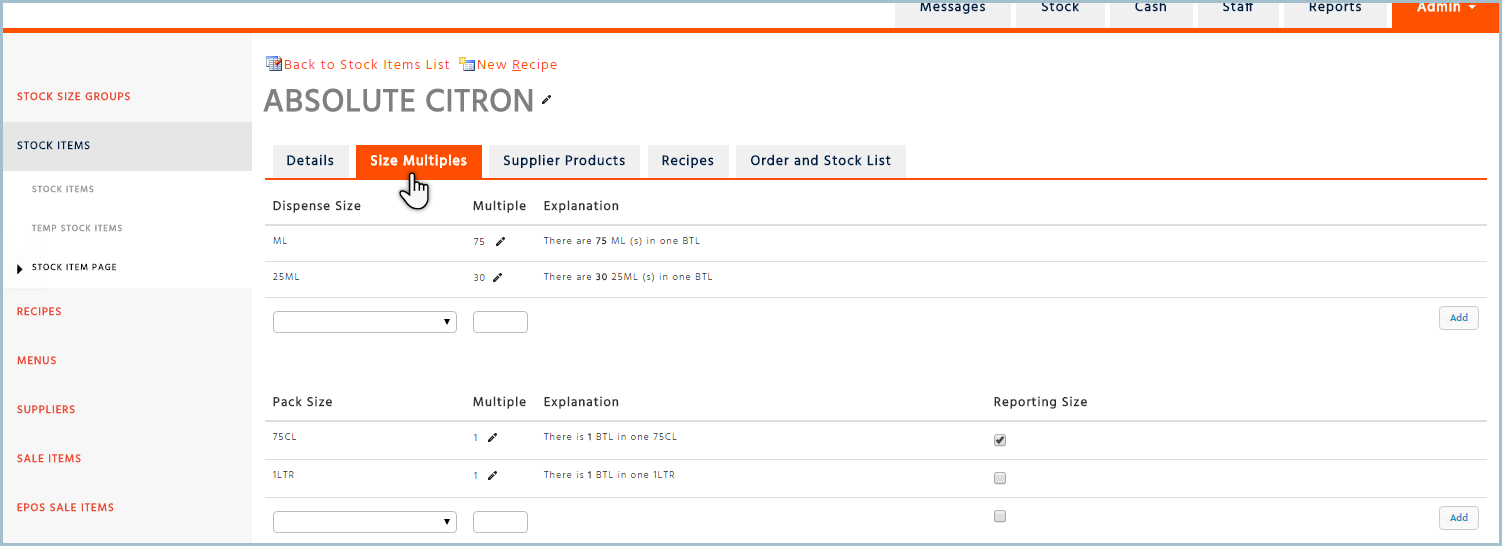
Select the required pack size the product is ordered by or search for it in the search box. If the pack size cannot be found a new pack size can be created by entering the size, you want in the box and entering the multiple e.g. there are 5 (250g) in one (5x250g) as in the screenshot above then selecting ‘Add’. The system will ask if you want to create the new pack size, click on ‘Yes’.
Enter the Dispense Size which is the unit of measurement that will be used when adding ingredients to recipes. This can be completed in the same way as the pack size multiple. Ingredient is the stock item you are now creating.
Reporting size is the pack size that will be viewed on the reports, if you do not require the current pack size to be the reporting size then leave this field blank and tab to the next field.
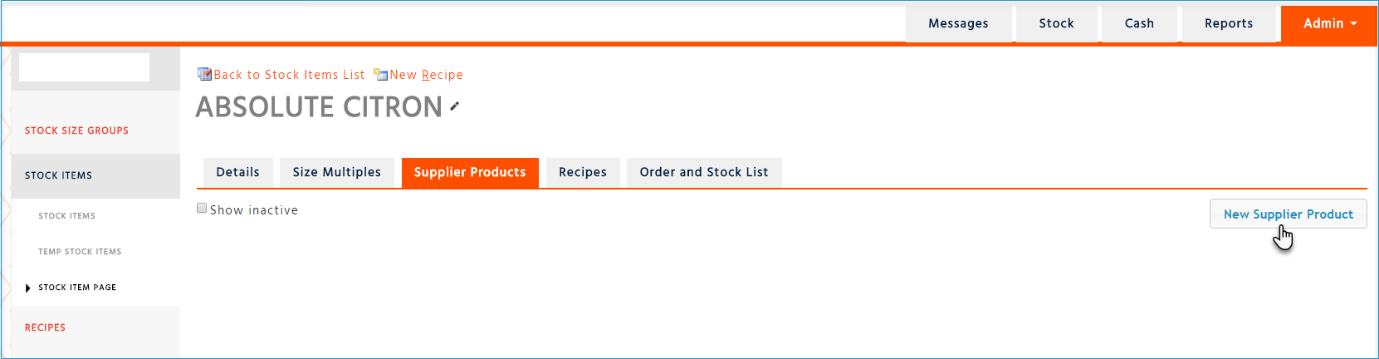
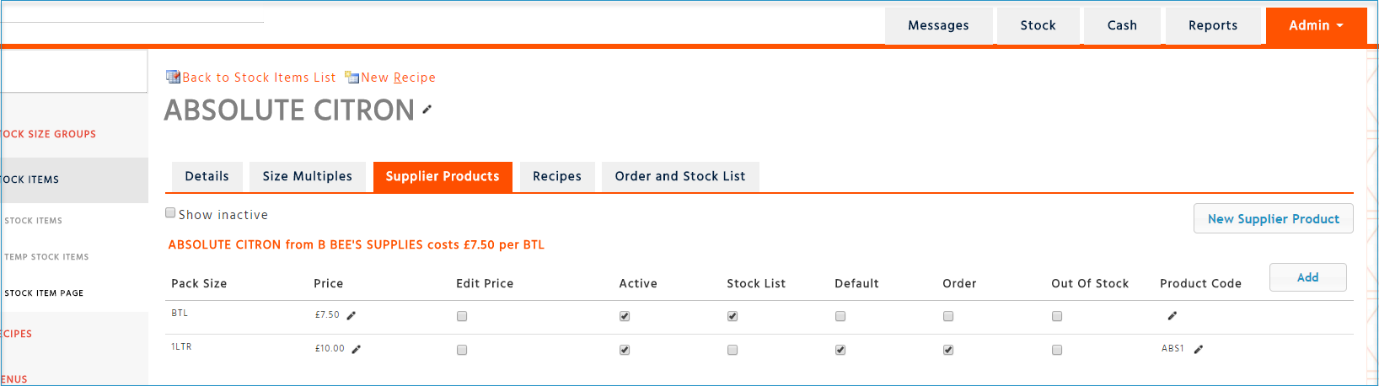
Supplier Products
The supplier products need to be created which is where you will be able to set the price of the product (the price that the supplier charges you without VAT), pack size and which supplier it comes from. This is also one of the four places a product will need to be flagged to order and count so that sites will see it on their order and stock lists.
Click on ‘New Supplier Product:
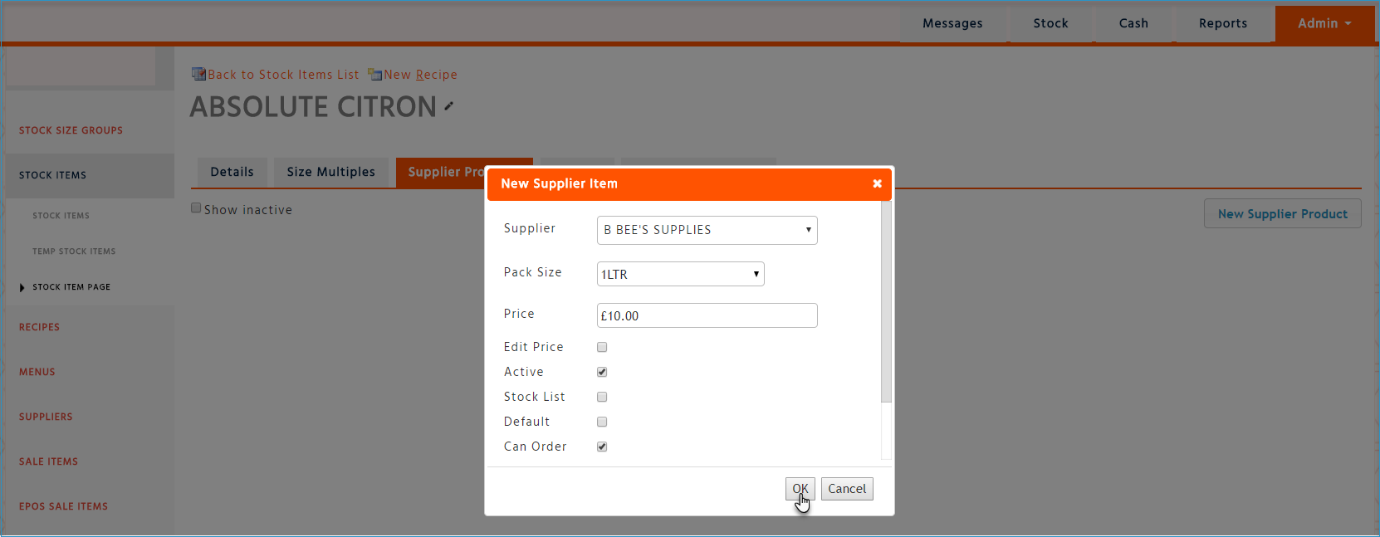
A dialogue box will appear:
-
Supplier - Choose the supplier the product comes from
-
Pack Size – Choose the pack size the product is ordered in which will have been created in ‘Size Multiples’
-
Price – Enter the cost of the product from the supplier according to pack size
-
Edit Price – Choose this if you would like the site to be able to edit the price on an invoice when declaring the goods onto the system
-
Active – This should be ticked automatically, if not flag it to be active
-
Stock List – Select this if you would like the pack size to be available on the stock count sheet
-
Default – This should be selected if you would like the recipe costs to be based on this supplier product
-
Can Order – Select this if you would like the pack size to be available on the order sheet
-
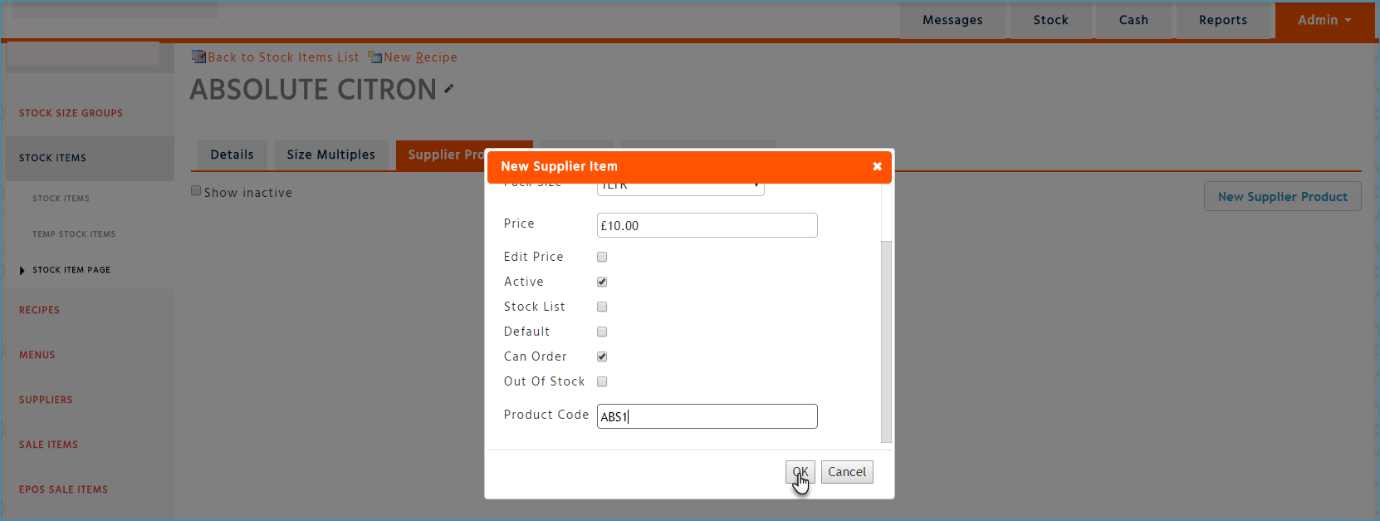
Out of Stock – Select this if the supplier is temporarily out of stock of the product, however you would need to remember to unflag it again when the product is back in stock
-
Product Code – Enter the supplier’s product code reference
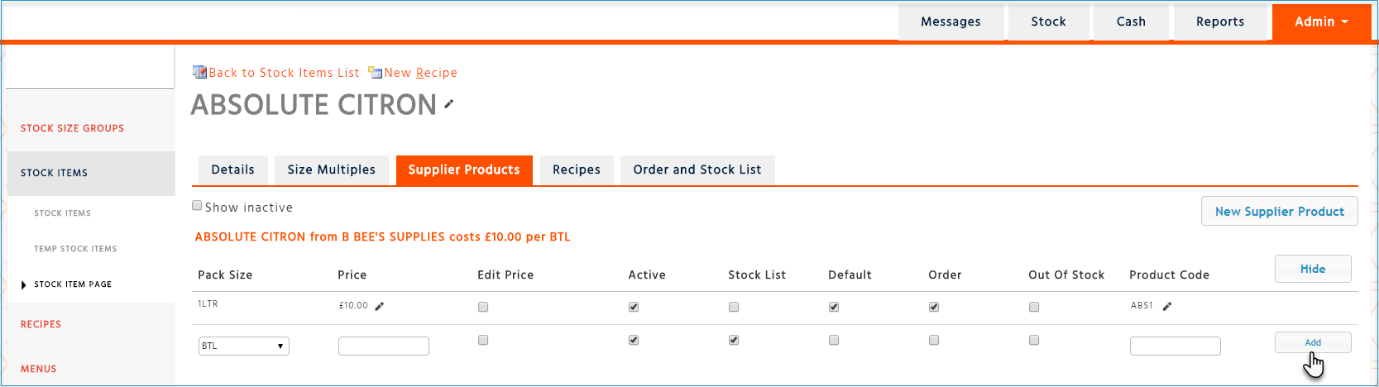
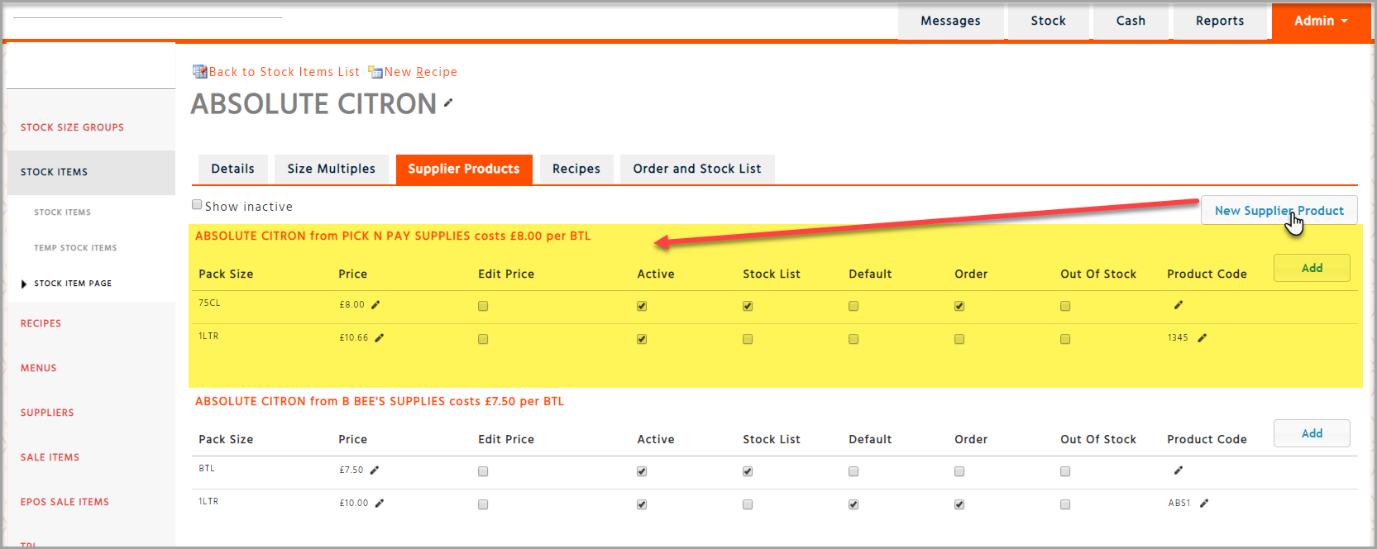
Once all done, select ‘OK’ to save your selections. This will take you back to the ‘Supplier Products’ page where you can view the supplier product you have just created. If you wish to have an additional supplier product so that one pack size is for the case and a second one is for the single pack size you can do that by clicking on ‘Add’ on the supplier product line. Choose the pack size, leave the price field blank as this will be calculated automatically, choose ‘Active’, ‘Stock List’ and leave everything else blank and then click ‘Add’. Refresh the page and the system will calculate the single pack size price and sort the lines into an order. Please note the ‘Product Code’ does not need to be added to the single pack size, this will still appear on the stock list since it is joined to the case size.
Adding a Secondary Supplier
If you receive a product that is similar to an existing one on the system (either from the same supplier or a different supplier) but will be used in different or new recipes, a completely new stock item must be set up for this. If the product is the same and will share the same recipes as the existing stock item, then a new ‘supplier product’ should be created within the existing stock item.
To create this simply follow the instructions to set up a new supplier product as set out previously.
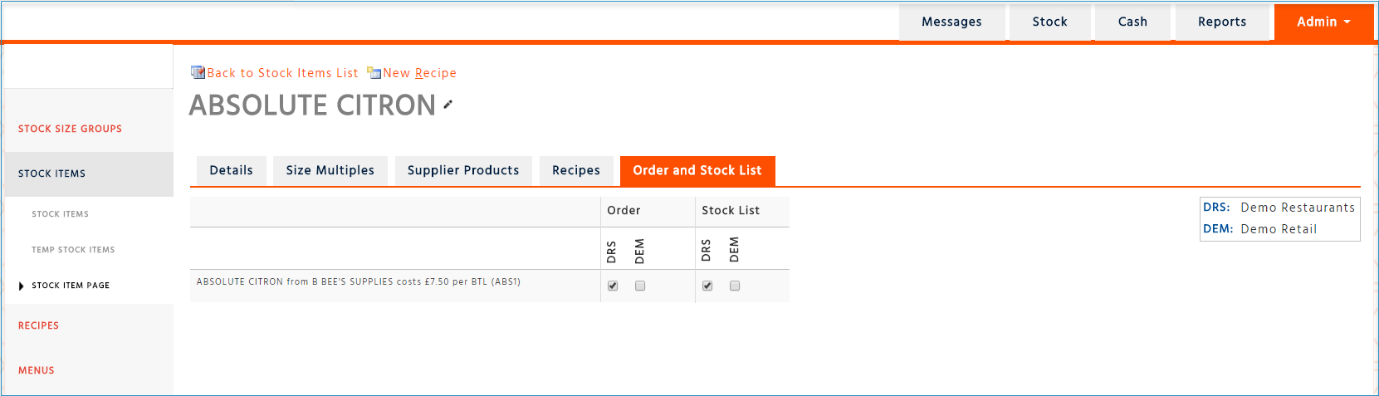
Order and Stock List
Under this tab is the fourth and final place the order and stock lists boxes can be flagged enabling you to select which divisions you want to be able to see the product on the order and count sheets.
Recipes
Select this tab if you wish to view which recipes contain this ingredient.

For Allergens and Nutritional information view additional topics