The purpose of a Recipe is to build an item that can contain Stock Items, Batches, or Choices as ingredients, which then you can sell to your customers.
To create, search for, or amend an existing Recipe, go to Stock Admin, then select the Recipes page from the left-hand side menu.
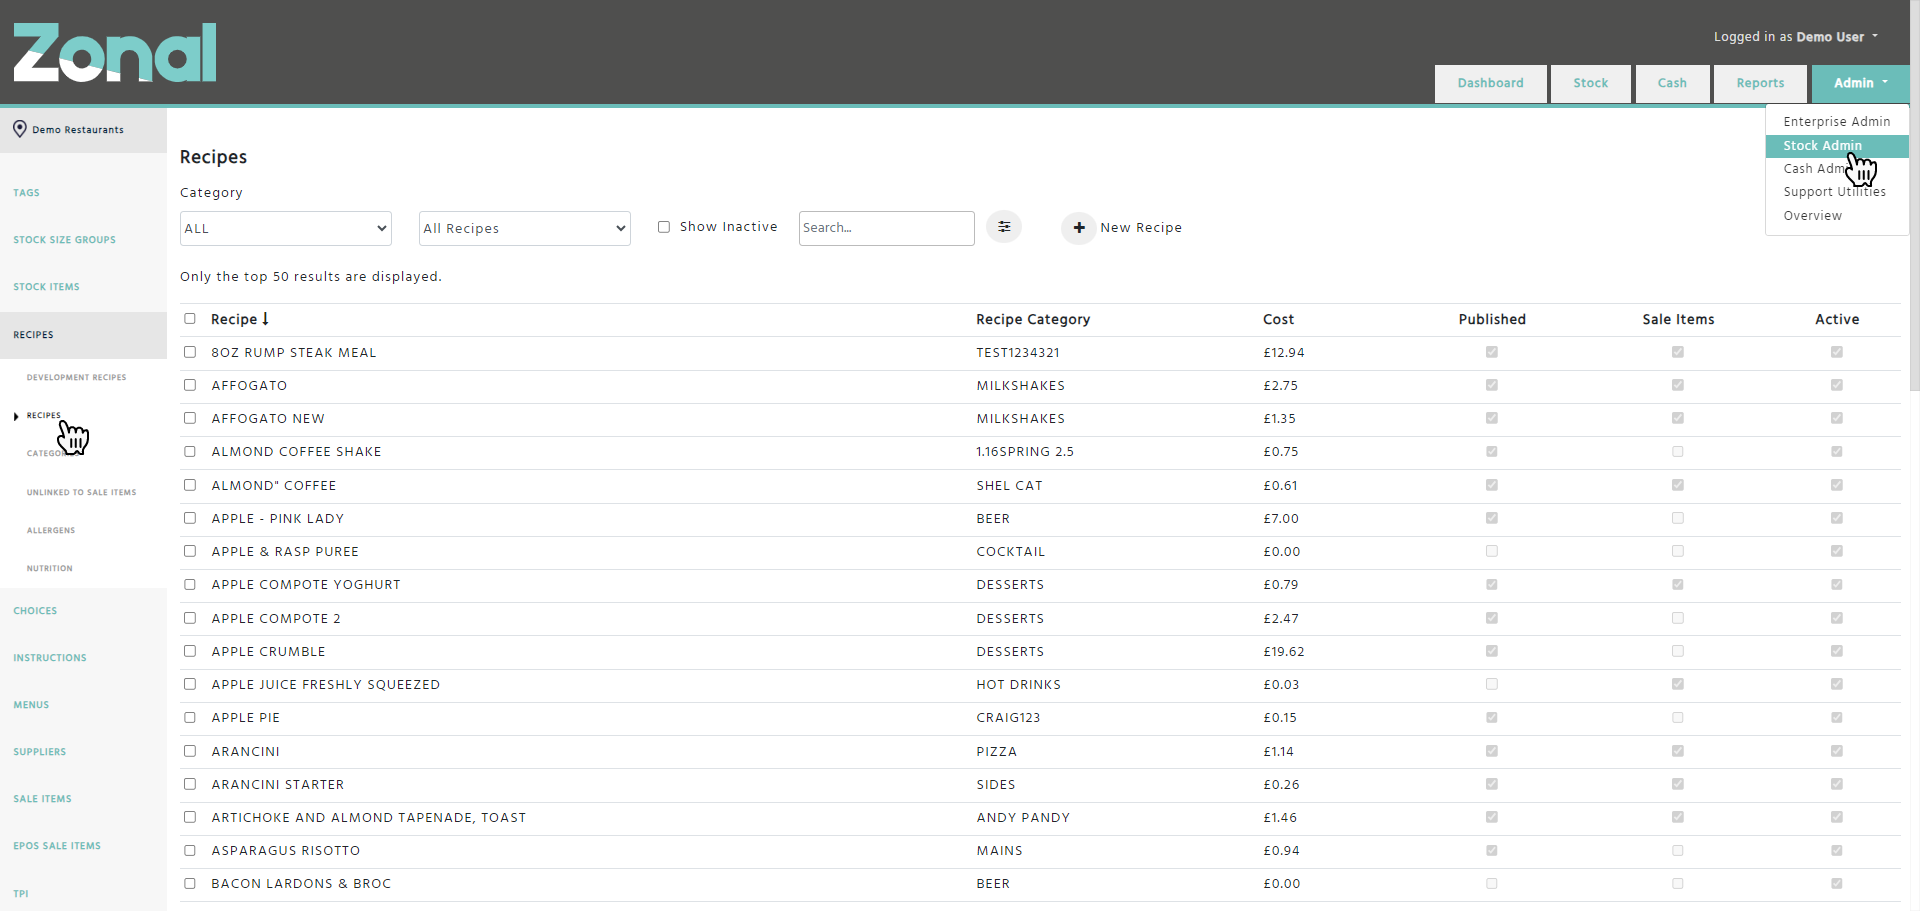
Creating a new Recipe
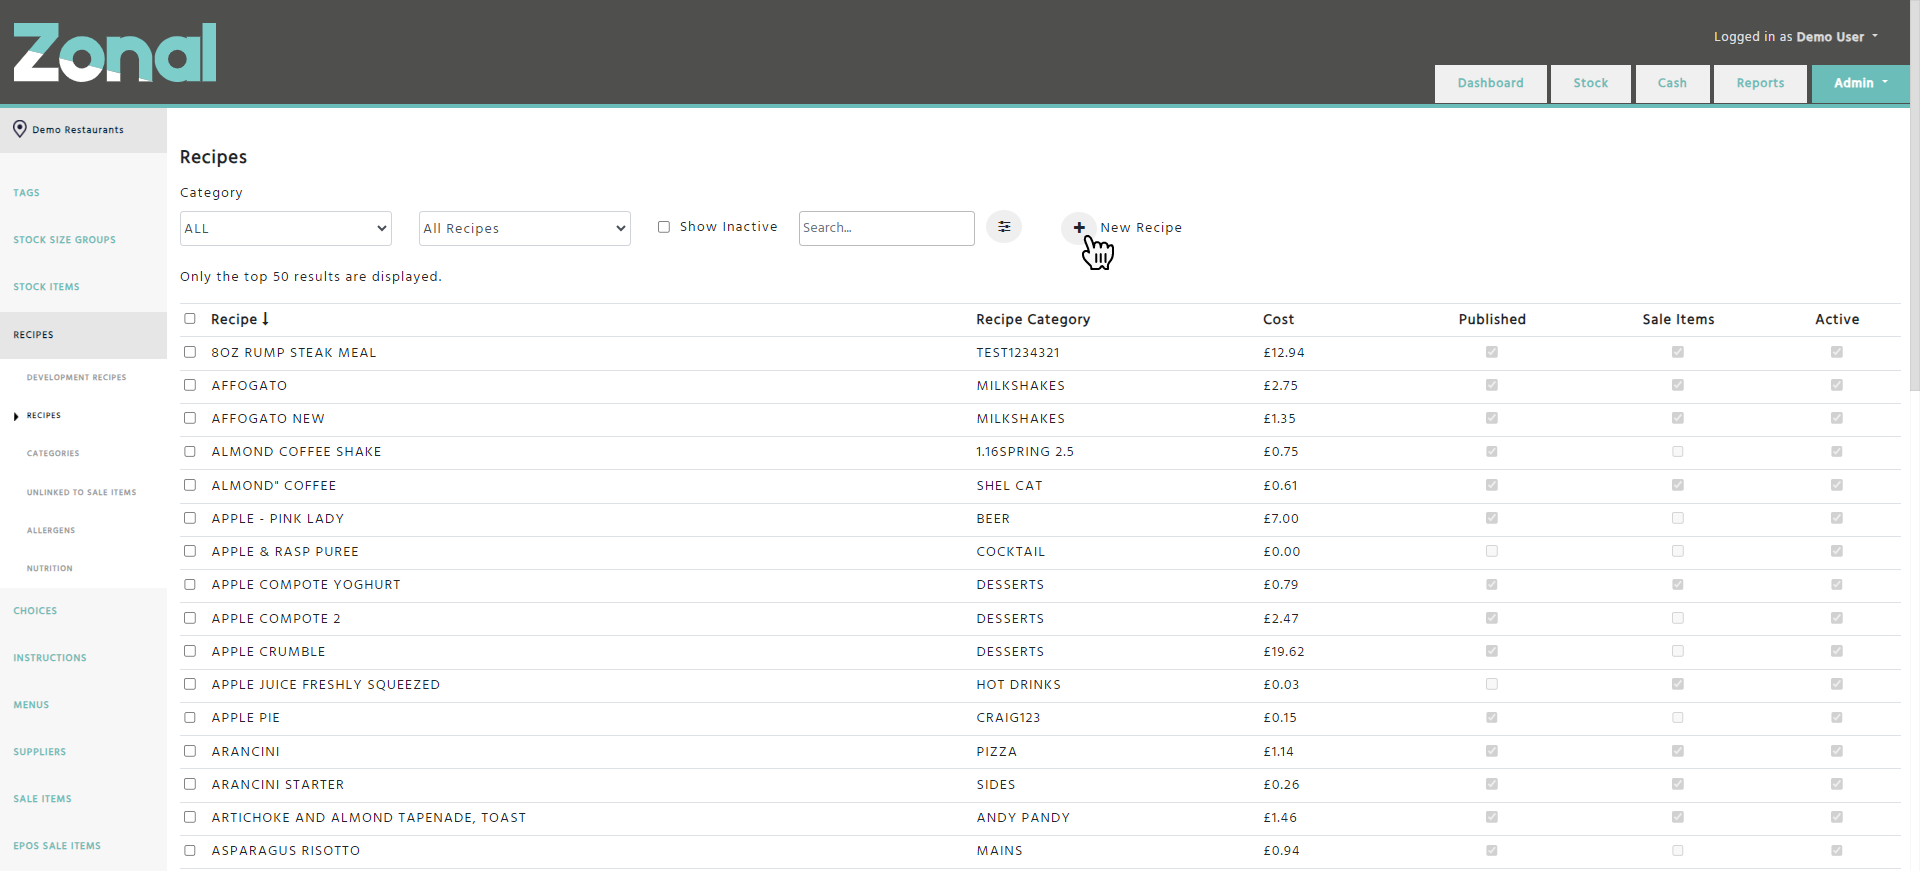
Step 1
Click on the ‘New Recipe’ button.
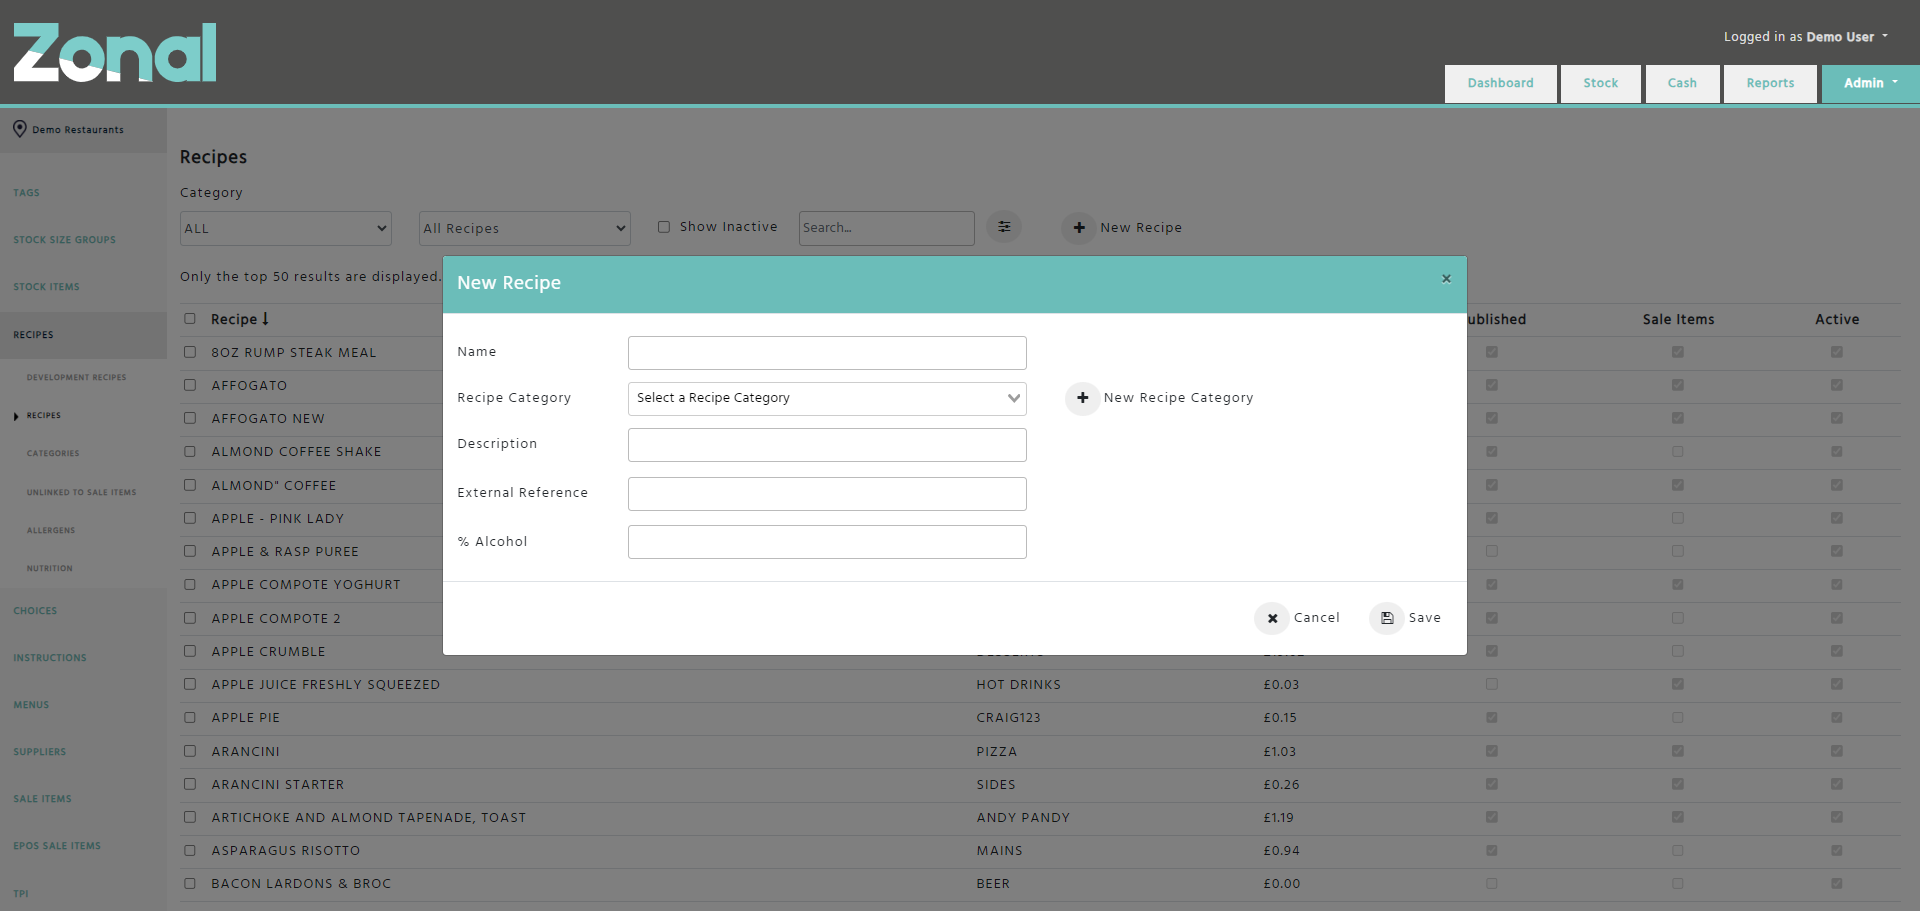
Step 2
Complete the below fields for your new Recipe.
Name – Enter a name up to 50 characters. Please note, the name of the Recipe must be unique within a Recipe Category.
*Aztec clients: you must enter the name up to 16 characters which will be populated as the ‘Retail Name’ field in Aztec.
Recipe Category – Select the relevant Recipe Category such as “Starters”.
*Aztec clients: The Recipe Categories will correspond with the Subcategories in Aztec. If you would like to add a new Subcategory, or edit an existing one, you will need to do this in Aztec and the changes will have to be imported into Enterprise.
Description – If you would like to add any extra information about the Recipe, enter it up to 40 characters.
*Aztec clients: this field will be populated as the ‘Description’ field in Aztec.
External Reference – If you would like to add an external reference information about the Recipe, enter it up to 15 characters.
*Aztec clients: this field will be populated as the ‘Import/Export Ref’ field in Aztec.
% Alcohol – If you would like to indicate the alcohol percentage value of the Recipe, enter it up to two decimals.
*Aztec clients: this field will be populated as the ‘% Alcohol’ field in Aztec.
When you are happy with the configured details, click on the ‘Save’ button.
Step 3
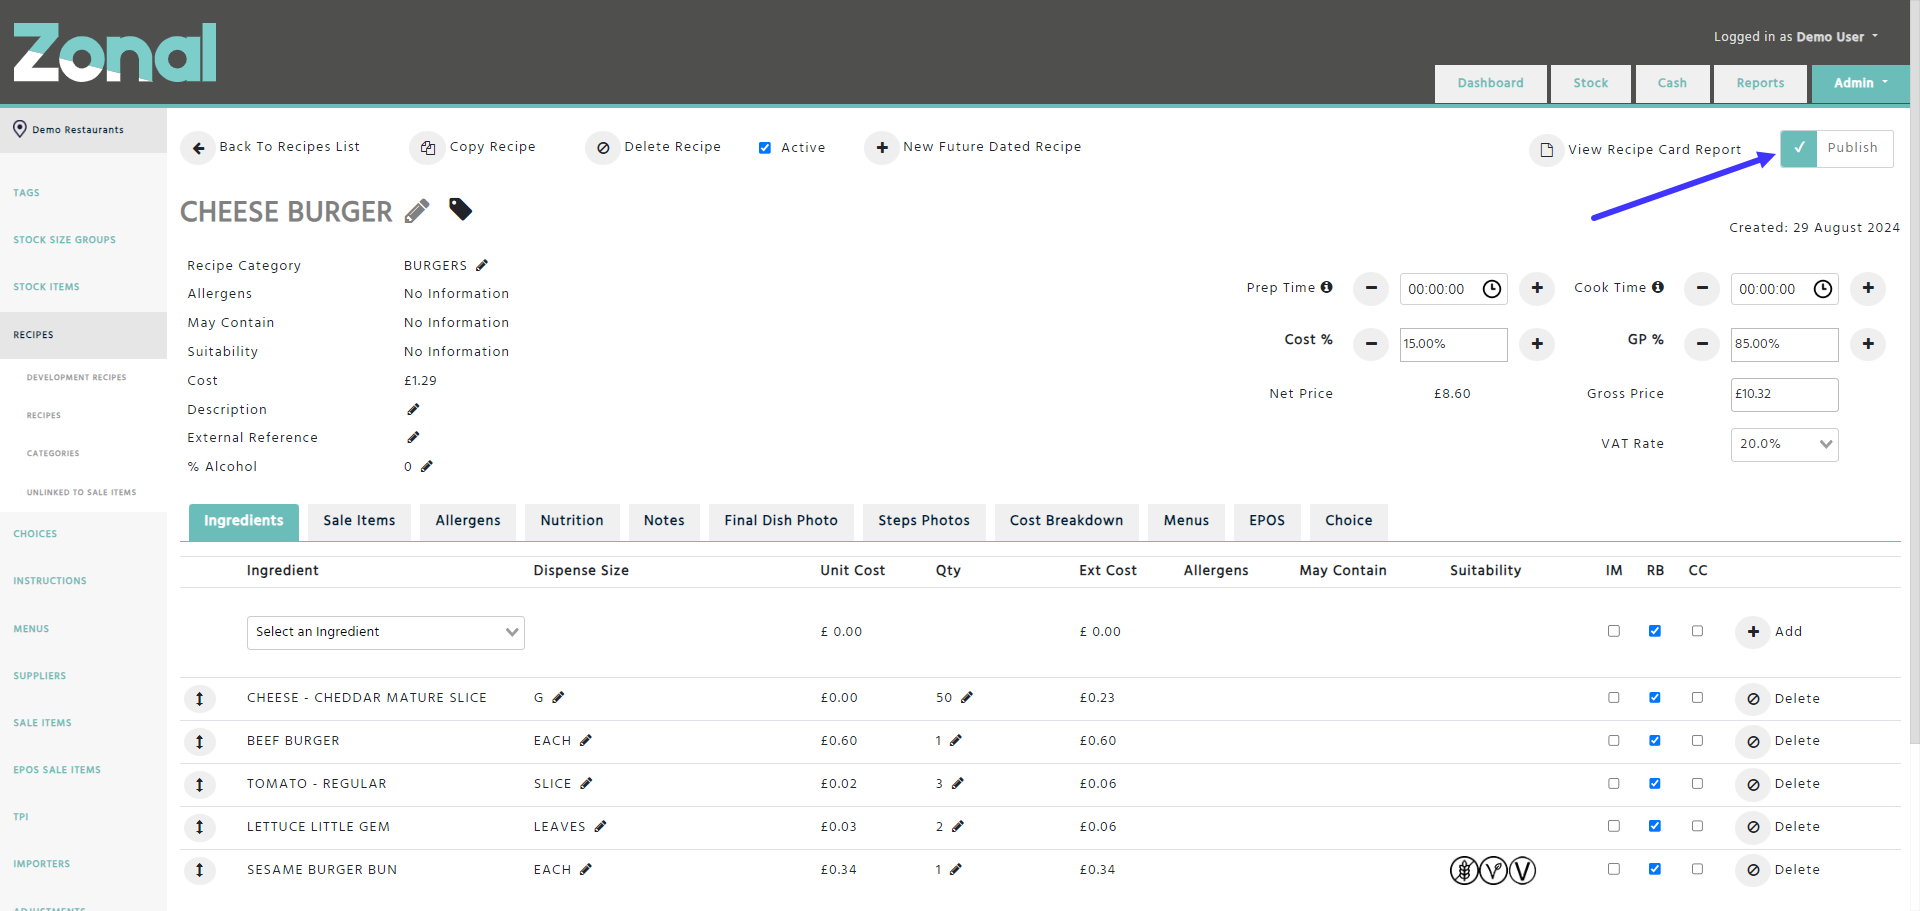
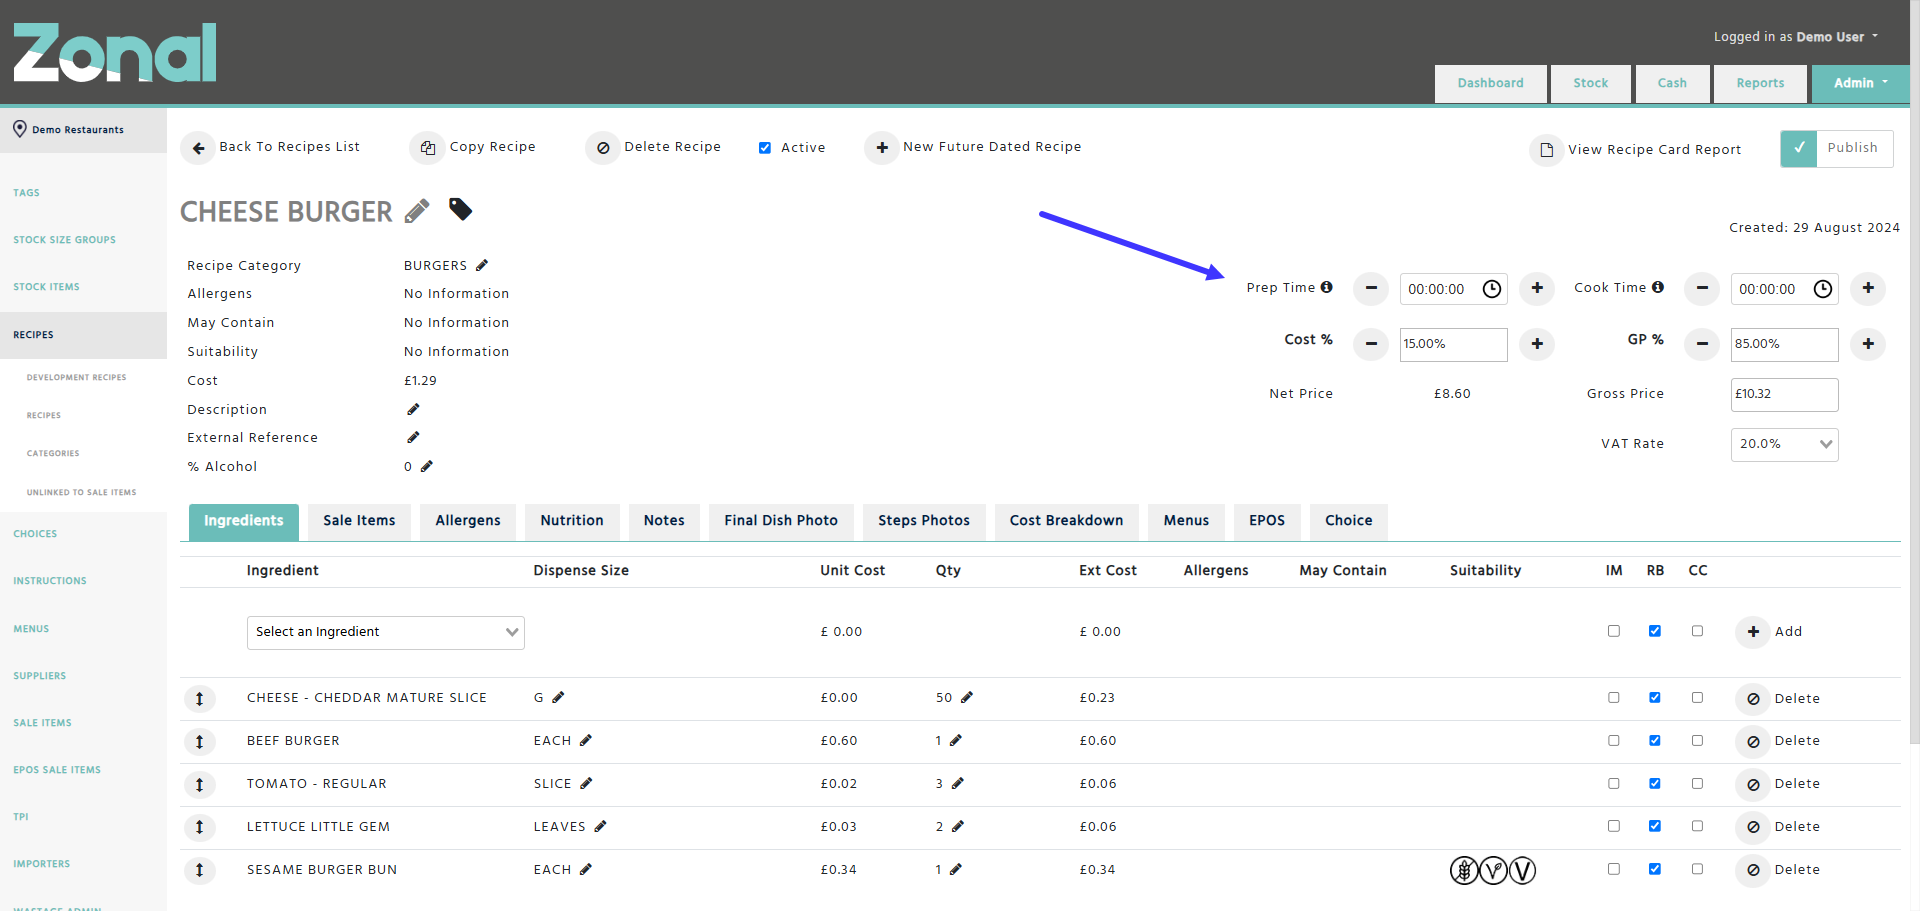
The next step is to add the relevant ingredients to your Recipe under the Ingredients tab.
To add an ingredient, enter a name of a Stock Item, Batch, or a Choice within the ‘Ingredient’ field, select the relevant size from the ‘Dispense Size’ field, enter the relevant quantity into the ‘Qty’ field, then click on the ‘Add’ button. If would like to add multiple ingredients to your Recipe, you can repeat this process as many times as required.
If you would like to remove an ingredient, click on the ‘Delete’ button at the end of the row.
To change the Dispense Size or the quantity of an existing ingredient, just amend the entries and save the changes.
Please note, the ingredients can be sorted by drag and dropping them which can be useful when you would like to see the ingredients in a specific order within the Recipe Book reports.
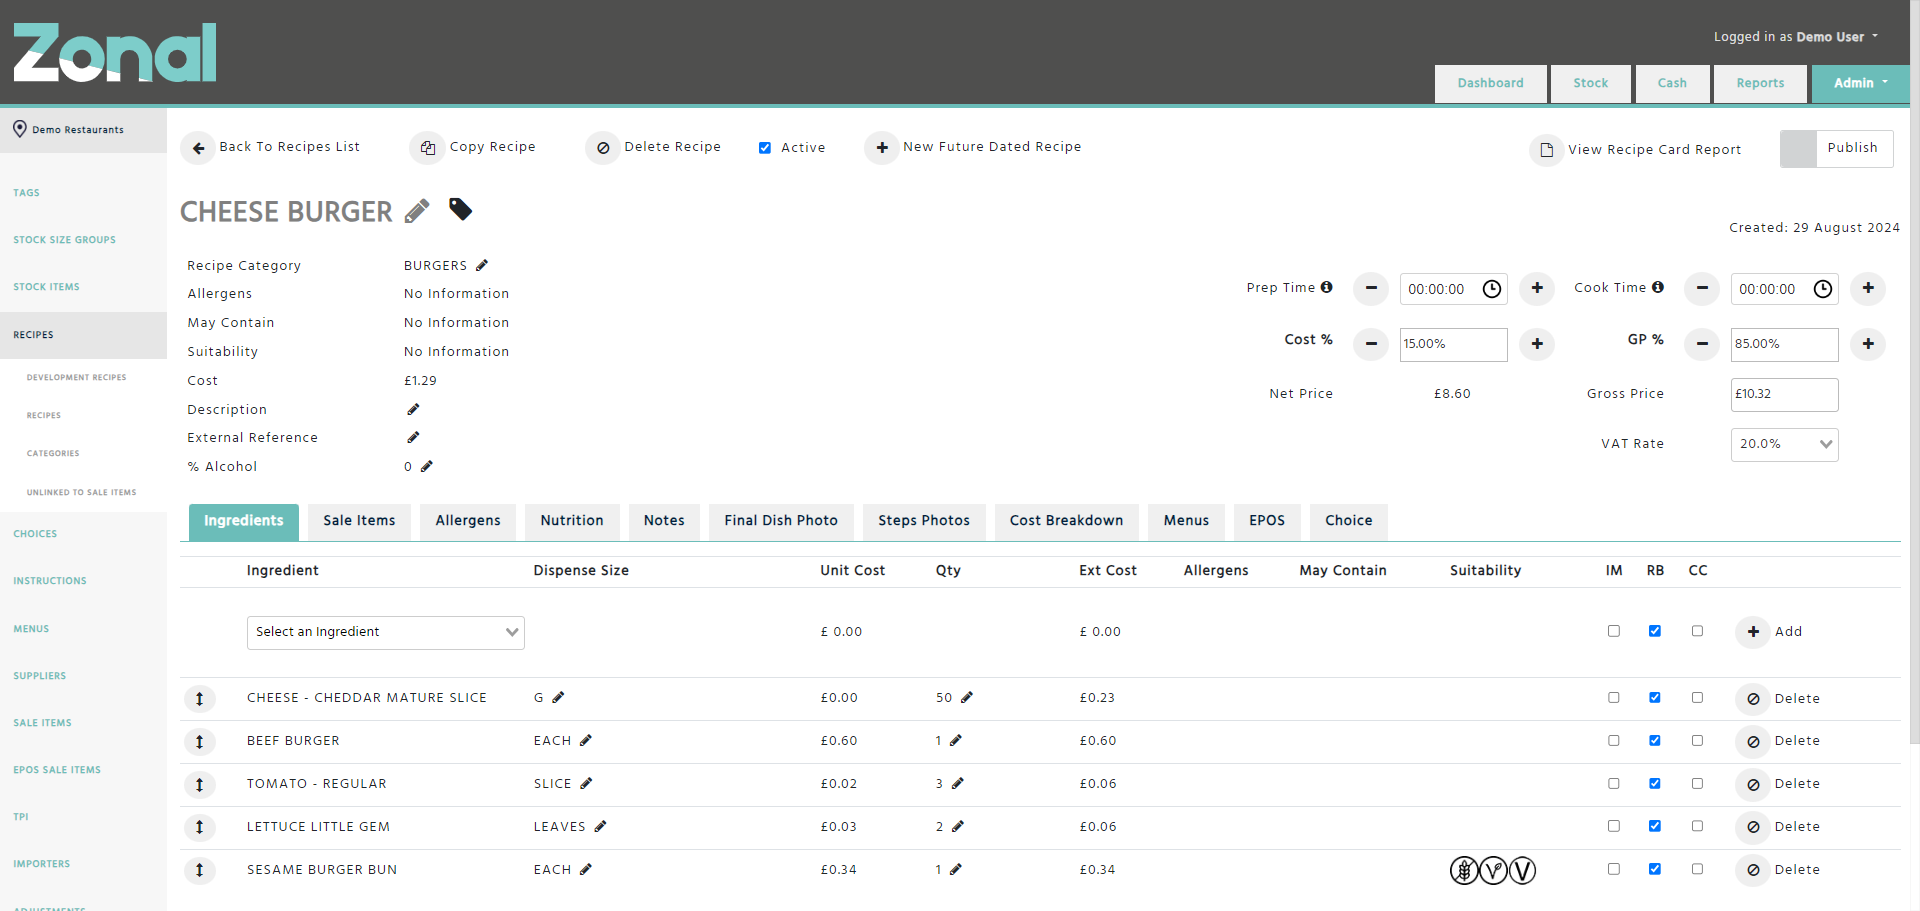
Explanation of the columns:
Ingredient – displays the name of a selected Stock Item, Batch, or Choice. The  sign will indicate Batches, and the
  sign will indicate Choices.
Please note, you can only select those Stock Items or Batches that have been made available for your Division.
Dispense size – displays the configured Dispense Size of the ingredient.
The available Dispense Sizes for Stock Items and for Batches are based on those Dispense Sizes that are created under their Size Multiples tab. If a required Dispense Size is not available, you will have to go to the Stock Item or Batch, then add it under its Size Multiples tab.
The available Dispense Sizes for Choices will always be their portions (e.g.: Standard, Double, etc).
Unit Cost – displays the cost of the ingredient according to the selected Dispense Size.
In case of a Stock Item, this is the cost of that supplier product that is flagged as default under the Stock Item’s Supplier Products tab.
In case of a Batch, this is the total cost of the Batch.
In case of a Choice, this is the configured cost of the Choice (average, minimum, or maximum).
Qty – displays the quantity usage of the ingredient.
Ext Cost – displays the selected Unit Cost multiplied by the entered Qty that will represent the overall cost of the ingredient.
Allergens – displays the allergen data of the ingredient. The summary based on all ingredients within a Recipe will be listed in the details section, just under the Recipe Category field.
May Contain – displays the may contain information of the ingredient. The summary based on all ingredients within a Recipe will be listed in the details section, just under the allergen summary.
Suitability – displays the suitability information of the ingredient. The summary based on all ingredients within a Recipe will be listed in the details section, just under the may contain summary.
Please note, the suitability for a Recipe can only be accurate, if every ingredient within the Recipe is rated. If it has one ingredient without rating, the Recipe will be considered as not suitable for any types.
IM – stands for Is Minor and it populates the ingredient’s ‘Is Minor’ flag within Aztec.
RB – stands for Recipe Book and it determines if an ingredient is displayed in the Recipe Book reports.
Please note, this flag is automatically applied when a new ingredient is added. If you don’t want an ingredient to be displayed in the Recipe Book reports, this field should be unflagged.
CC – stands for Condiment Chain and it affects the allergen results of the Recipe. If you would like to add an ingredient to the Recipe for costing purposes but you would like to remove it from the allergen results of that Recipe, this field should be flagged (e.g.: optional parmesan cheese).
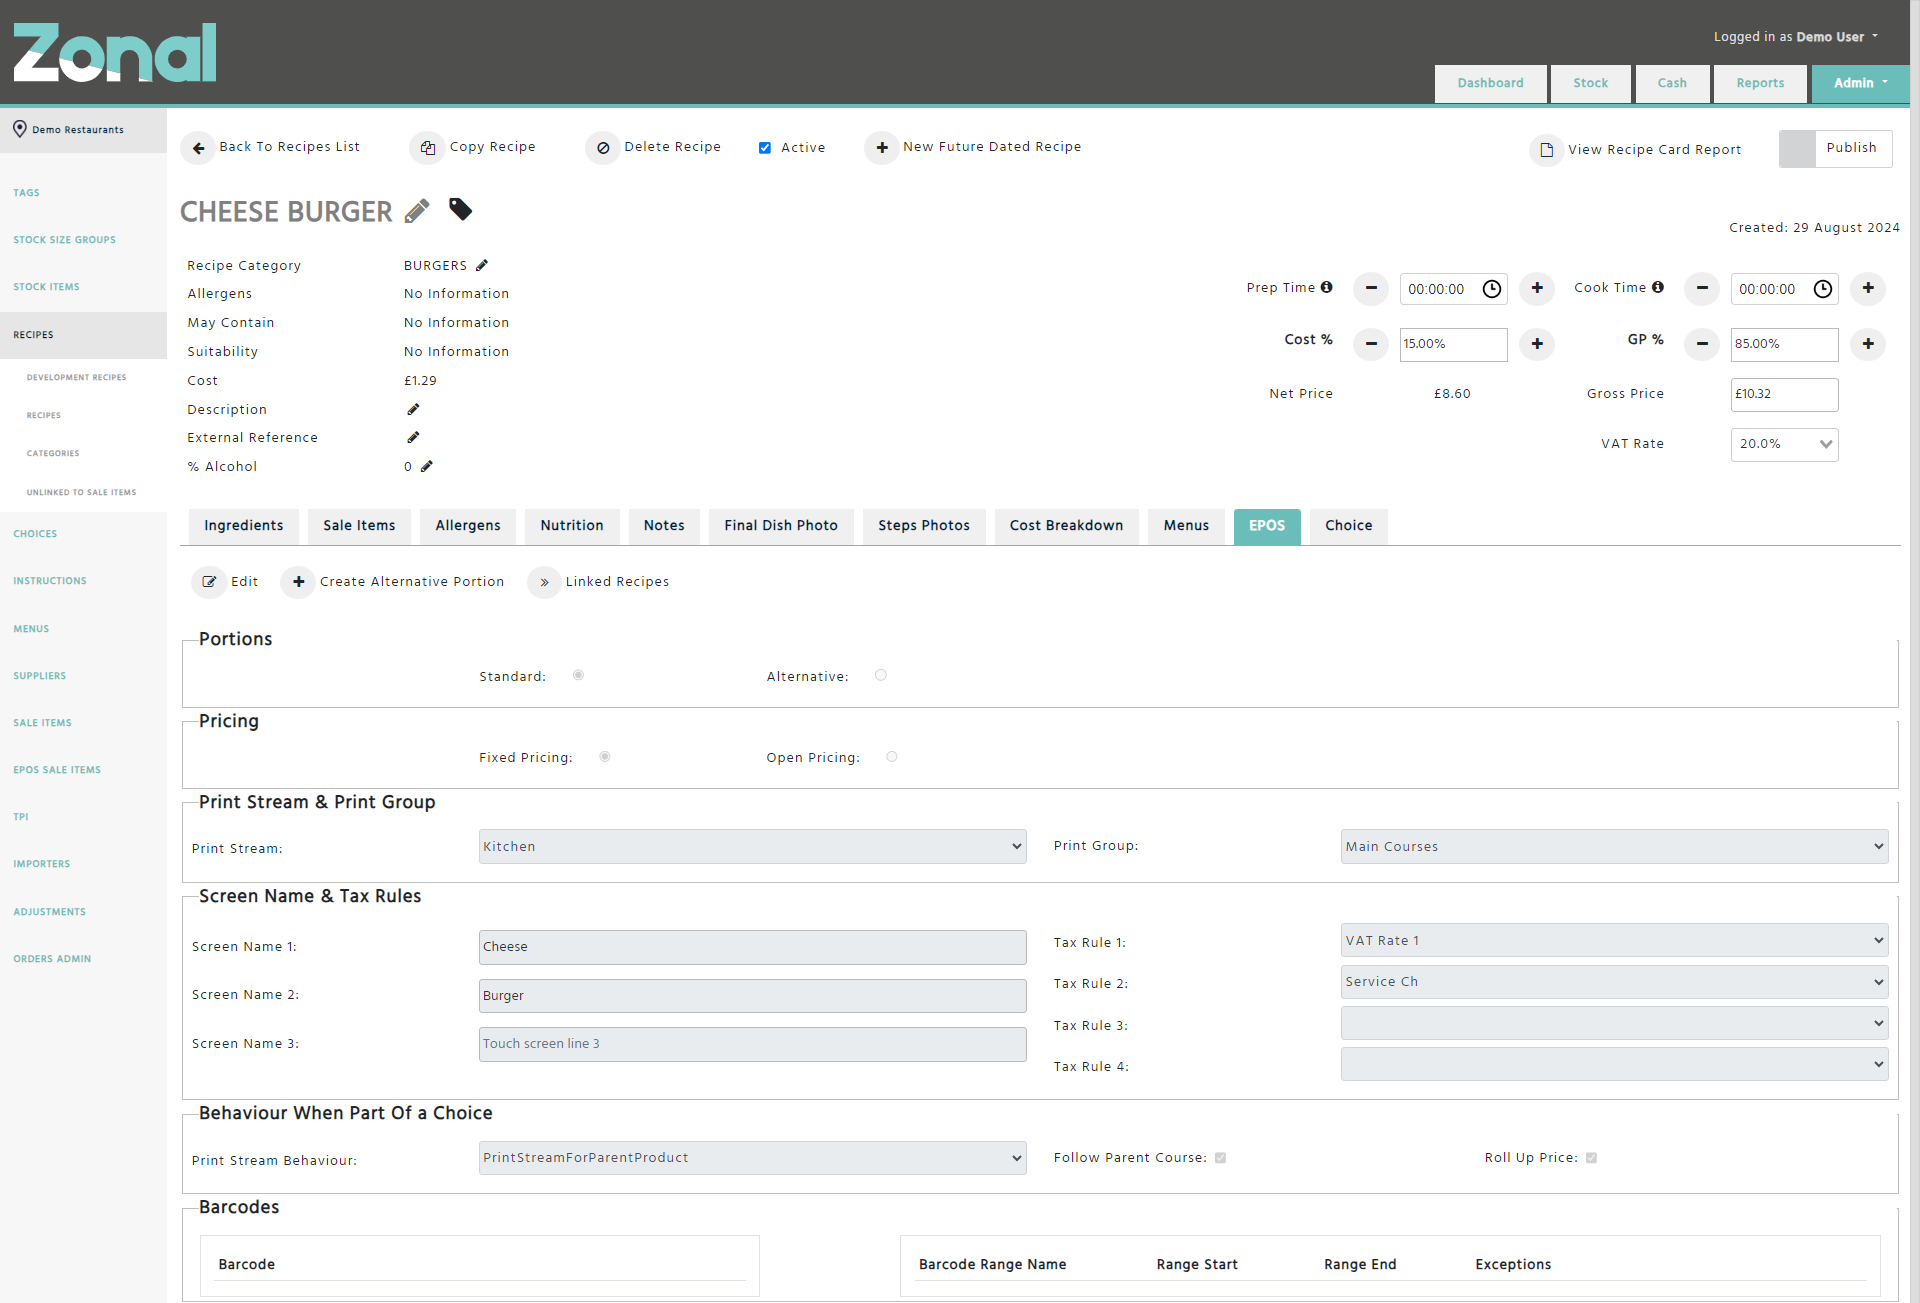
Step 4 - Only for Aztec clients
Select the EPOS tab to configure the EPOS settings for your Recipe, which will correspond to the EPOS settings in Aztec.
The Portion section will indicate whether your Recipe is a Standard Portion Recipe or an Alternative Portion of another Recipe.
The Pricing section will be configured as ‘Fixed Pricing’ by default, but you will be able to change this to ‘Open Pricing’ if you wish to do so.
To configure the Print Stream and Print Group (Course) fields for your Recipe, select the relevant options within the ‘Print Stream & Print Group’ section. Please note, when a new Recipe is created, both fields will be preselected as ‘Unallocated’ so you will have to change them as required. Please also note that the selectable options within those fields are configured in Aztec.
The Screen Name fields will be pre-populated based on your Recipe’s name. If you would like to change them, enter the new name up to 8 characters in each line, which will be populated as the Touch Screen name in Aztec.
The Tax Rules will be imported from Aztec, and you will be able to configure them within the 4 tax rule fields. Please note, you will only be able to select a particular tax rule once across the 4 tax rule fields.
If you would like to change the behaviour of your Recipe when it is part of a Choice, you will be able to do this within the next section. Please note, when you create a new Recipe, the ‘Print Stream Behaviour’ field will be preselected as ‘PrintStreamForParentProduct’, and the ‘Follow parent course’ and the ‘Roll up price’ fields will be flagged by default.
The last section will allow you to create barcodes and barcode ranges for your Recipe.
Step 5
Flag the ‘Publish’ field so that the Recipe will be displayed within the Recipe Book reports.
*Aztec clients: this field will have to flagged if you would like the Recipe to be sent to Aztec.
The following tabs will provide more information about your Recipe.
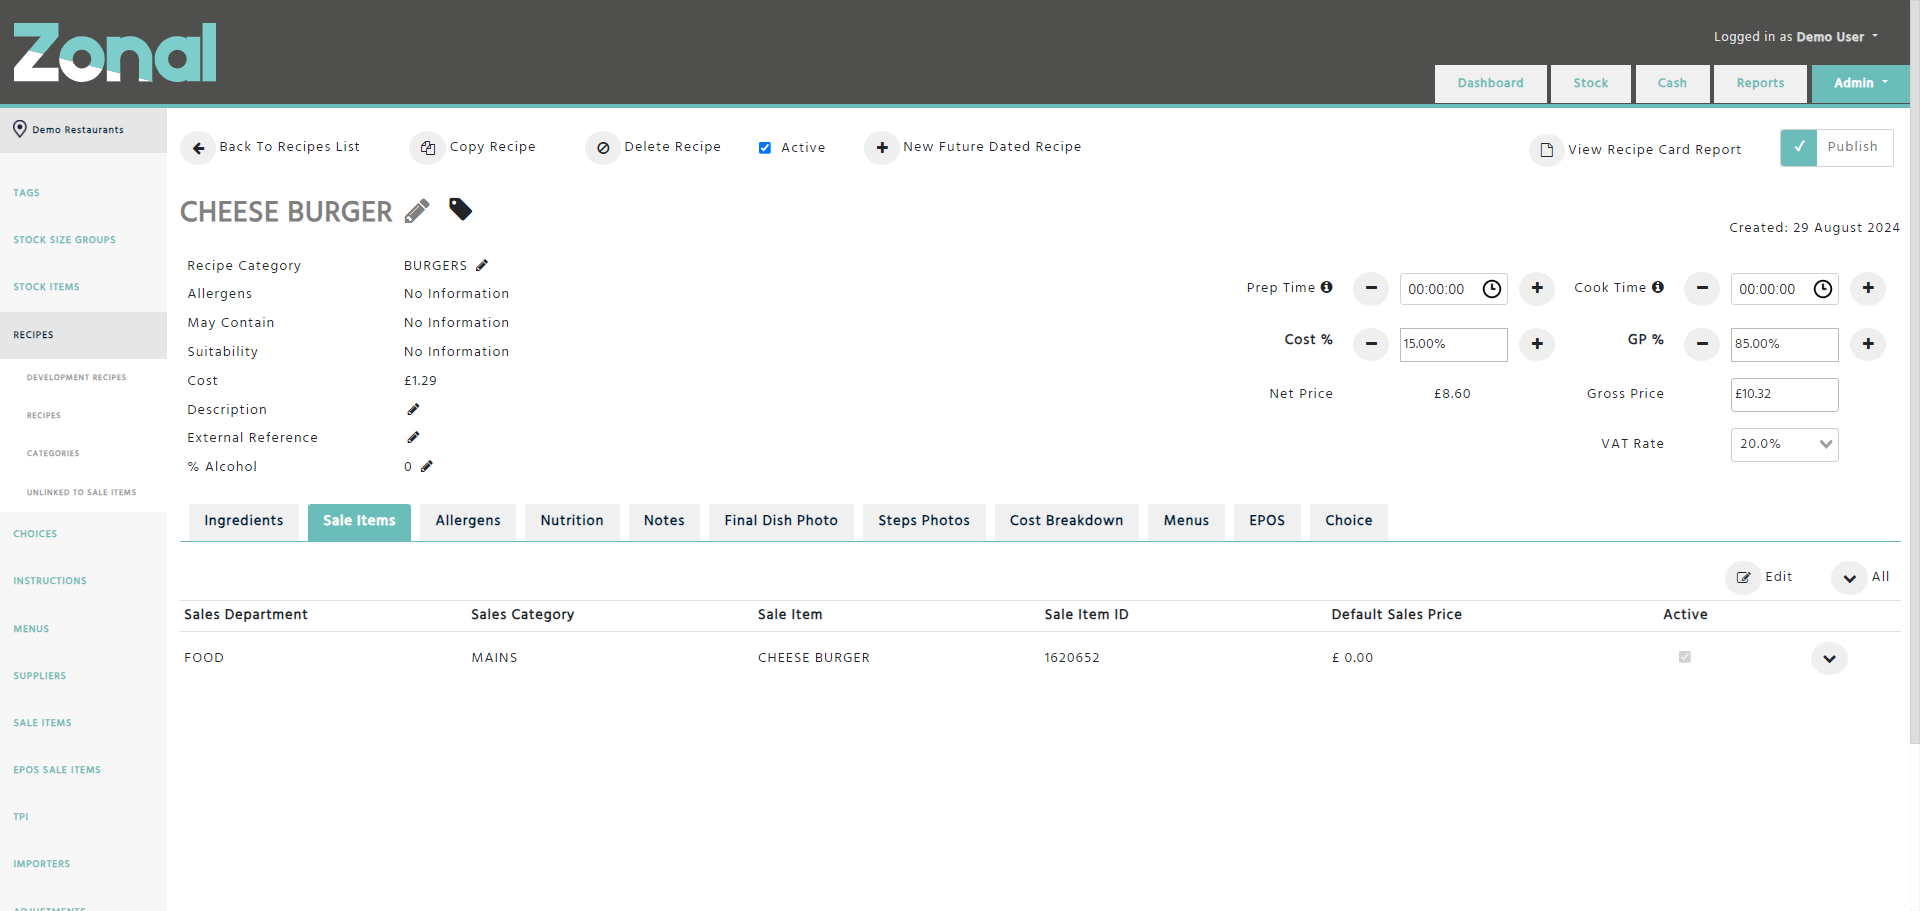
Sale Items tab
If you would like to see which Sale Items are linked to your Recipe, select the Sale Items tab.
Allergens tab
If you would like to see the allergen data of your Recipe’s ingredients in more detail, select the Allergens tab.
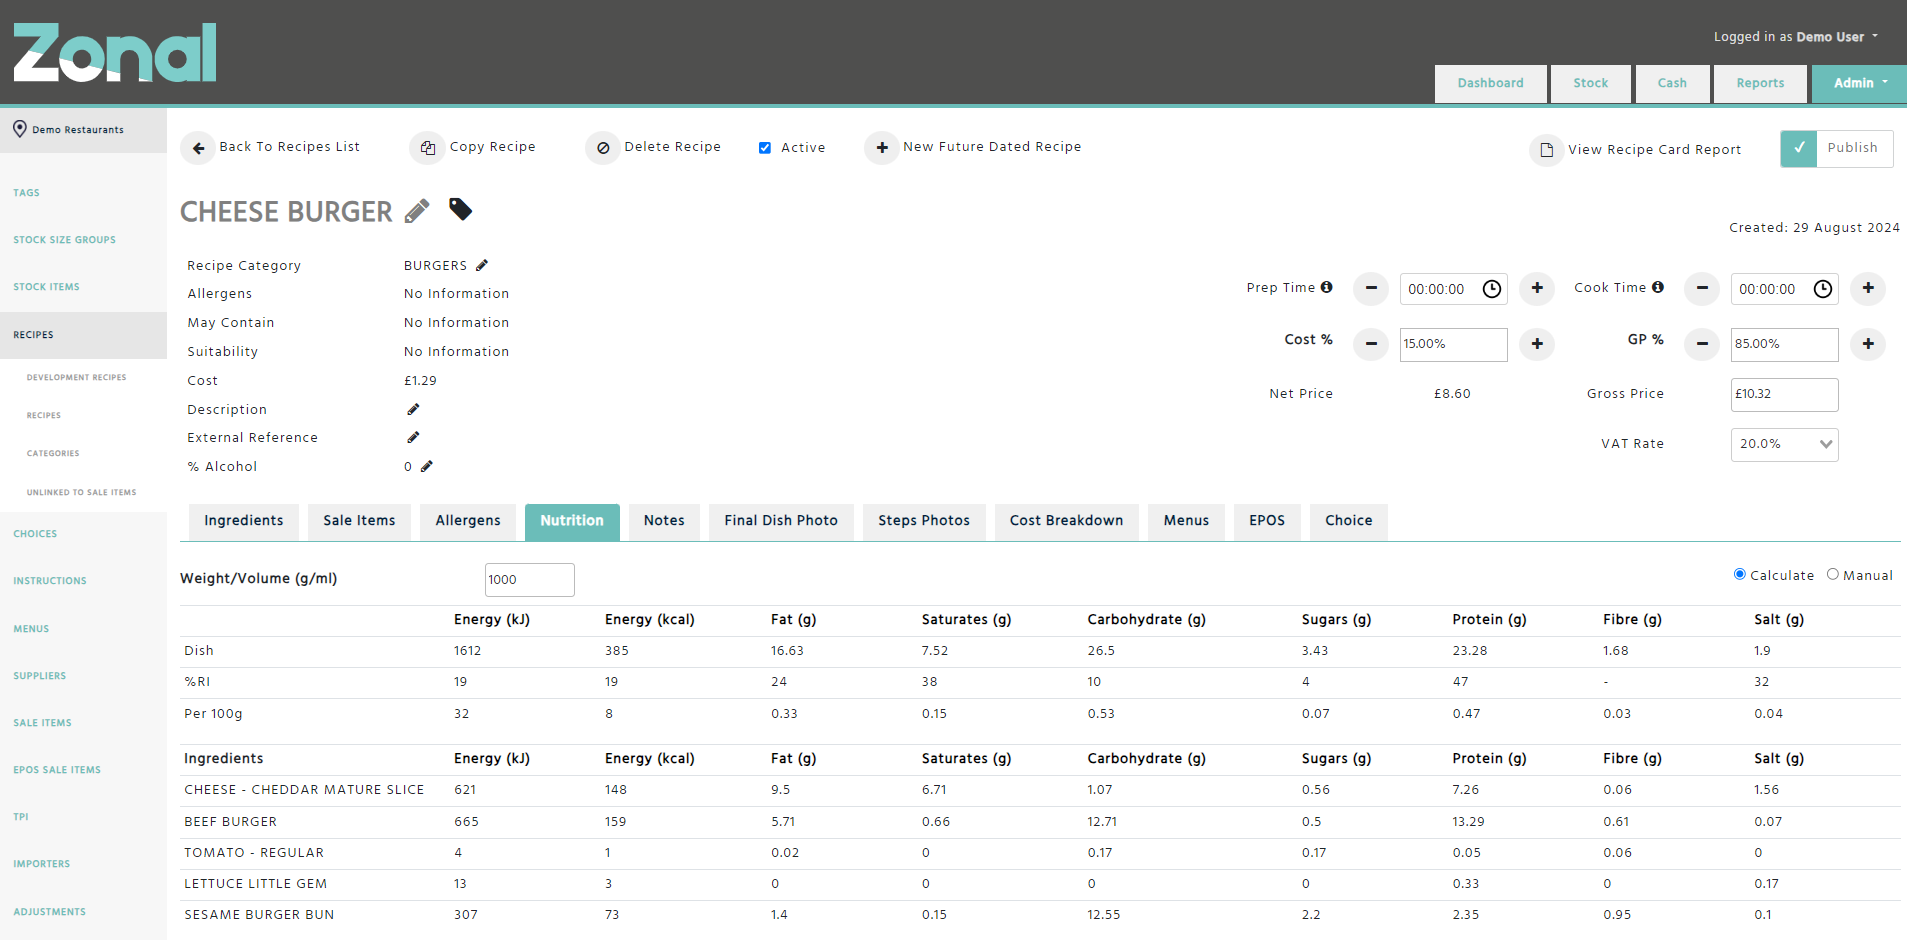
Nutrition tab
If you would like to see the nutritional information of your Recipe, select the Nutrition tab.
Please note, when you create a new Recipe, the Nutrition tab will be flagged as ‘Calculated’ by default so the total nutritional values of the Recipe will be automatically calculated based on its ingredients. If you would like to enter the nutritional values for the Recipe manually, please change the flag to ‘Manual’.
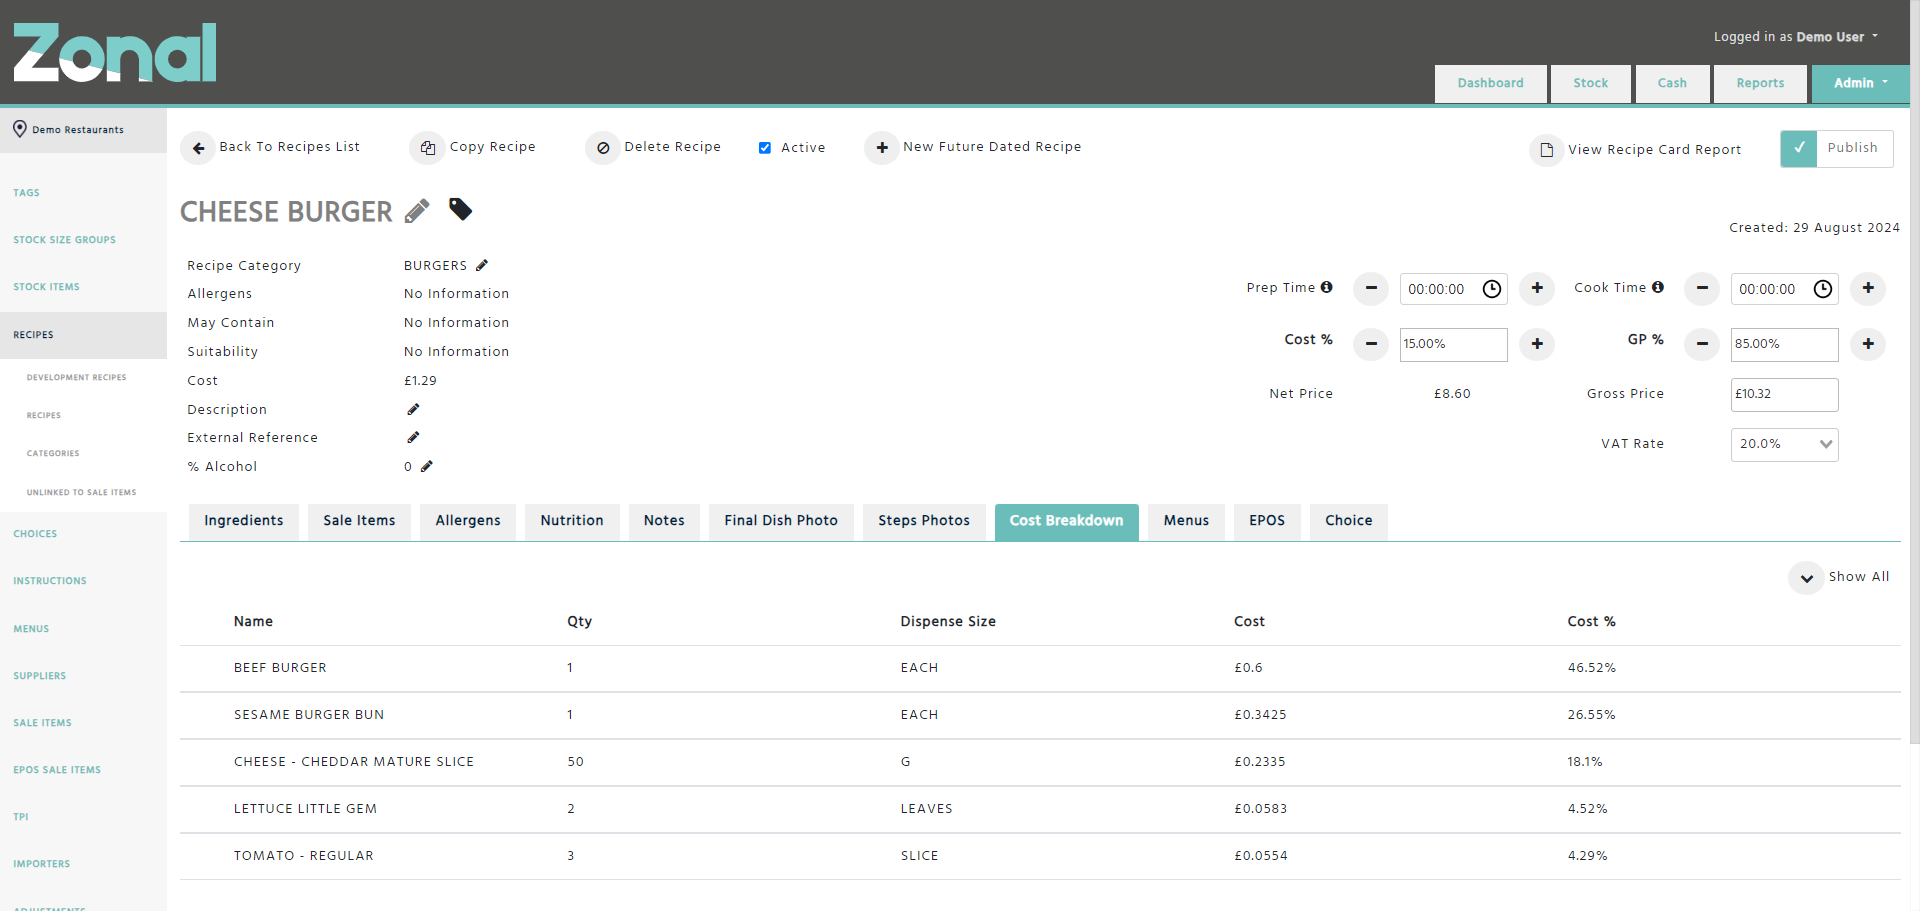
Cost Breakdown tab
If you would like to see a breakdown of the ingredients’ costs, select the Cost Breakdown tab.
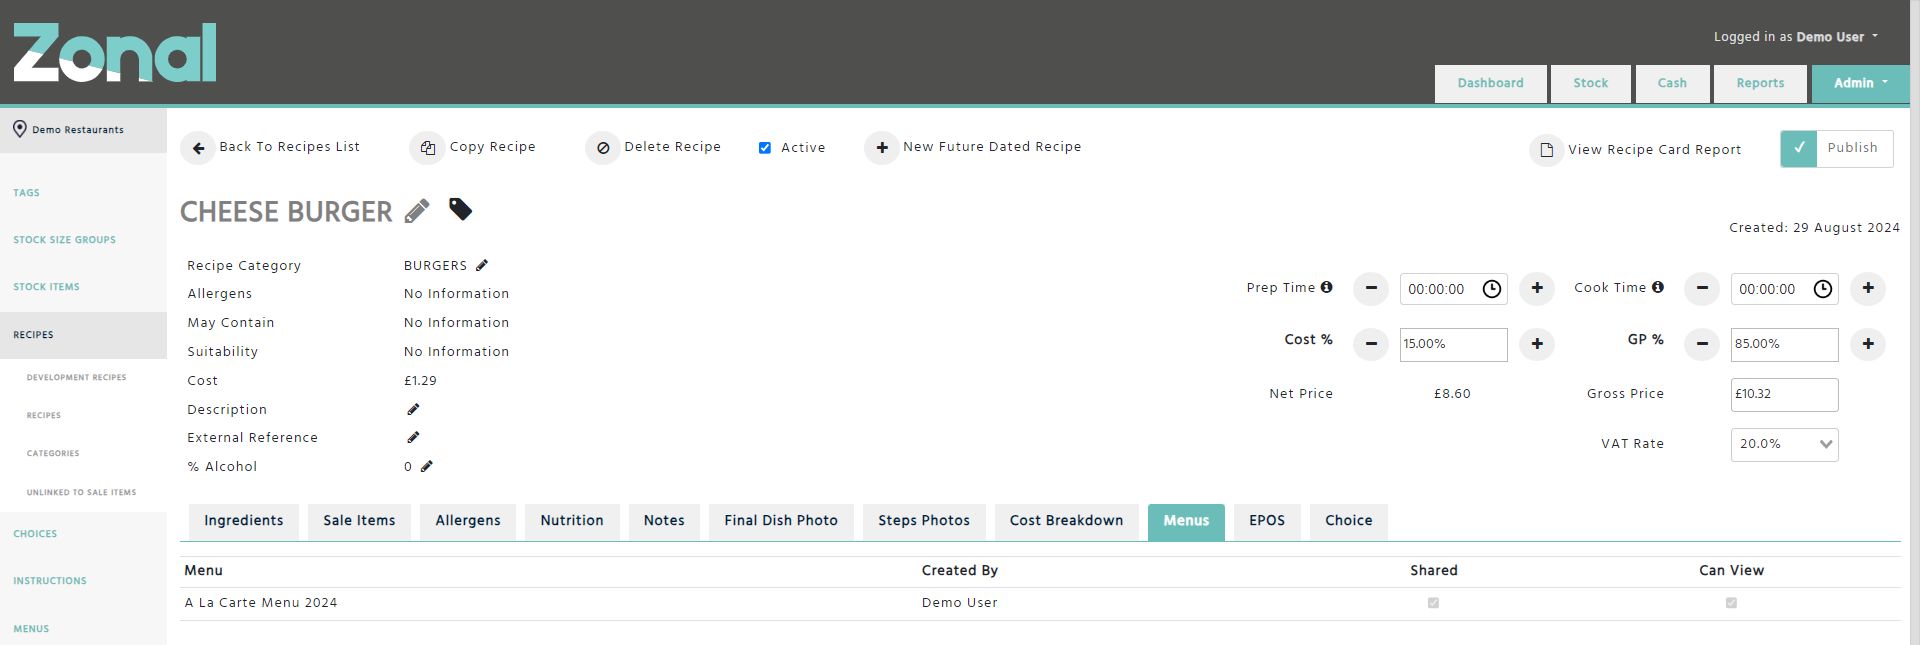
Menus tab
If you would like to see which Menus are using your Recipe, select the Menus tab.
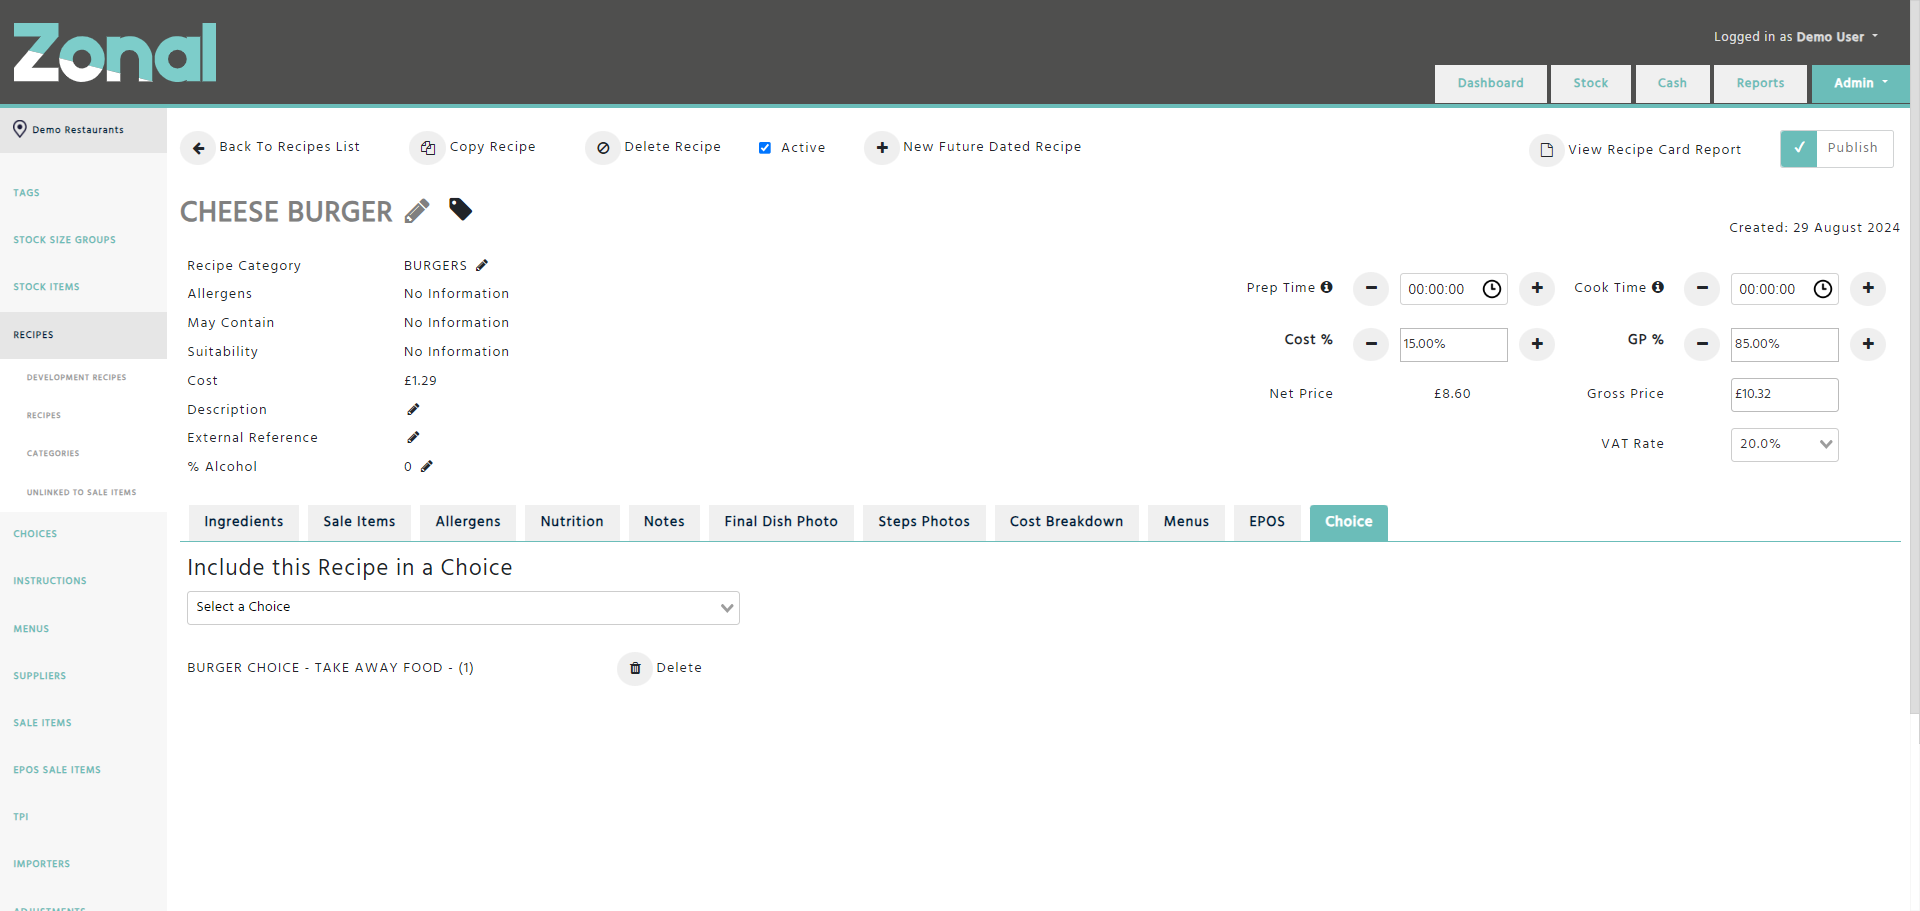
Choice tab
If you would like to see which Choices are using your Recipe as an option, or if you would like to add your Recipe as an option into a Choice, select the Choice tab.
The following tabs can be used to add more information about your Recipe which will be displayed in the Recipe Book reports.
Notes tab
If you would like to describe how to prepare your Recipe, click on the ‘Edit’ button under the Notes tab, enter the relevant information, then click on the ‘Save’ button to store your entry.
You will be able to format the text as you wish, and you will be able to create text areas such as Shelf Life or Service Tips.
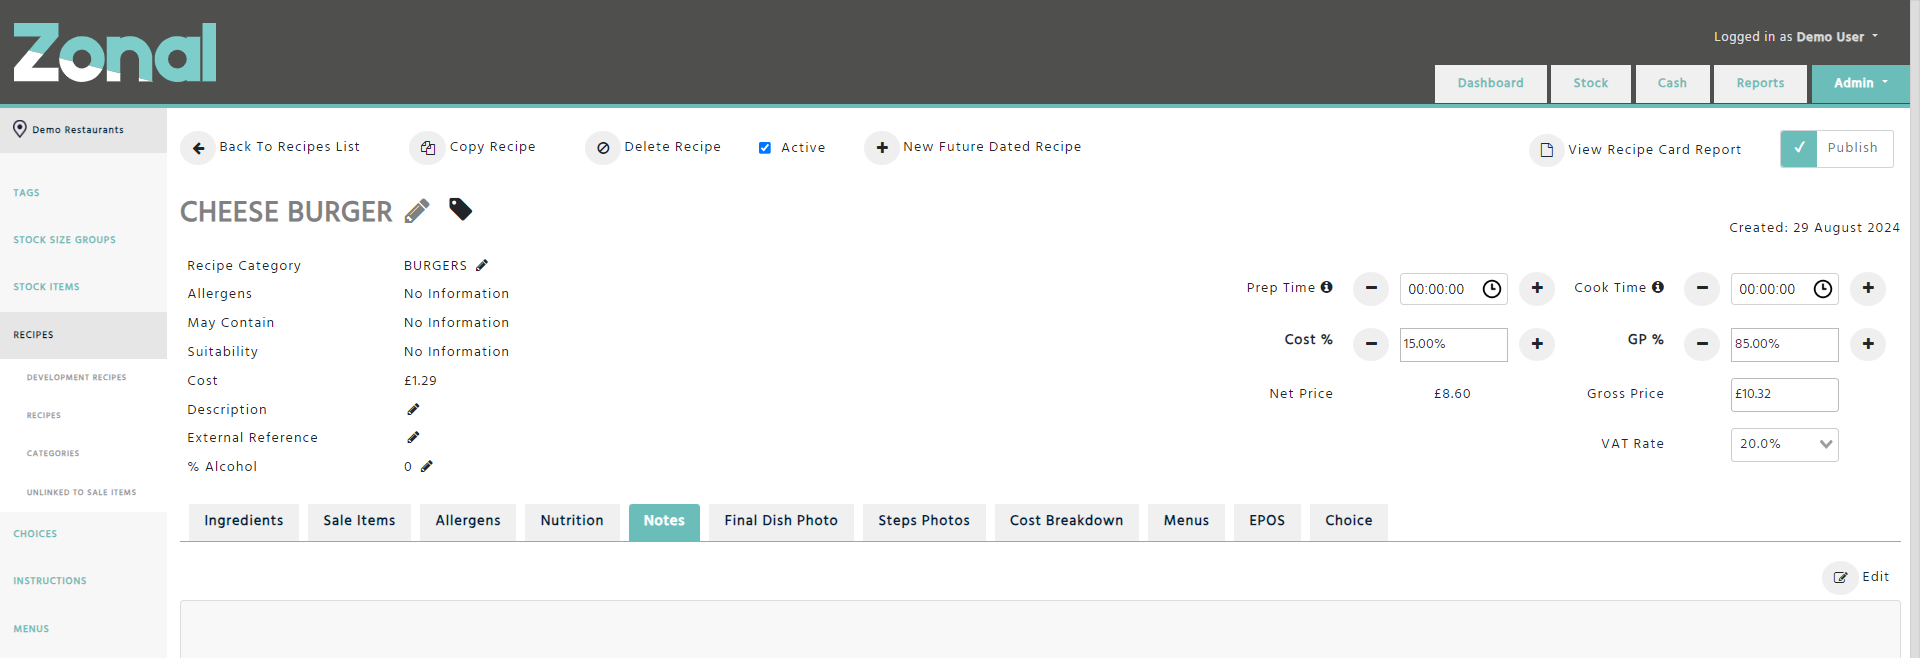
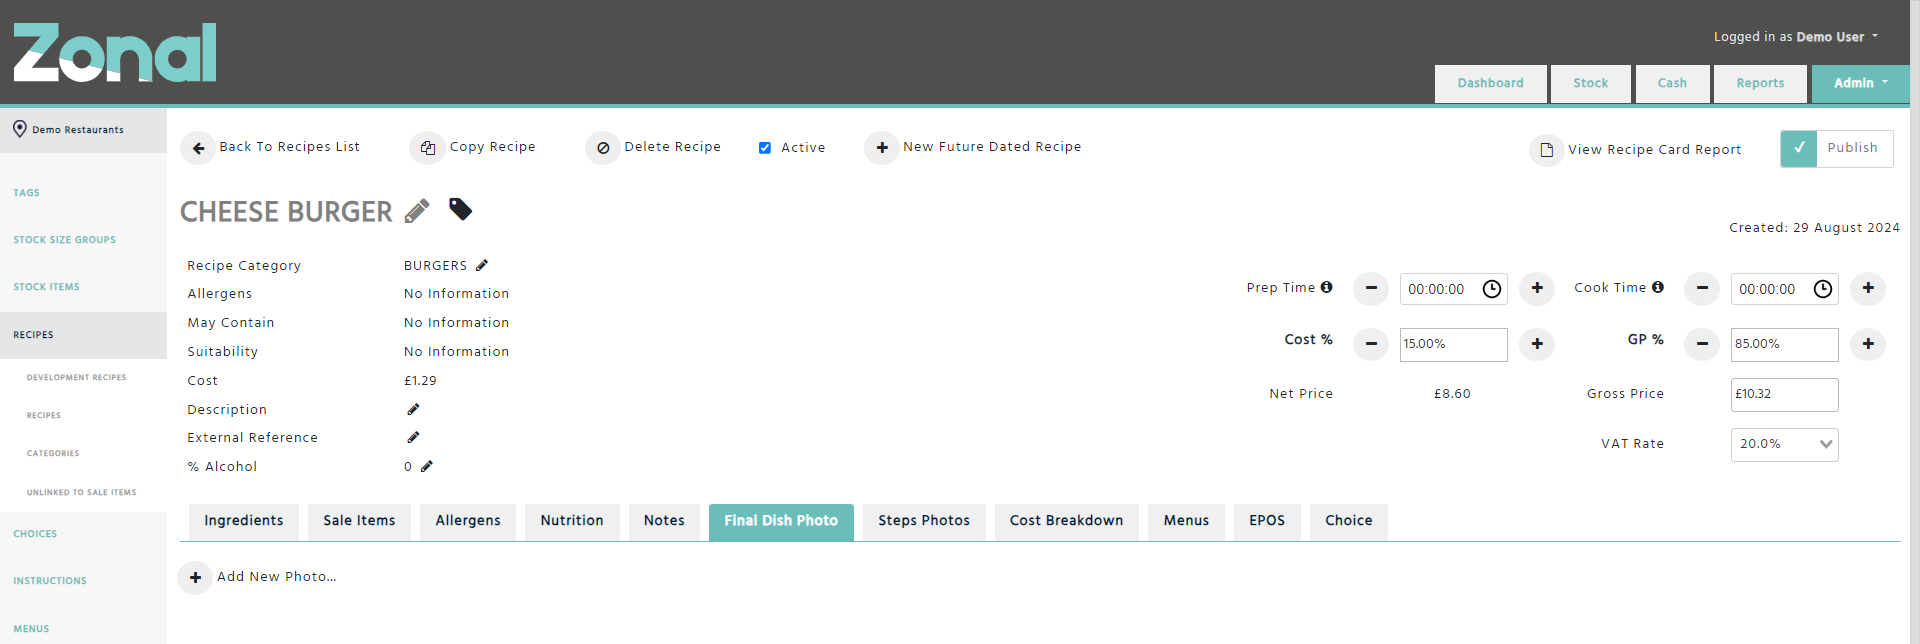
Final Dish Photo tab
If you would like to add a photo of your Recipe when it is ready made, you can upload a picture of it under the Final Dish Photo tab by clicking on the ‘Add new photo’ button.
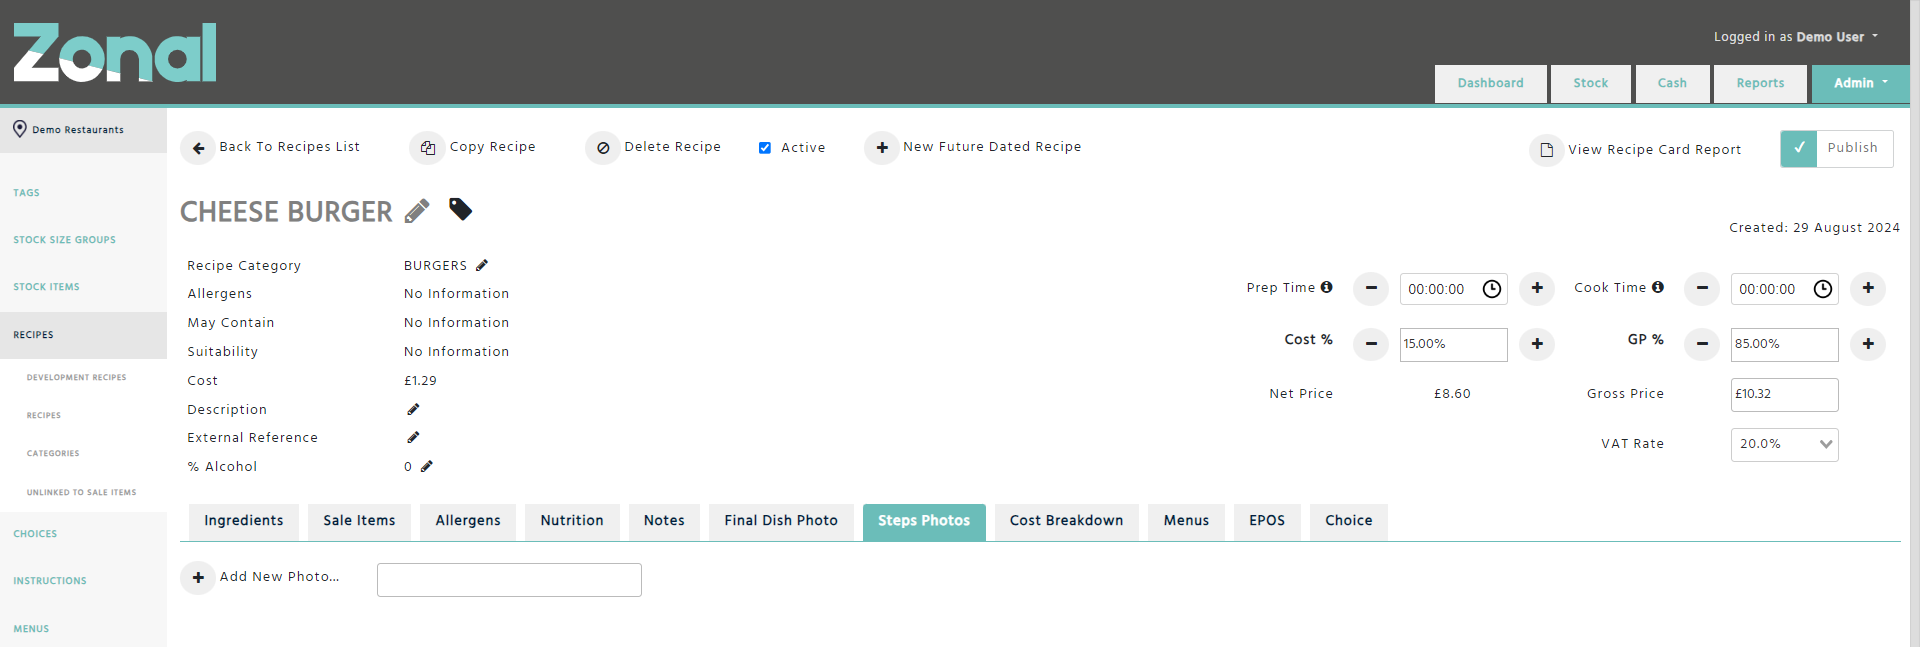
Steps Photos tab
If you would like to add some preparation photos for your Recipe, you can upload them under the Steps Photos tab by clicking on the ‘Add new photo’ button and you can also add a short description to them. Once you uploaded all the photos, you will be able to drag and drop them as required.
Recipe Tool calculator
With the help of the Recipe Tool calculator, you will be able to see the suggested Gross Price for your Recipe based on the total costs of its ingredients and the preconfigured Cost % and VAT Rate values.
Please note, when you create a new Recipe and change its ingredients, the Net Price and the Gross Price values will be recalculated by default, which is indicated by the Cost % and GP % fields’ names being displayed in bold. If you would like the Net Price and Gross Price fields to remain unchanged, enter a Gross Price value, then going forward the Cost % and GP % fields to be recalculated when you change the Recipe’s ingredients, which will be indicated by the Net Price and Gross Price fields’ names being displayed in bold.
You can also add the preparation time and the cooking time for your Recipe by entering the relevant times to the Prep Time and the Cook Time fields which you can find above the Recipe Tool calculator.
*Aztec clients: The Cook Time is going to be exported into Aztec and could be used for Kitchen Display Systems.
Copying Recipes
If you would like to copy a Recipe, click on the ‘Copy Recipe’ button, enter a name for the new Recipe, then click on the ‘Ok’ button.
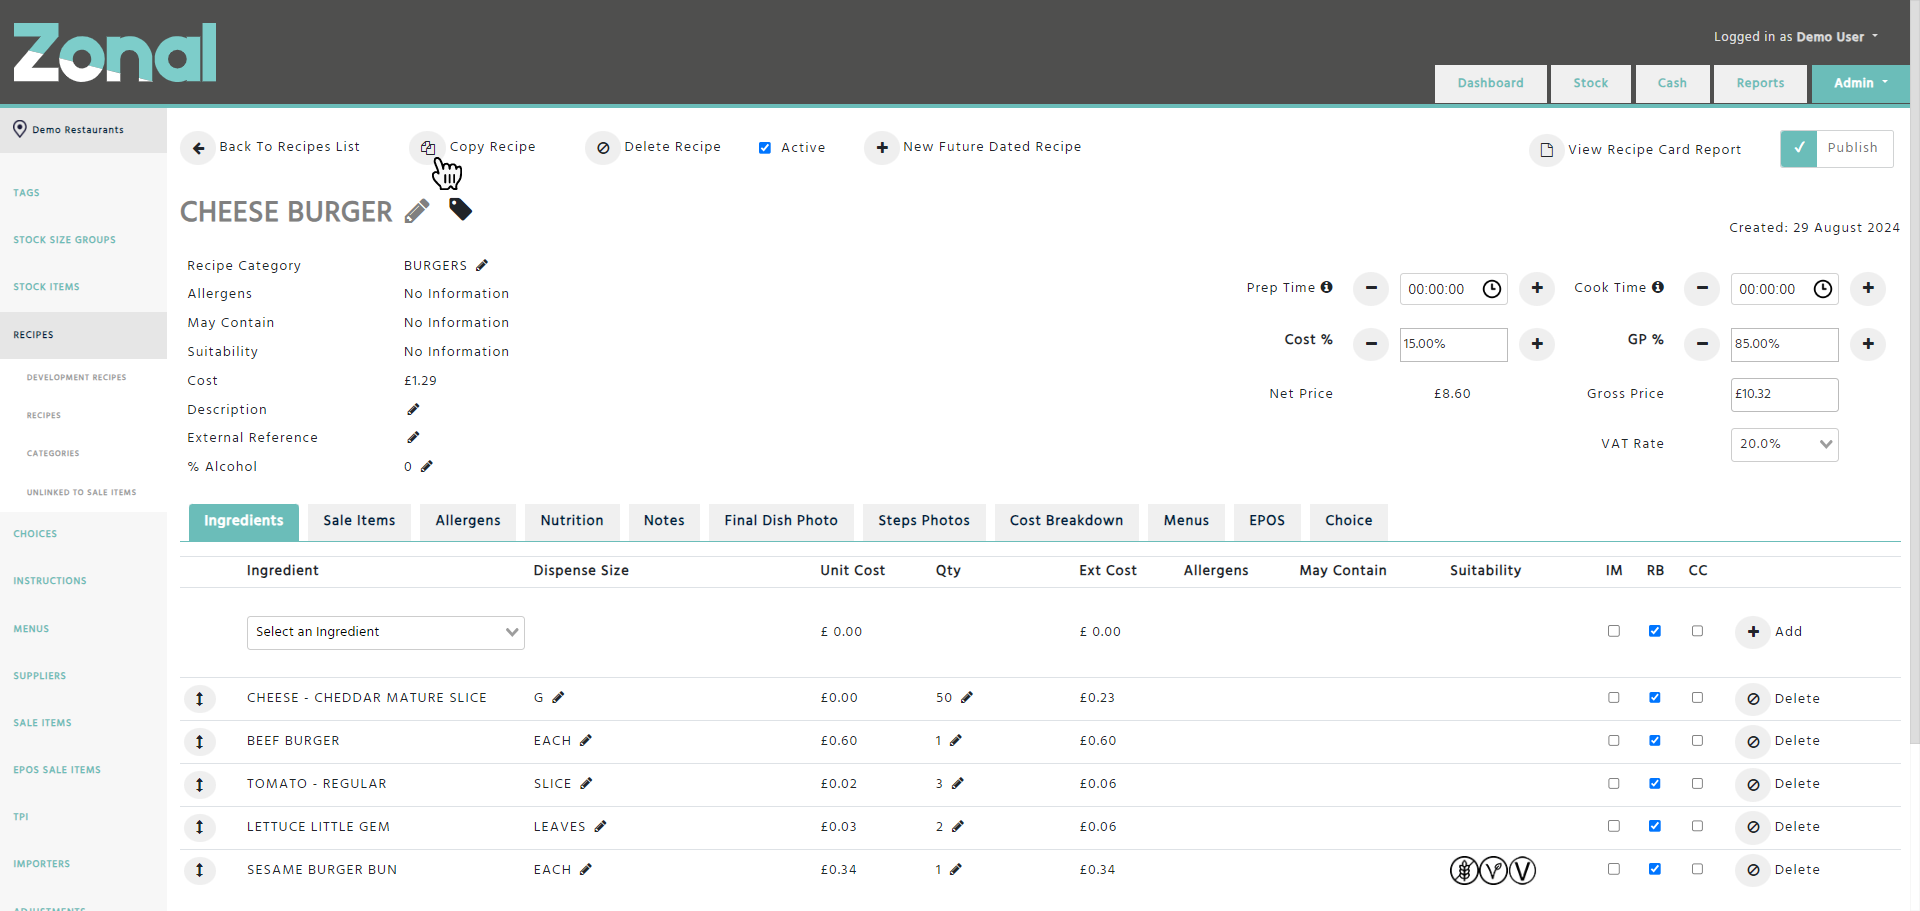
Important notes
-
If you copy a Recipe that has entries within its ‘Description’ and ‘External Reference’ fields, the values for those fields will not be copied for the new Recipe.
-
If you copy a Recipe that is set to published, the newly copied Recipe will not be created as published.
-
When you copy a Recipe that has preconfigured values within its Recipe Tool calculator, the newly copied Recipe will get its Cost % and VAT Rate fields populated according to the default values.
-
If you cannot see the 'Copy Recipe' button, you will need the user permission to be added to your user group. Please contact your stock administrator.
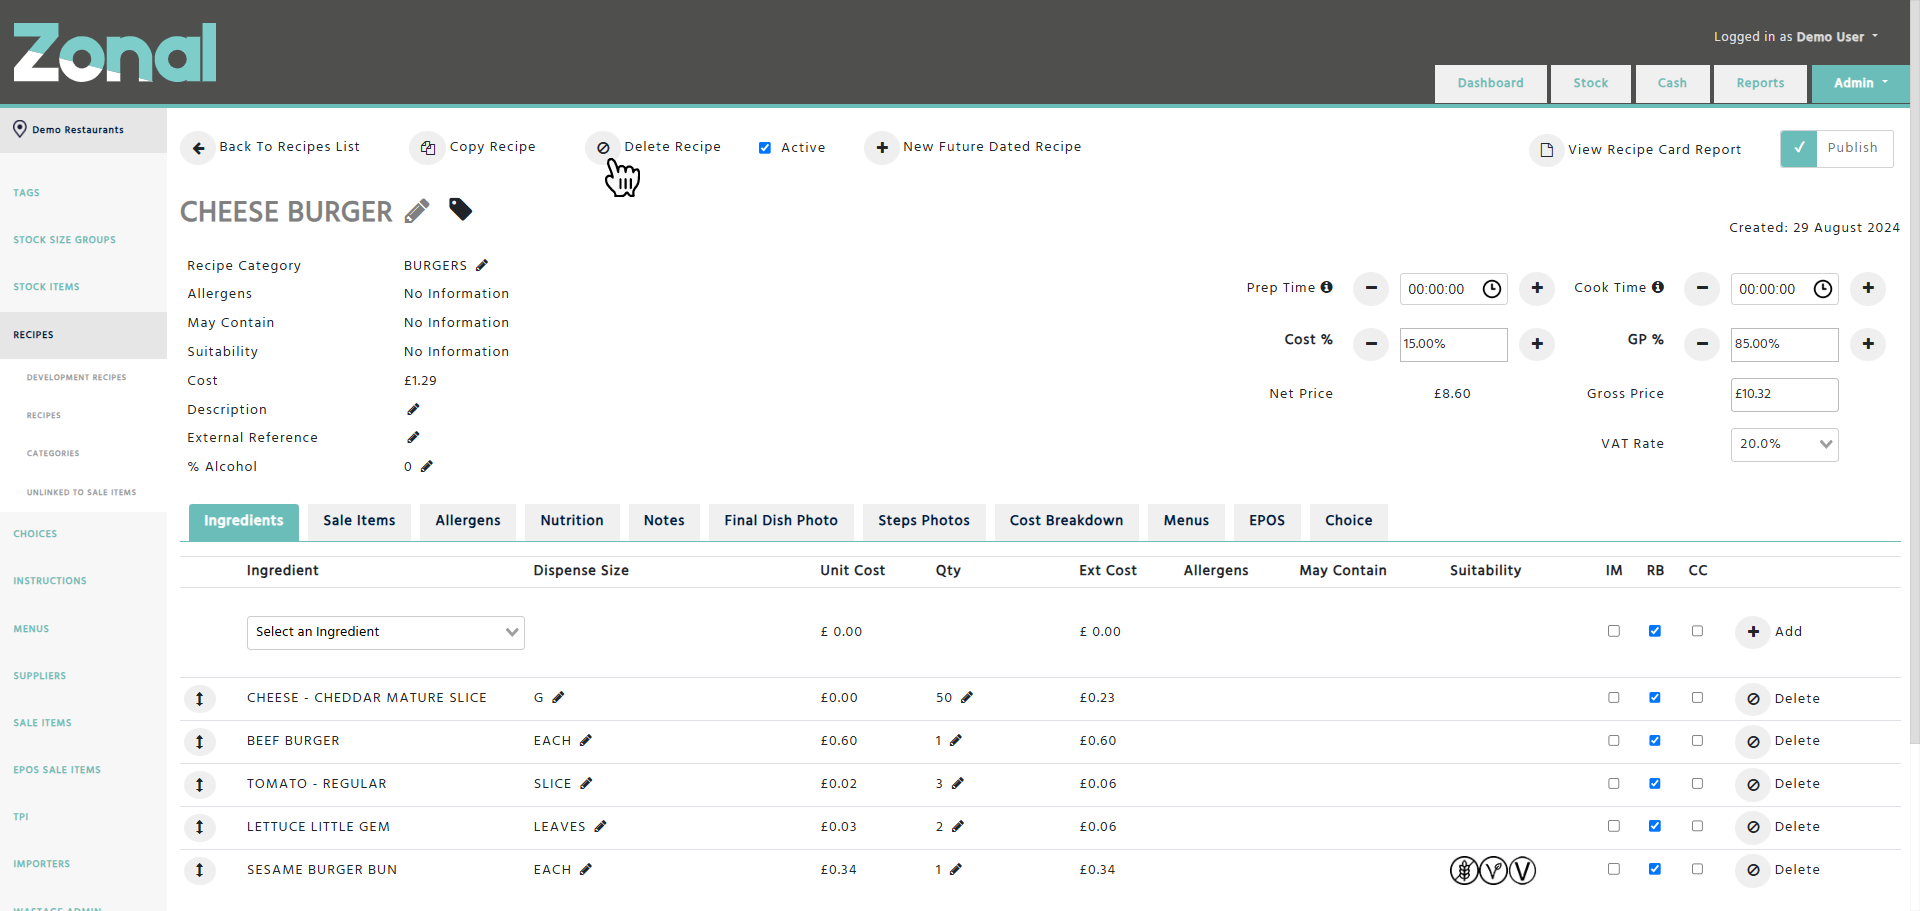
Deleting Recipes
If you would like to permanently delete a Recipe, you will be able to do this by clicking on the ‘Delete Recipe’ button, but only, if the Recipe has no Sale Items.
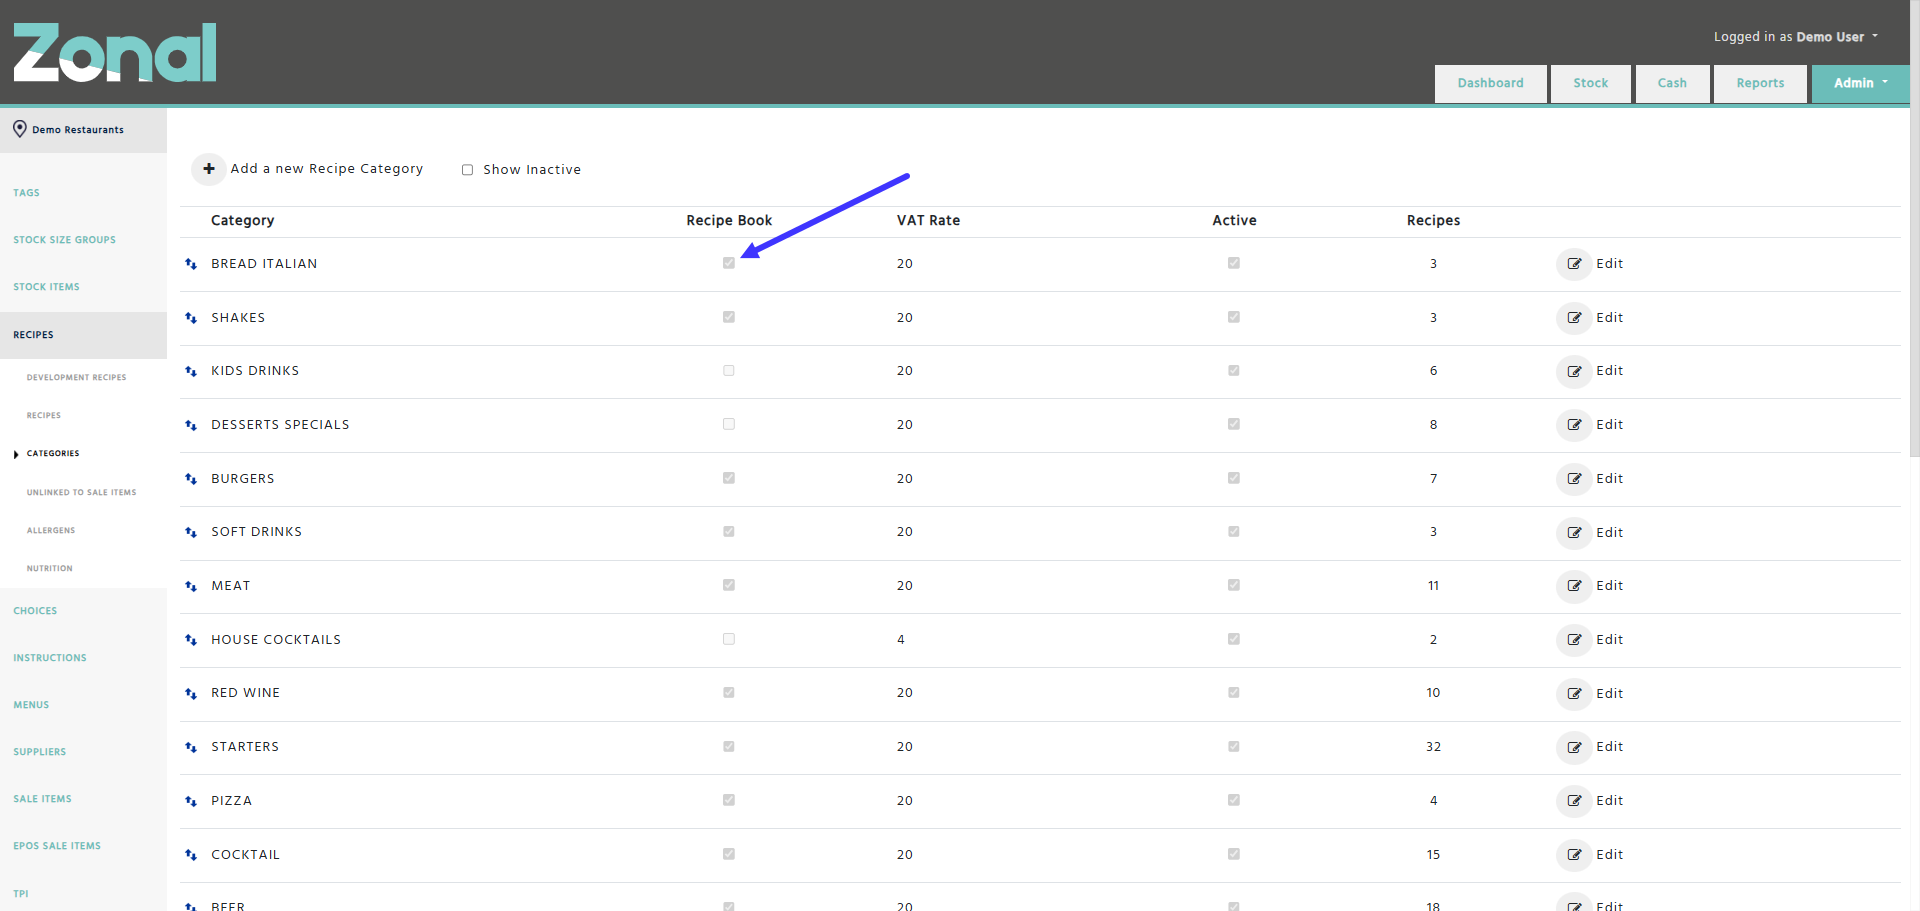
Recipe Categories page
If you would like the published Recipes to be displayed by the Recipe Book reports, you will have to ensure that the relevant Recipe Categories are configured for the Recipe Book reports’ purposes.
If you would like to configure a Recipe Category, go to the Recipes page, select the Categories page from the left-hand side menu, click on the ‘Edit’ button, then flag the relevant Recipe Category under the Recipe Book column.
*Aztec clients: the Recipe Categories correspond to Aztec’s Subcategories so if you would like to make any changes regarding the names of the categories, you will have to do that in Aztec, then import the changes to Enterprise.
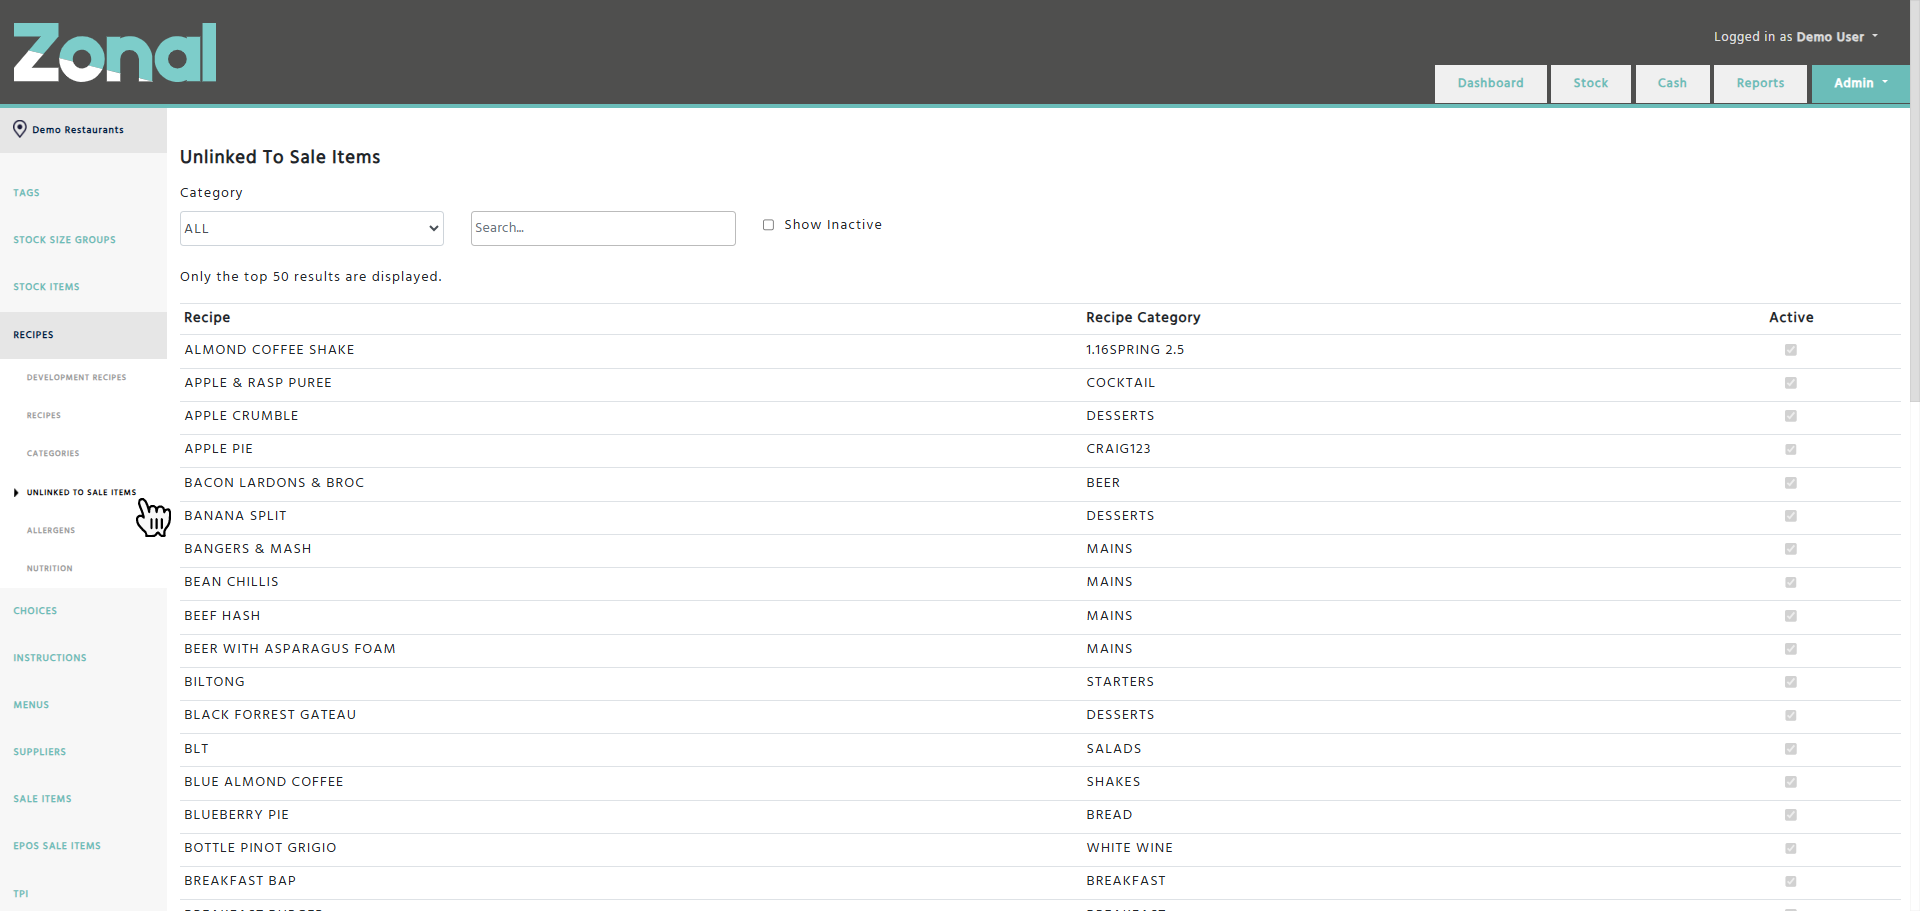
Unlinked to Sale Items page
If you would like to see which Recipes are not linked to Sale Items, go to the Recipes page, then select the Unlinked to Sale Items page from the left-hand side menu.
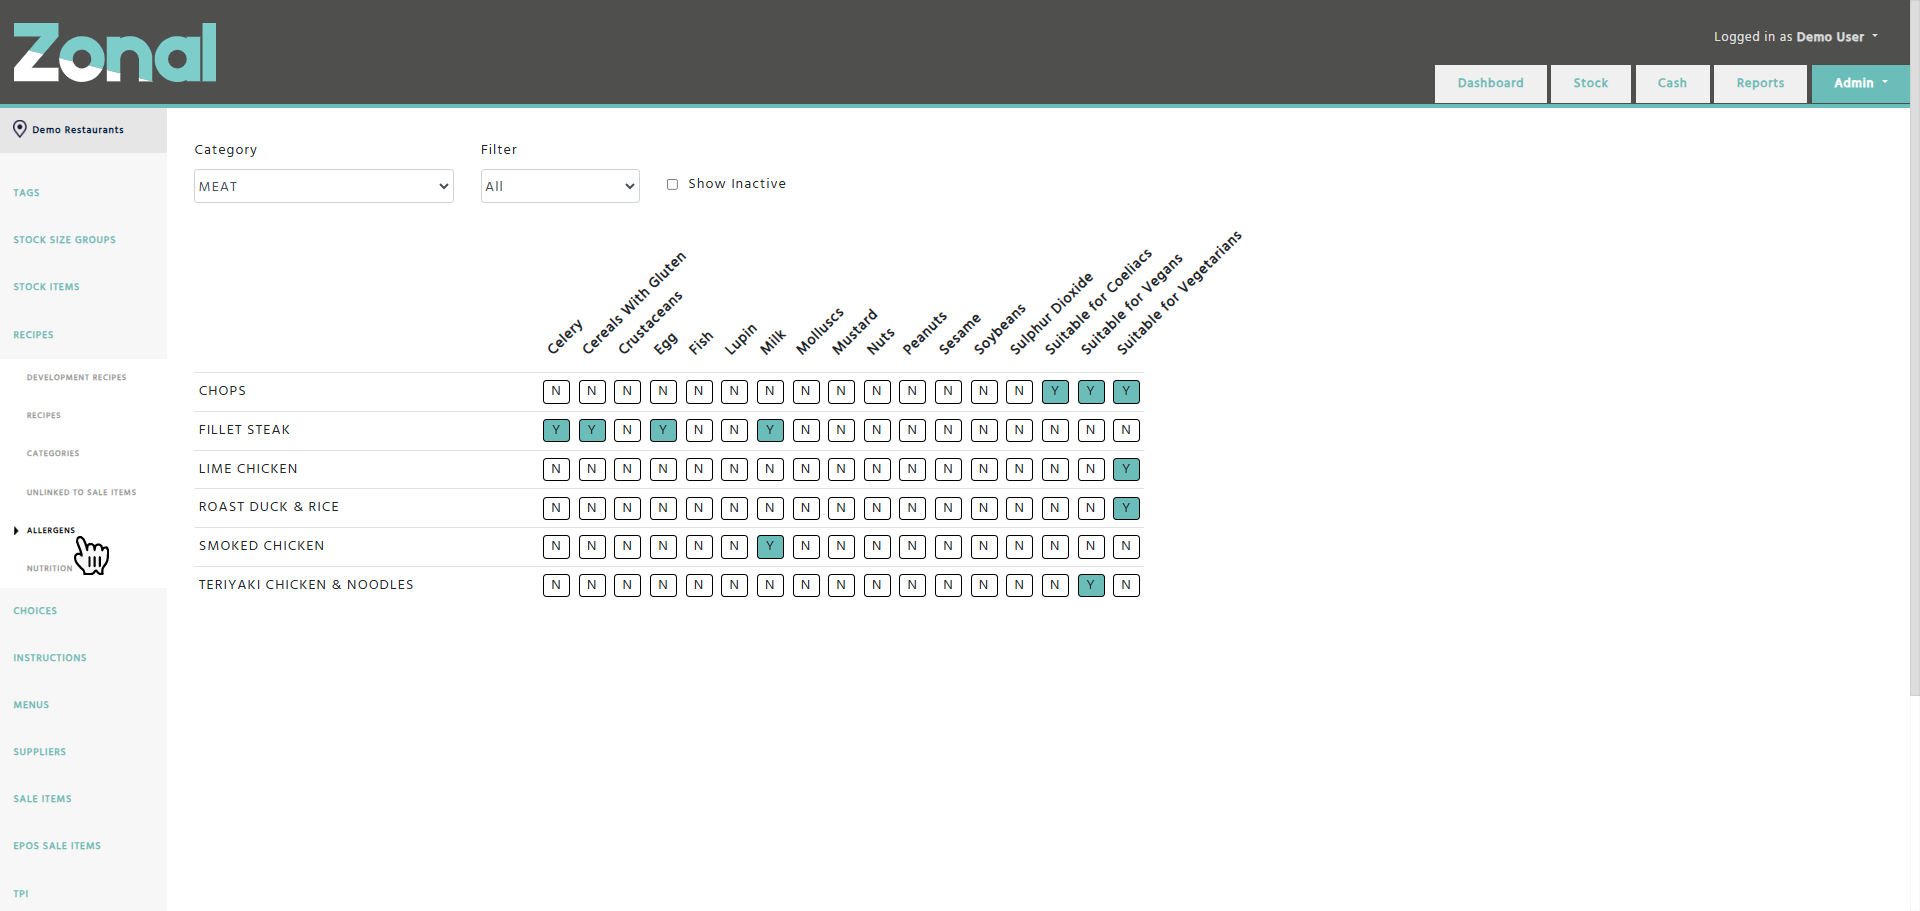
Allergens list page
If you would like to see the allergen information for each Recipe within a Recipe Category, go to the Recipes page, then select the Allergens page from the left hand-side menu.
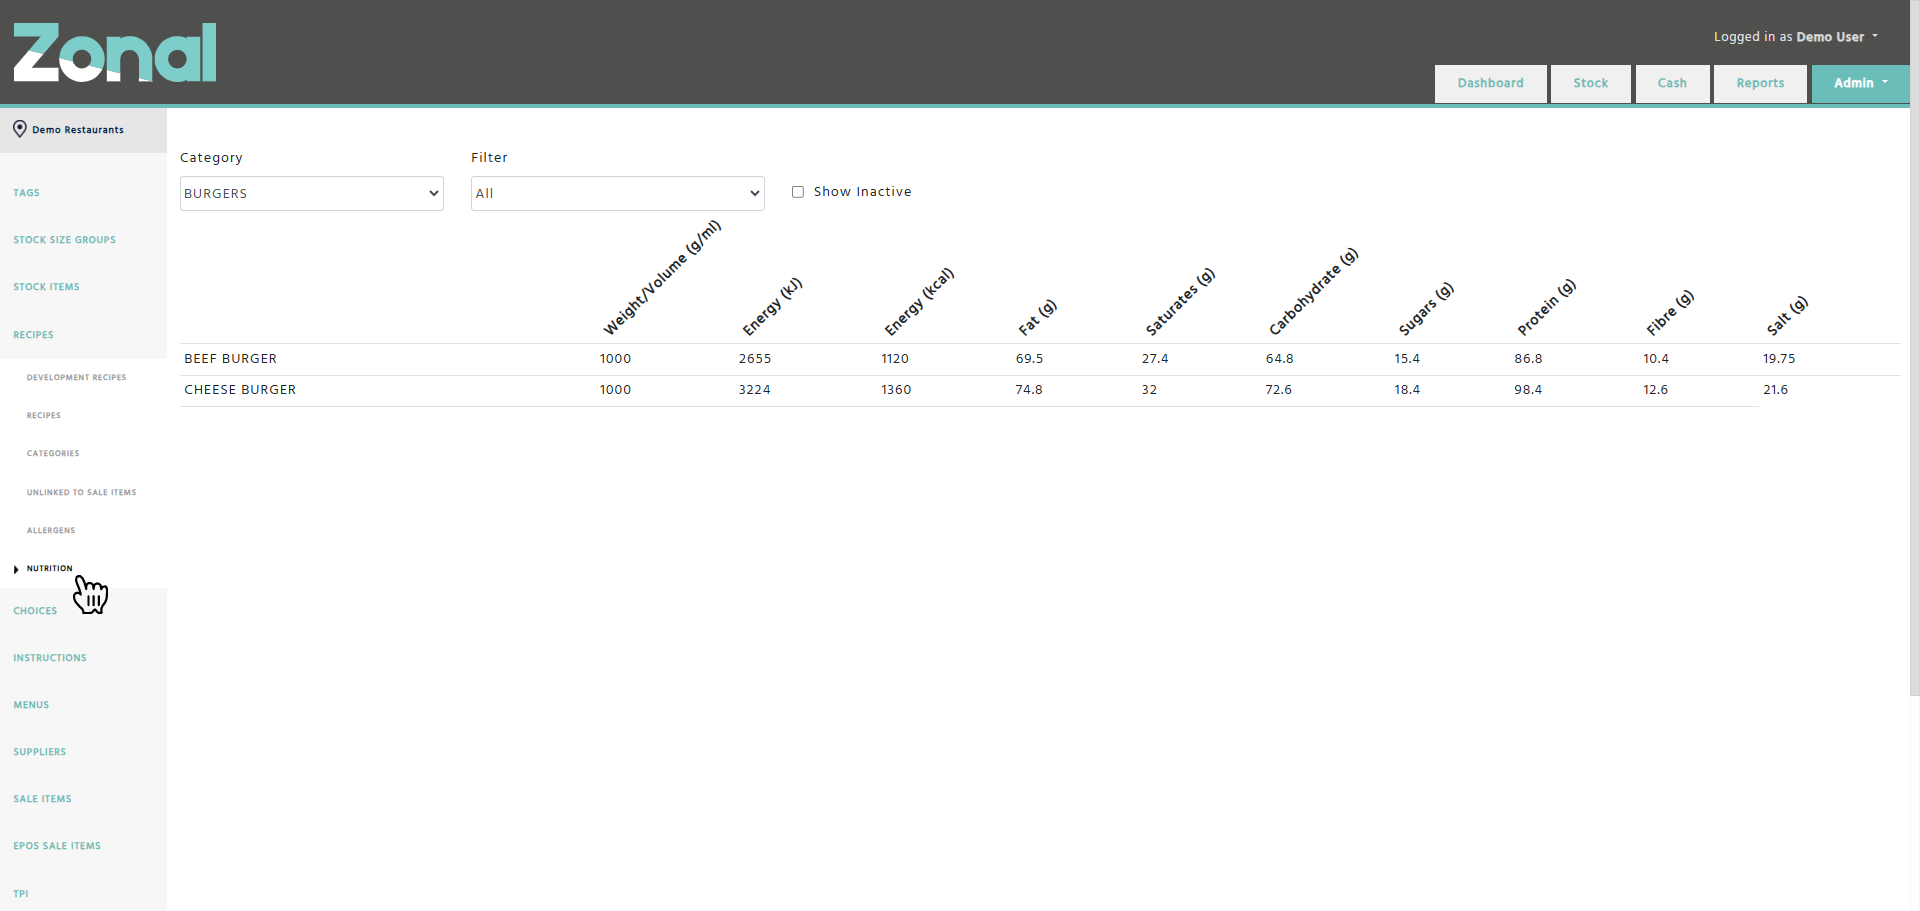
Nutrition list page
If you would like to see the nutrition information for each Recipe within a Recipe Category, go to the Recipes page, then select the Nutrition page from the left hand-side menu.
Aztec integration notes
-
When the Recipes are imported from Aztec and they have identical names, their entity codes will be populated at the end of their names followed by three dashes.
-
When a Recipe comes from a Standard Line, you will not be able to delete its main ingredient which is that Stock Item that was automatically created as part of the Standard Line during the initial Aztec import.
-
Following the initial Aztec import, the Recipes with multiple portions will be broken down into multiple Recipes.
The name of the alternative portion Recipes will be the combination of the standard portion Recipe’s name followed by three dashes, then the portion name.