Adding Pass Creator Templates to Loyalty
Introduction
This guide will walk you through the process of adding templates from Pass Creator into Loyalty. You will also learn how to send these passes via email to your guests with an "Add to Wallet" button so that they can easily add the passes to their Apple or Google Wallet.
Prerequisites
-
Loyalty Access
-
Pass Creator Access
-
Previously created Pass Template
Step-by-Step Instructions
Link Pass Template to Loyalty
Once your pass template is created, follow these steps to link it to your Loyalty program:
-
Log in to Loyalty Platform
-
Navigate to the ‘Companies’ tab

-
Select the specific company of choice for estates with multiple companies
-
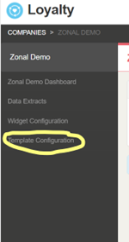
On the left-hand side, click ‘Template Configuration’
-
At the top-right of the page, click 'Edit'
-
Select the template you wish to use from the drop-down
-
Click 'Save' to apply changes
Insert 'Add to Wallet' Button in Emails
After linking the template, the next step is to include the add to wallet button in emails so that guests will be able to receive their passes.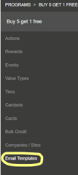
-
Navigate to the ‘Programs’ tab in the upper right corner of the page
-
Choose the correct program
-
Navigate to the ‘Email Templates’ module on the lower left of the page
-
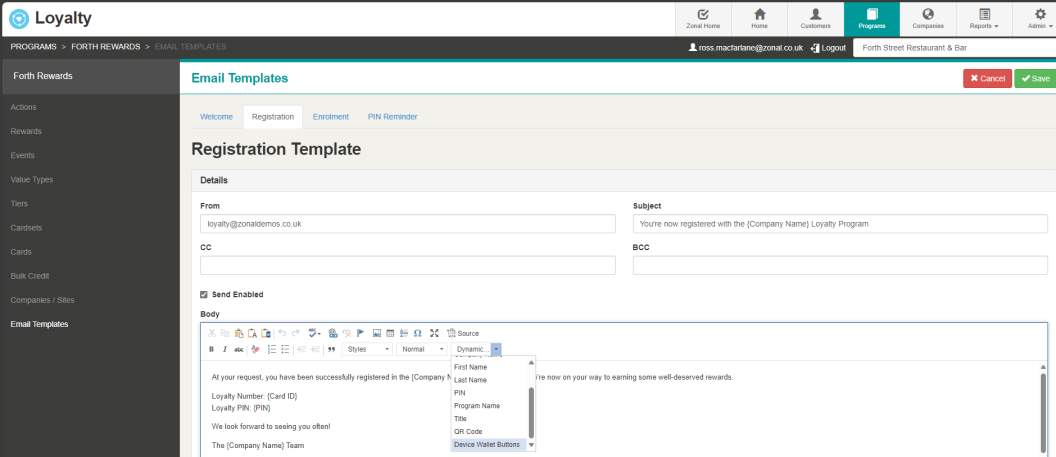
Select the email template you wish to edit and hit 'Edit'
-
Edit the email as desired and choose 'Device Wallet Buttons' from the dynamic marker drop-down menu
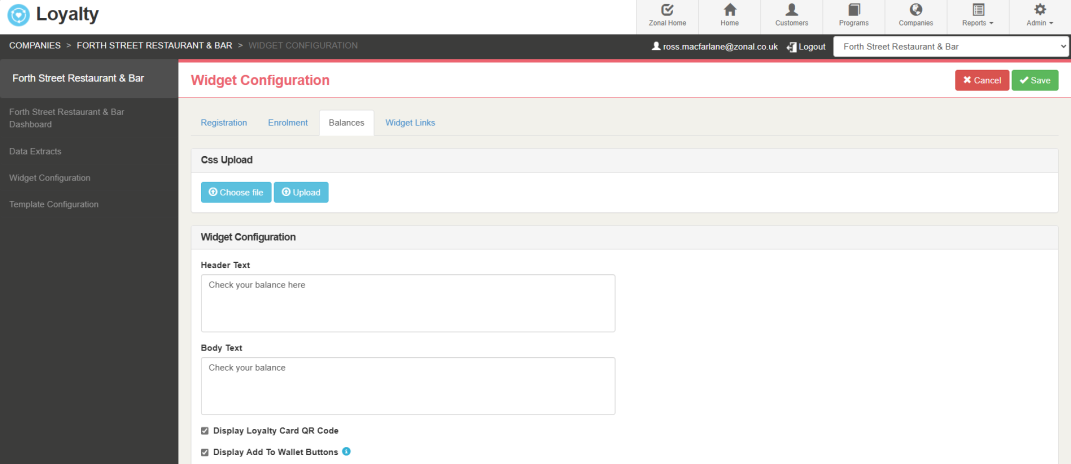
Insert 'Add to Wallet' Button in Balance Widget
After linking the template, the next step is to include the add to wallet button in the Balance Widget so that guests will be able to receive their passes.
-
Navigate to the ‘Companies’ tab in the upper right corner of the page
-
Choose the correct company
-
Navigate to the ‘Widget Configuration’ module from the left-hand navigation menu
-
Select the Balances tab and hit 'Edit'
-
Ensure the 'Display Add to Wallet Buttons' checkbox is ticked