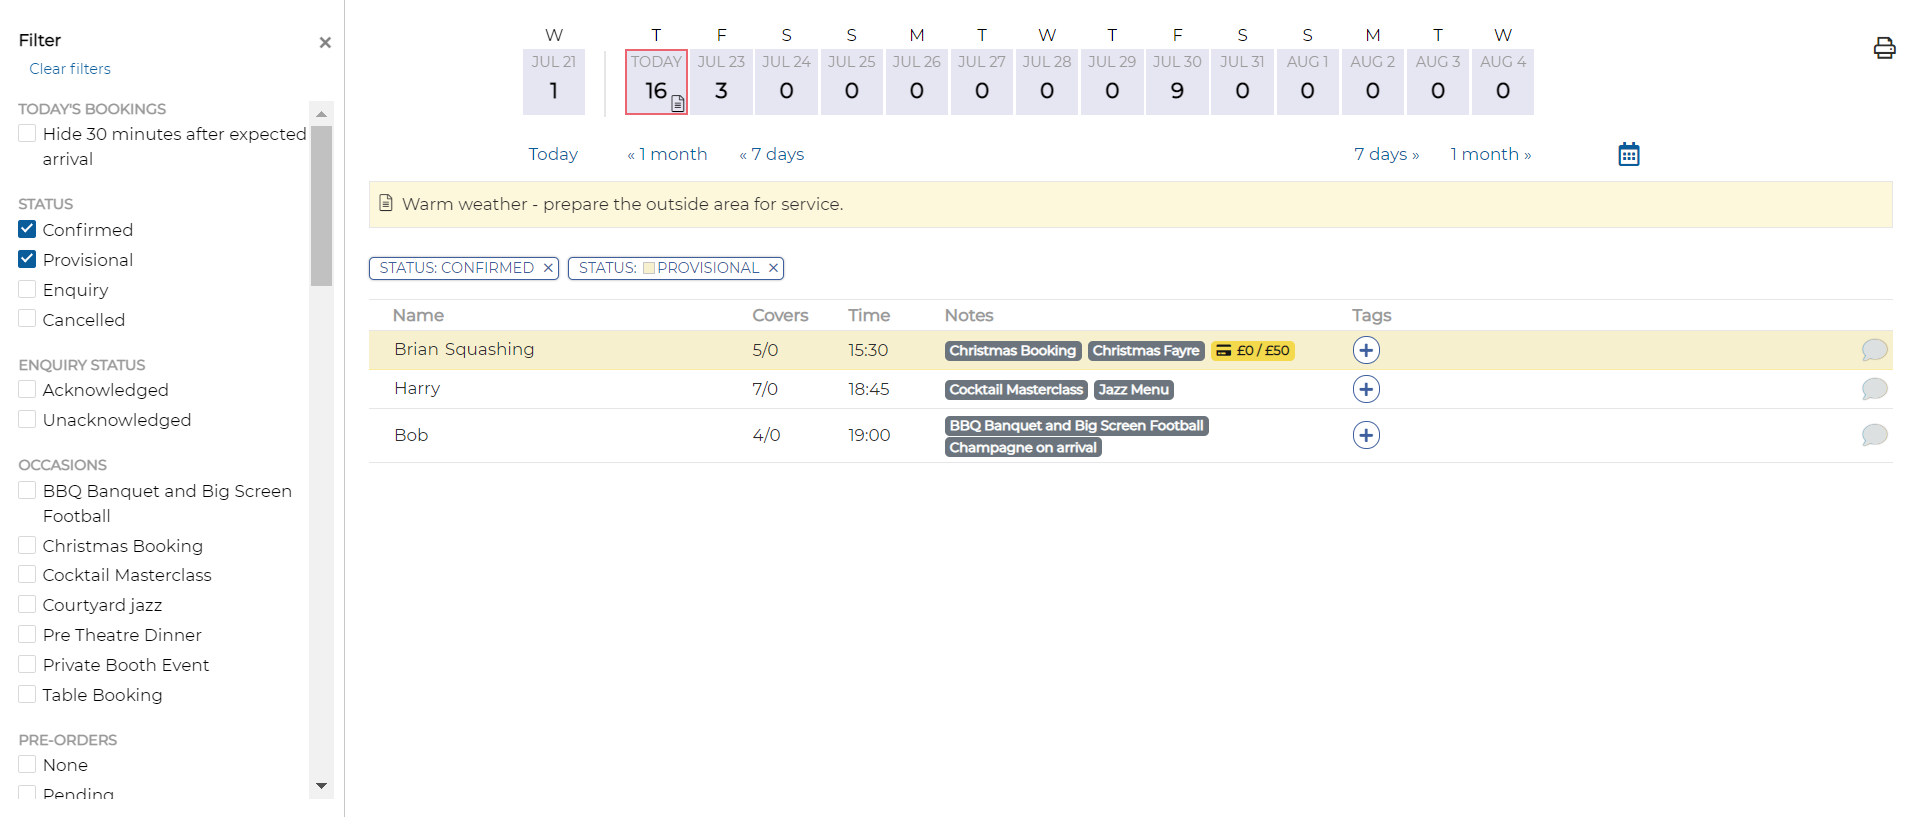
The Bookings screen allows you to view the number of up-coming bookings for the next two weeks and a summary of all the bookings for the selected day.
The two-week ribbon view displays the day, date and number of bookings in a quick, easy-to-read format in the same style as Tables.
Change the week to view by selecting the <7 days or the 7 days> buttons to scroll forward or backward by one week.
Change the month by selecting the <1 month or the 1 month> buttons to scroll forward or backward by one month.
The two dates either side of the two week period allow you to jump forward to the next available booking or jump back to the last available booking.
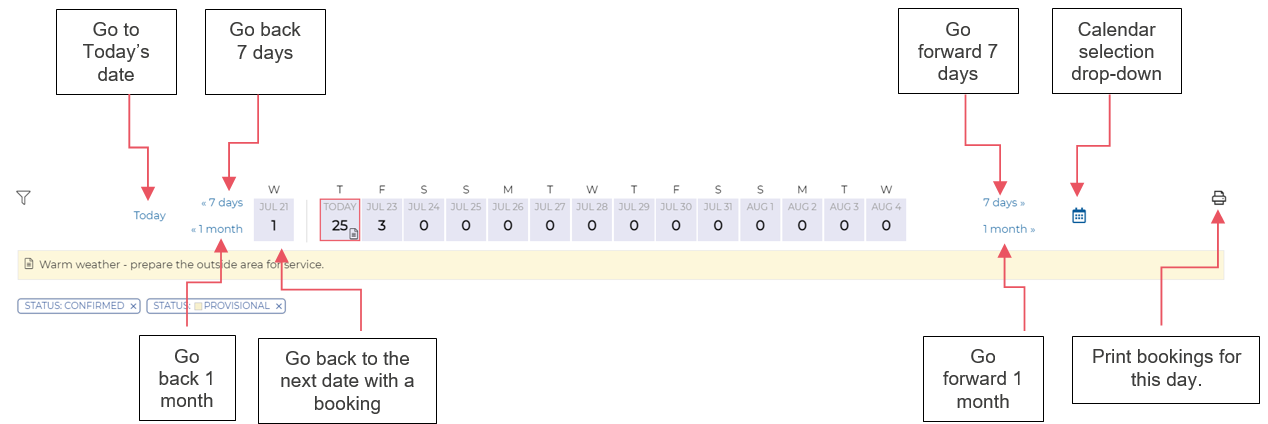
Alternatively, you can select the calendar button and choose a date from the drop-down calendar.
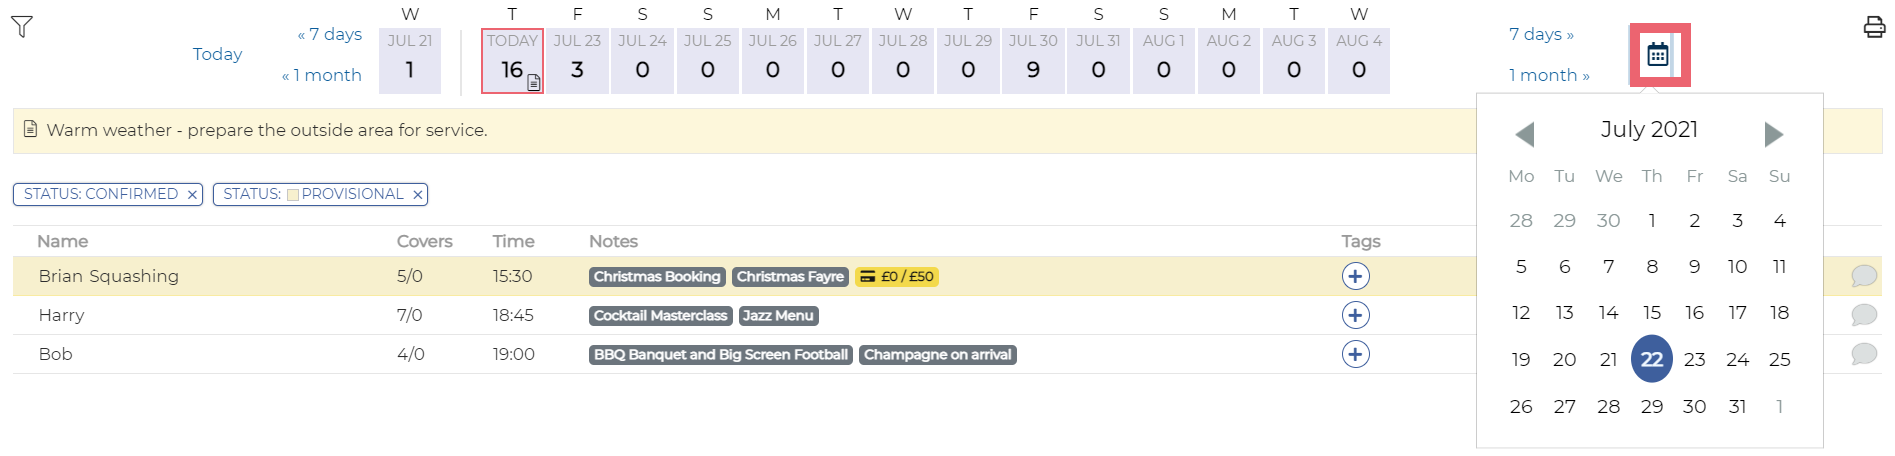
When you select a date from the ribbon, a summary of the bookings for the day selected is displayed underneath.
On smaller screens the position of the Calendar Ribbon actions may be below the ribbon rather than to each side.
Adding Day Notes
Beside the Print icon at the top right of the Bookings page is a notes icon.
This allows the host to create notes per day that then display just below the calendar ribbon when viewing that day.
First navigate to the day you wish to add the note. Clicking on the icon brings up a text box:
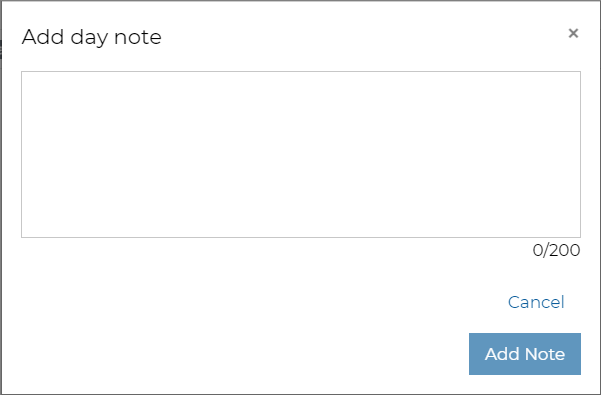
Enter the note that you wish to add and click on ‘Add Note’
When viewing a day with a note, it displays on the Bookings page as follows.

To edit the note, clicking on the note itself will bring up the text box again to make any adjustment.
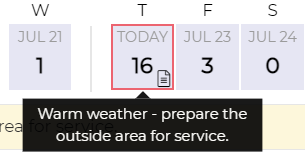
Days with day notes are shown with an icon on the calendar ribbon and when hovered over, the note can be viewed in more detail:
Any note for today will also show at the top of Today's Bookings on the dashboard.

Messaging to Host
There may be occasion where a message needs to be sent out across to all sites. When this is configured at an administration level, there may be an additional message shown above the calendar ribbon in the Bookings page and also at the top of the Enquiries page. It is not possible to collapse this message and it will only disappear when removed by the administrator.

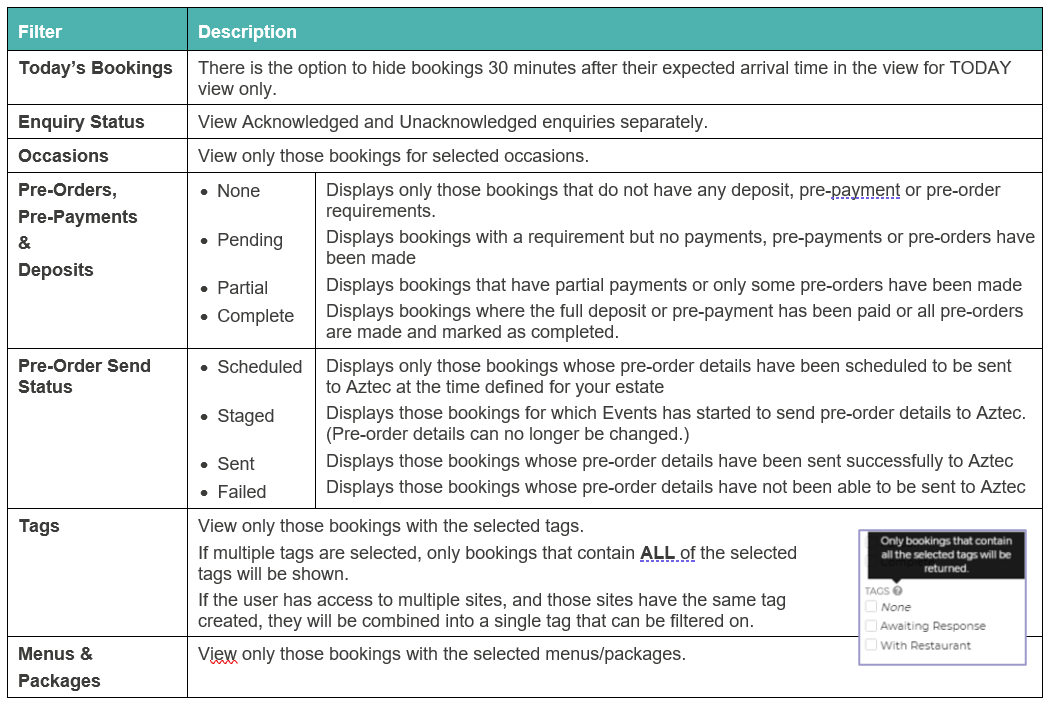
The following filters are available:
| Filter | Description |
|---|---|
| Today's Bookings | There is the option to hide bookings 30 minutes after their expected arrival time in the view for Today view only |
| Enquiry Status | View Acknowledged and Unacknowledged enquiries separately |
| Occasions | View only those bookings for selected occasions |
|
Pre-Orders Pre-Payments Deposits
|
|
| Pre-Order Send Status |
|
| Tags |
View those bookings with only the selected tags If multiple tags are selected, only bookings that contain ALL of the selected tags will be displayed If the user has access to multiple sites, and those sites have the same tag created, they will combine into a single tag that can be filtered on |
| Menus & Packages | View only those bookings with selected menus / packages |
As you select a filter, a label is added beneath the date ribbon as shown and the list of bookings is refreshed accordingly. These filters are persistent, so if you close the filter section or move away to another screen, when you return to the booking page the chosen filters are still selected. For example: 
You can remove a status filter either within the Filter sidebar itself, or by clicking the X on the labels under the date ribbon. When you select ‘Clear Filters’ this will return the statuses filtered to the default of Confirmed and Provisional.
Printing a Daily Booking Summary
Print the daily booking summary by choosing the required day on the ribbon and selecting the Print icon.
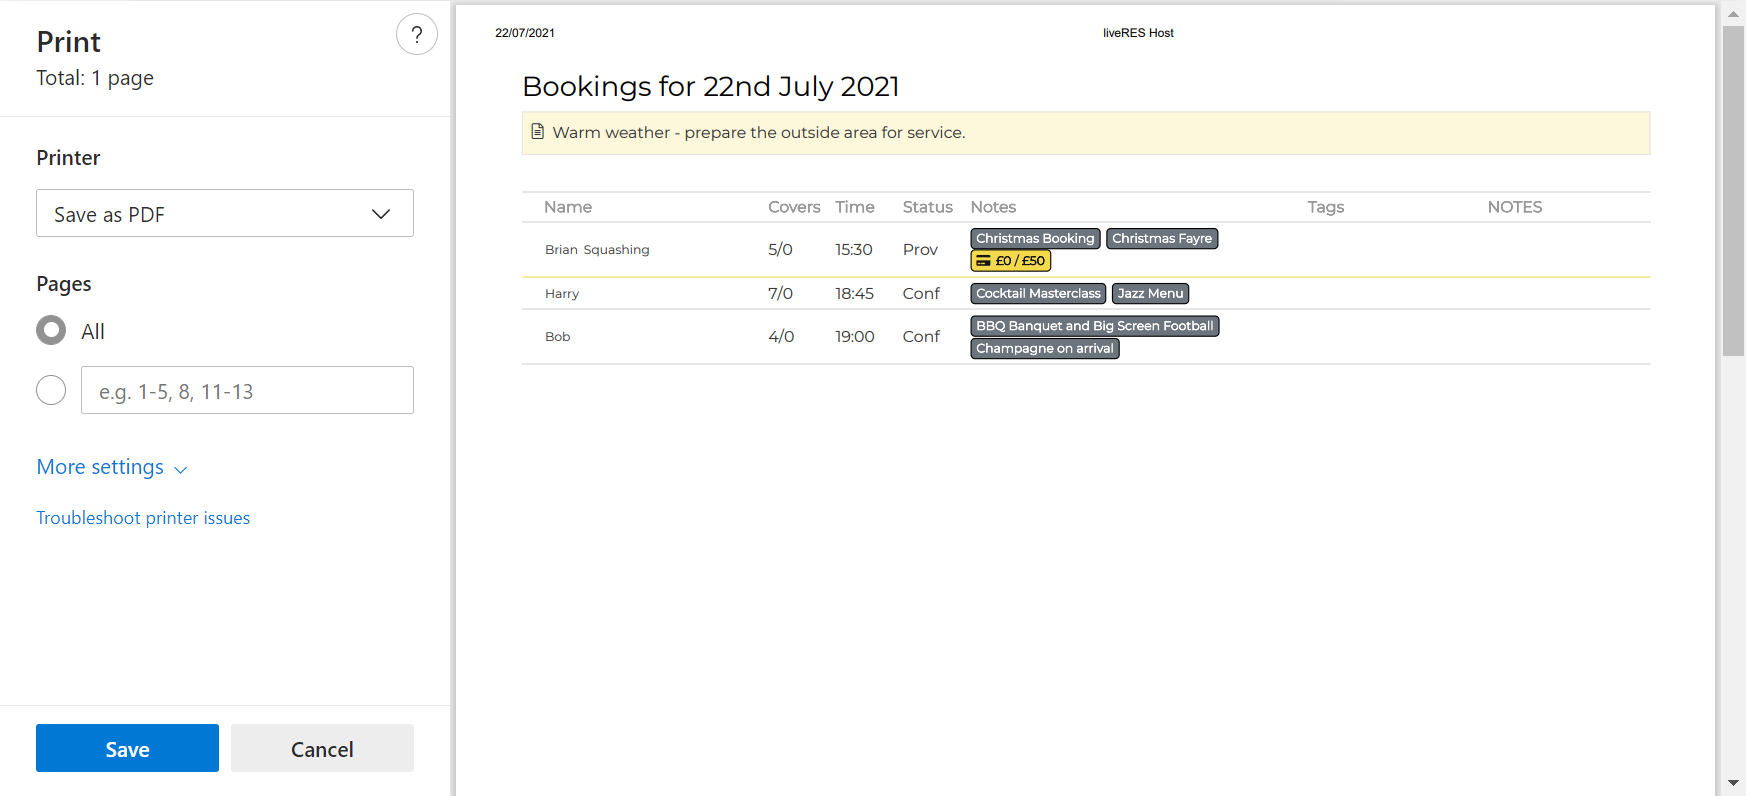
Day notes (if defined for the current day) will be included in the printed bookings list for that day.
Creating a New Booking
To create a new booking:
-
Select the New Booking button in the top right corner
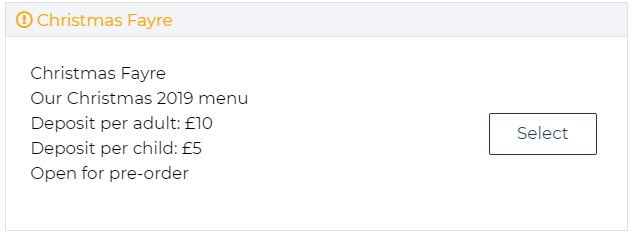
The available occasions are displayed:

-
Select the required occasion from the available list
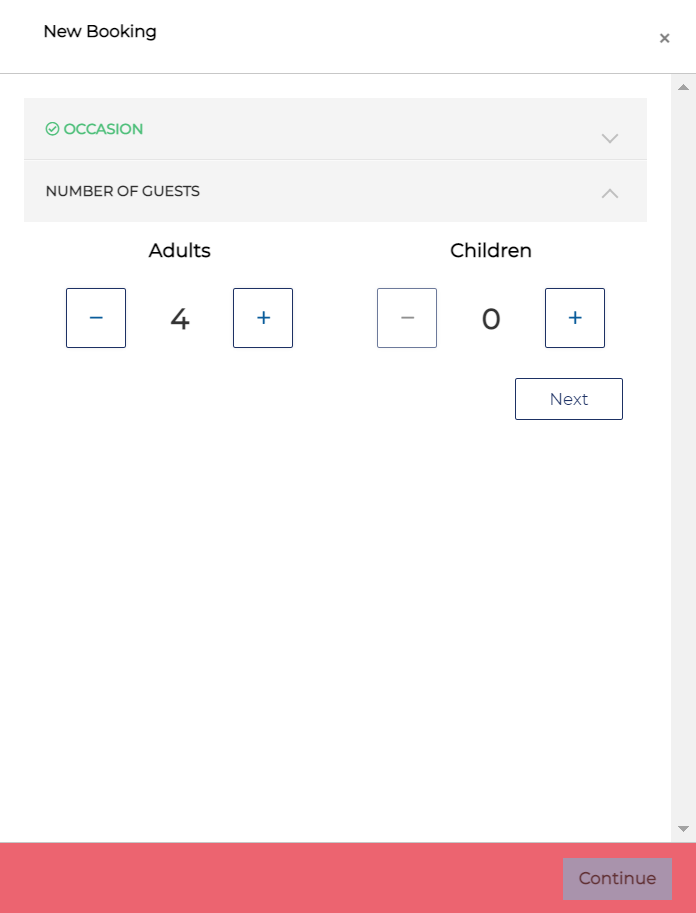
The Number of Guests screen is displayed:

-
Using the + and – buttons, define the number of adults and children for the booking and select Next
The Date screen is displayed:
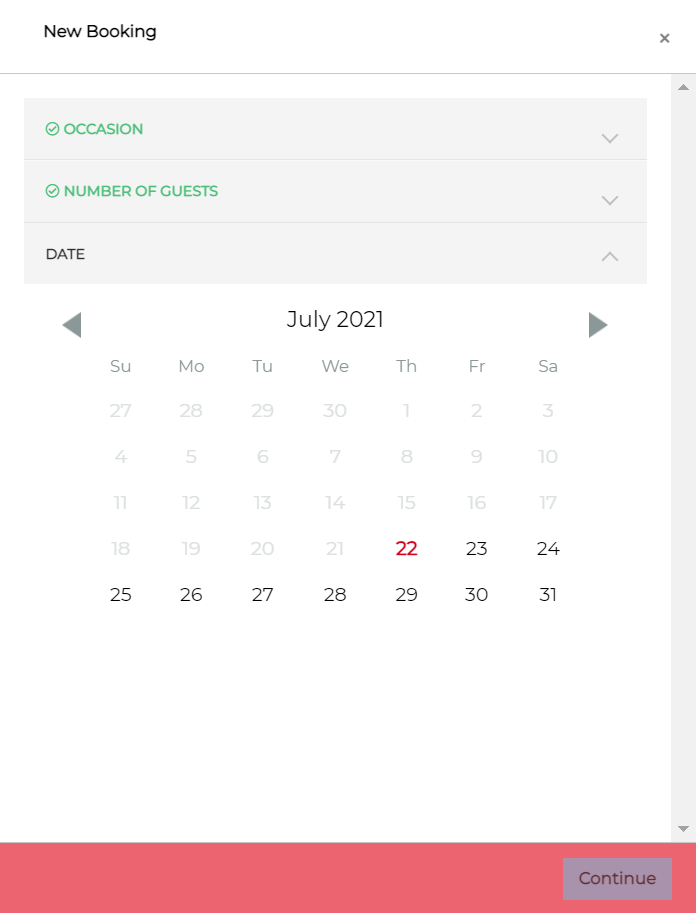
-
Select the required date
The Time screen is displayed:

If multiple sessions have been defined for your site in Tables | Reservation Settings, you will be able to choose the required session, and then select a booking time. If you are using an All Day session, you will only need to select a time
-
Select the session and time as appropriate
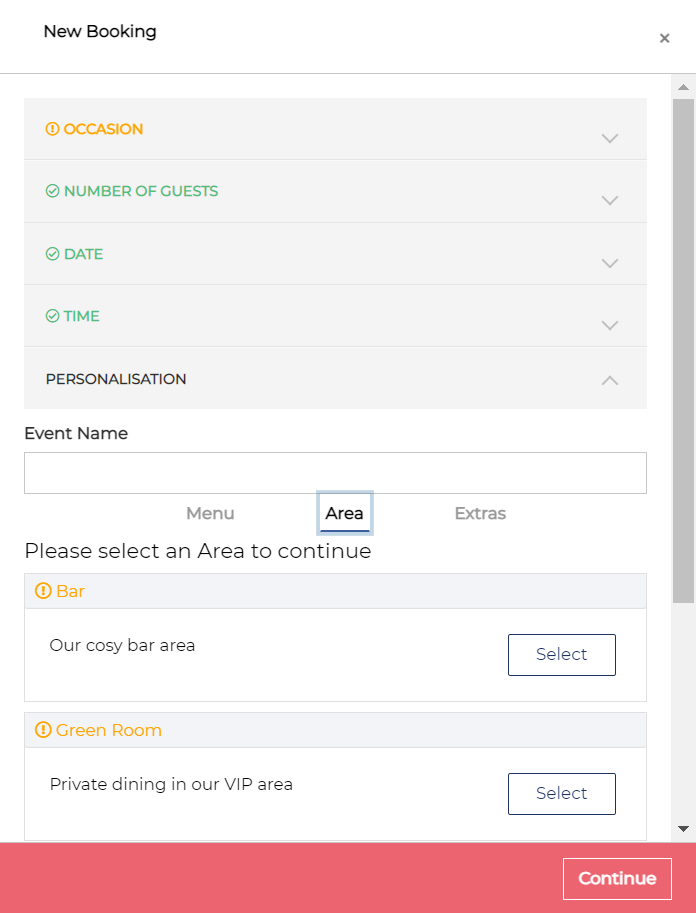
The Personalisation screen is displayed:
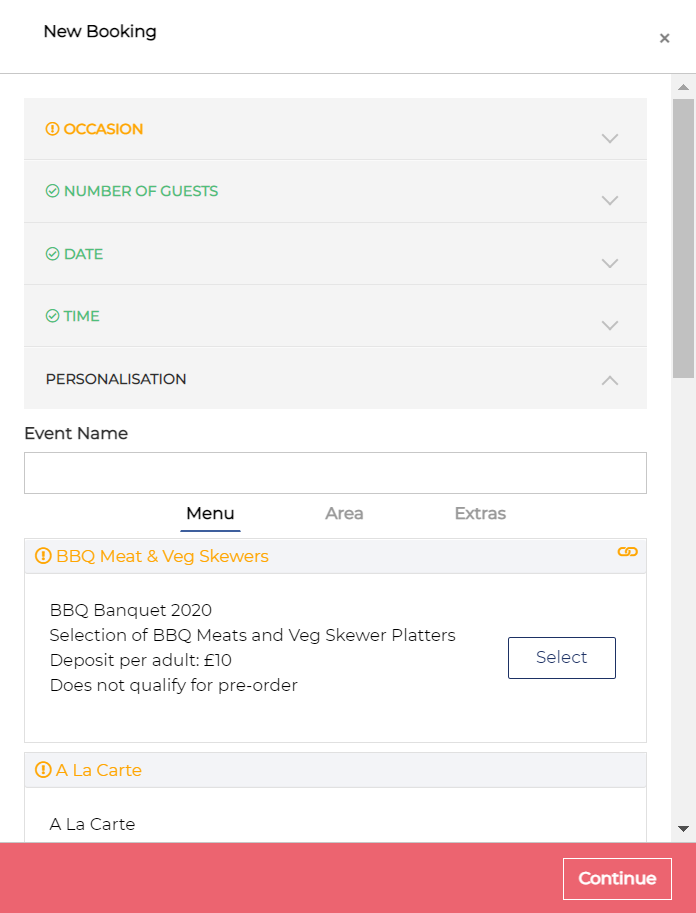
-
Enter the Event name as chosen by the guest
-
Select the required area, menu and package from the respective tab pages:


If a pre-order or pre-payment is required for the selected event, the user will be advised accordingly:
-
Select Complete
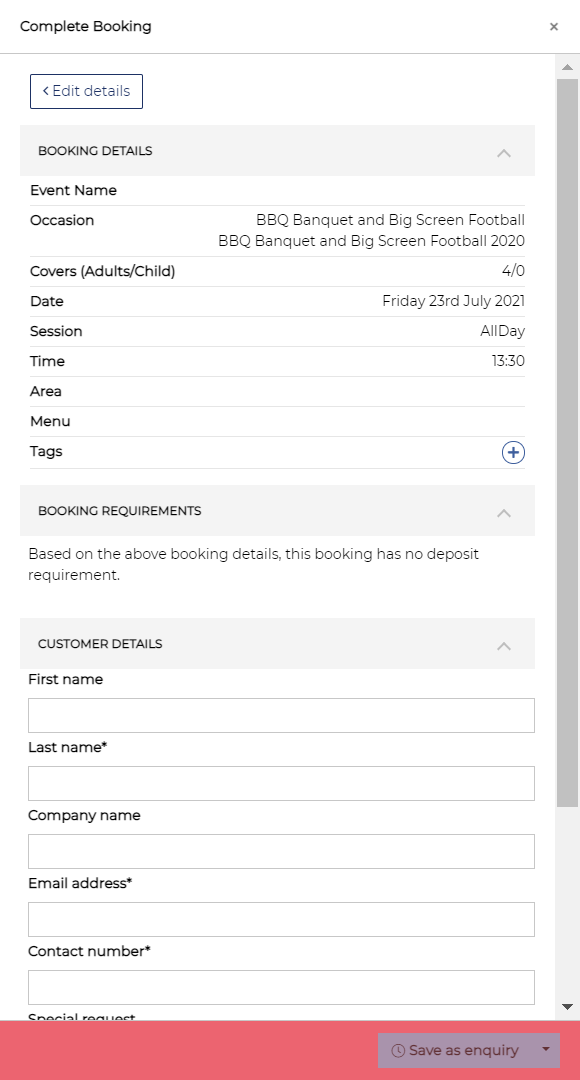
The Complete Booking screen is displayed:
-
Review the booking details with the guest. If there is a discrepancy between the booking and the guest’s preferences, select the <Edit details button to return to the New Booking screen and modify accordingly
-
Enter the customer’s details. (Mandatory fields are identified with a *):
-
First Name
-
Last Name*
-
Company Name – This optional field allows you to identify bookings by a company in addition to a personal name. The company name is displayed on all bookings beneath the organiser’s name
-
Email address* – This allows you to contact the customer via email about the booking
-
Contact Number* – This allows you to contact the customer by phone about the booking
-
Special Request – This allows you to record customer preferences or key information
-
Booking notes – This is a note specific to this particular booking
-
Customer notes – This is a note specific to this customer that should persist against the guest for future visits
-
-
Select any consent options the customer agrees to
The estimated cost of the booking is displayed in the bar at the bottom
-
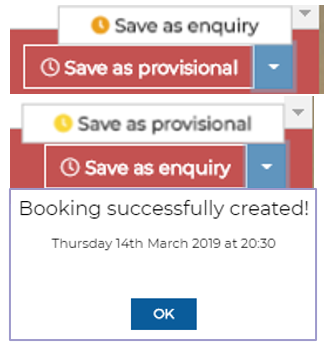
You can save the booking as provisional (if a menu with a deposit has been selected) or Confirmed. Alternatively, using the drop-down option, choose to save the booking as an enquiry
If any of the booking elements were highlighted in orange because they did not match the specific restrictions for the selected booking you will be able to save the booking as an enquiry or using the drop-down option, save the booking as Provisional / Confirmed.
A booking confirmation message is displayed.
Editing a Booking
To edit a booking:
-
Select the guest’s name on the Dashboard or the Bookings screen
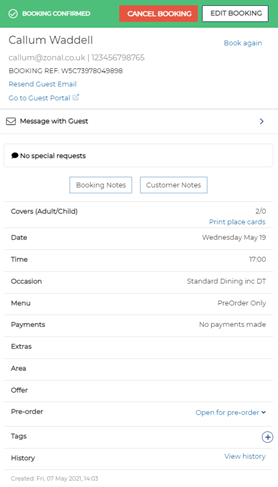
The Booking Details window is displayed in the right-hand side of the screen
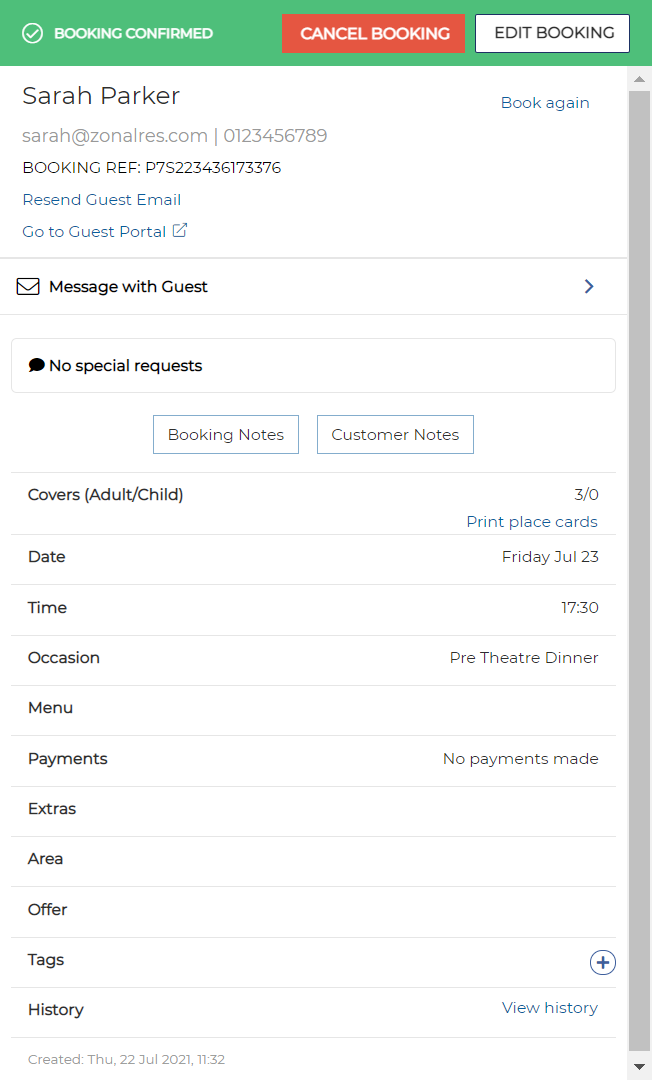
Viewing Booking Payments
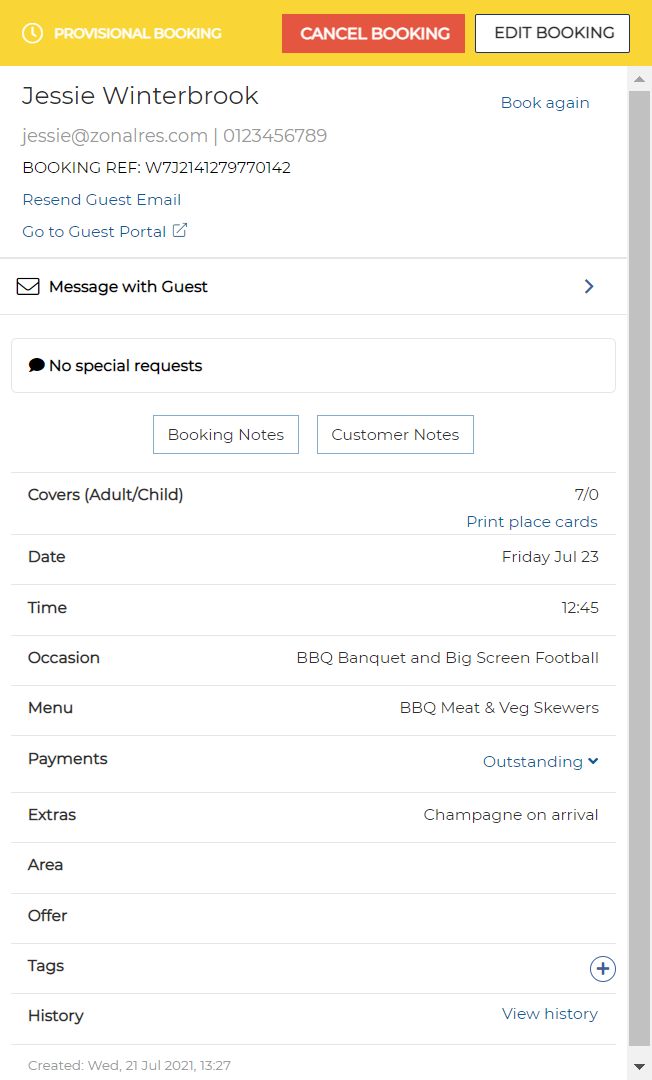
When you select a booking name, more information about that booking is displayed, showing all payments made against a booking, as well as any deposit, pre-order or pre-payment requirements, if there are any.. This shows in the Payments section of the booking details.
When no payments are yet made against a booking, ‘No payments made’ will be shown in Payments section.
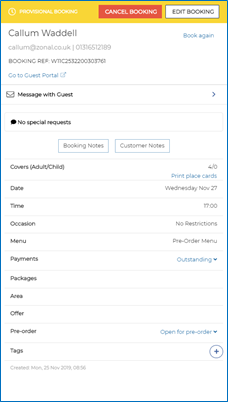
When something has been paid or there are any deposit, pre-order or pre-payment requirements, Payments section will contain Outstanding link. This link allows you to view Payments details as a drop-down.
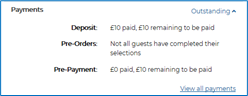
The View all payments link allows you to see what has been paid against an Event. When you select View all Payments a pop-up screen opens to show all transactions on the account:
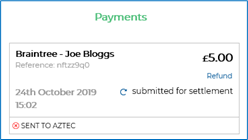
When the Braintree payments gateway is enabled, a Refresh icon may be shown. This allows you to update some statuses of payments. For example if the status shows Submitted for Settlement, selecting Refresh will update the payment status to Settled if the payment has been processed.
The Refresh option is not part of the payment process and is not a required step, it only visually updates the status on this screen
Events supports 3D Secure payments for all Braintree payments made through the Guest Portal
Charging an Organiser for a Missed Booking / Removing Payment Details
If a booking ends up as a no-show, the host can choose to charge the organiser using the payment details provided at the time of booking.
Alternatively, the host can remove the payment details if they are satisfied that the guest attended the booking, or that sufficient mitigating circumstances exist to warrant not charging the guest for the missed booking.
Payment details are removed automatically after 24 hours of the booking so that payment details are not retained unnecessarily.
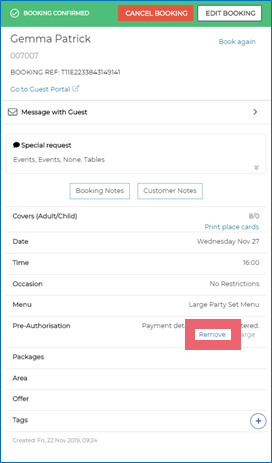
To charge an organiser or remove the payment details:
-
Select the booking from the Bookings window or via the Search function.
-
Select Charge to take a payment.
The default amount is set to the total deposit value of the booking as defined for the menus chosen at time of booking. Users can update this amount as appropriate before applying the charge.
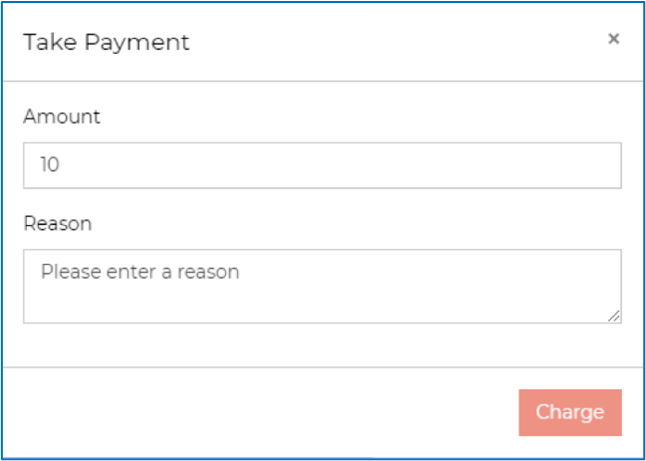
-
Enter the payment amount and a reason for the charge in the box provided and select Charge.
or
-
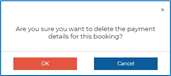
Select Remove to clear the payment details from Events.
You are prompted to select OK to confirm or to cancel.
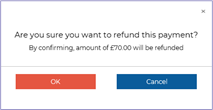
You can also refund Braintree payments from the View Payments screen and mark non-Braintree payments as having been refunded The Refund link is available under the amount paid.
Select Refund and OK to confirm the refund.
The section for that payment will now show as successfully refunded with a green tick.
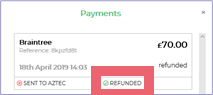
When integrated with Braintree, this link sends a refund from Braintree to the guest.
If the payment was made by any other means or if your payment gateway is not Braintree, the Refund option will not return any money to the guest so you need to process a refund manually.
Once refunded, the booking status will return to provisional if the total of any remaining payments falls below the required deposit. This will also update any other integrated Zonal products (liveRES Reservations, Tables and Aztec).
It is possible to refund past bookings and cancelled bookings.
If automatic refunds have been enabled (Braintree integrated sites only), when a booking is cancelled, the refund is issued automatically.
Editing and Managing Enquiries
If a booking was recorded as an enquiry due to insufficient capacity, the host can check the booking screen to ascertain whether their restaurant can handle the event. Alternatively, Tables users can open Tables to check whether a booking can be seated correctly.
Filtering Your Enquiries
You can filter the list of enquiries by selecting the Filter icon and choosing one or more of the available filters. This allows hosts to identify the enquiries that require further action for any one particular day quickly and easily.
By default, only the Confirmed and Provisional booking status filters are selected, and no other filter will be applied.

The following filters are available:
As you select a filter, a label is added beneath the date ribbon as shown and the list of bookings is refreshed accordingly. These filters are persistent, so if you close the filter section or move away to another screen, when you return to the booking page the chosen filters are still selected. For example:

You can remove a status filter either within the Filter sidebar itself, or by clicking the X on the labels under the date ribbon.
When you select ‘Clear Filters’ this will return the statuses filtered to the default of Confirmed and Provisional.
Printing a Daily Booking Summary
Print the daily booking summary by choosing the required day on the ribbon and selecting the Print icon.

Day notes (if defined for the current day) will be included in the printed bookings list for that day.
Creating a New Booking
To create a new booking:
-
Select the New Booking button in the top right corner
The available occasions are displayed:

-
Select the required occasion from the available list.
The Number of Guests screen is displayed:
-
Using the + and – buttons, define the number of adults and children for the booking and select Next
The Date screen is displayed:

-
Select the required date
The Time screen is displayed:
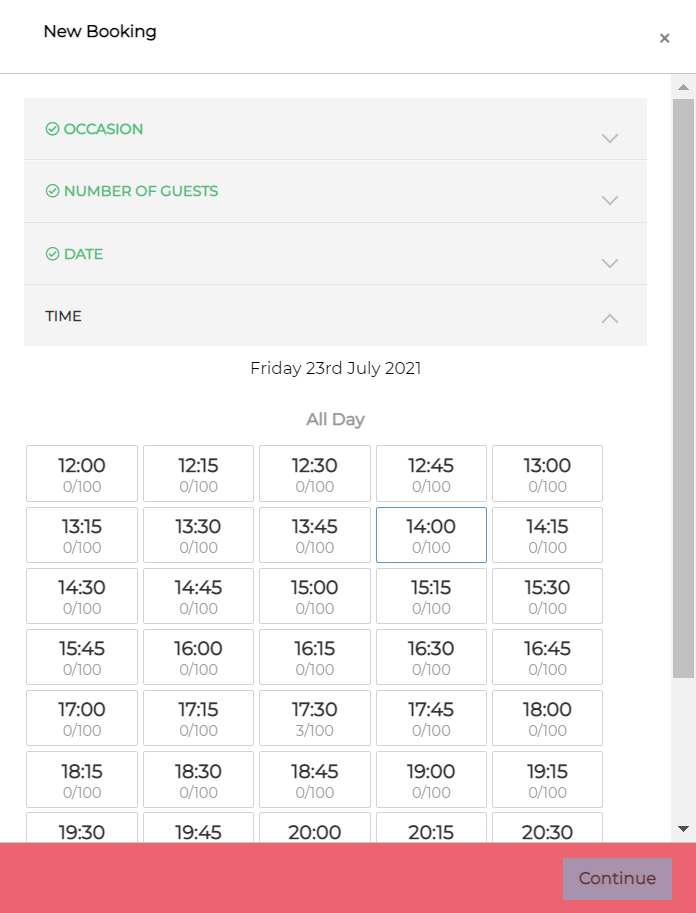
If multiple sessions have been defined for your site in Tables | Reservation Settings, you will be able to choose the required session, and then select a booking time. If you are using an All Day session, you will only need to select a time
-
Select the session and time as appropriate.
The Personalisation screen is displayed:

-
Enter the Event name as chosen by the guest
-
Select the required area, menu and package from the respective tab pages:
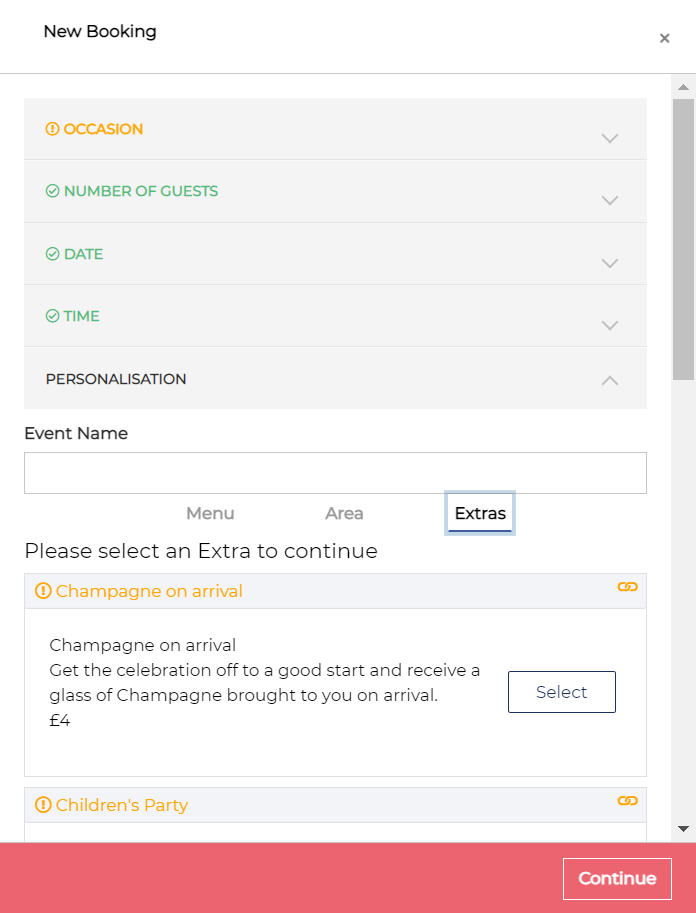
If a pre-order or pre-payment is required for the selected event, the user will be advised accordingly:

-
Select Complete
The Complete Booking screen is displayed:

-
Review the booking details with the guest. If there is a discrepancy between the booking and the guest’s preferences, select the <Edit details button to return to the New Booking screen and modify accordingly
-
Enter the customer’s details. (Mandatory fields are identified with a *):
-
First Name
-
Last Name*
-
Company Name – This optional field allows you to identify bookings by a company in addition to a personal name. The company name is displayed on all bookings beneath the organiser’s name
-
Email address* – This allows you to contact the customer via email about the booking
-
Contact Number* – This allows you to contact the customer by phone about the booking
-
Special Request – This allows you to record customer preferences or key information
-
Booking notes – This is a note specific to this particular booking
-
Customer notes – This is a note specific to this customer that should persist against the guest for future visits
-
-
Select any consent options the customer agrees to
The estimated cost of the booking is displayed in the bar at the bottom
-
You can save the booking as provisional (if a menu with a deposit has been selected) or Confirmed. Alternatively, using the drop-down option, choose to save the booking as an enquiry
If any of the booking elements were highlighted in orange because they did not match the specific restrictions for the selected booking you will be able to save the booking as an enquiry or using the drop-down option, save the booking as Provisional / Confirmed
A booking confirmation message is displayed

Editing a Booking
To edit a booking:
-
Select the guest’s name on the Dashboard or the Bookings screen
The Booking Details window is displayed in the right-hand side of the screen
-
Select Edit Booking
-
Select + to add a tag to the selected booking.
Modify the booking details as required. The following fields can be edited:
-
First name
-
Last name
-
Company Name
-
Email address
-
Contact number
-
Special request
-
Booking notes
-
Customer notes
-
-
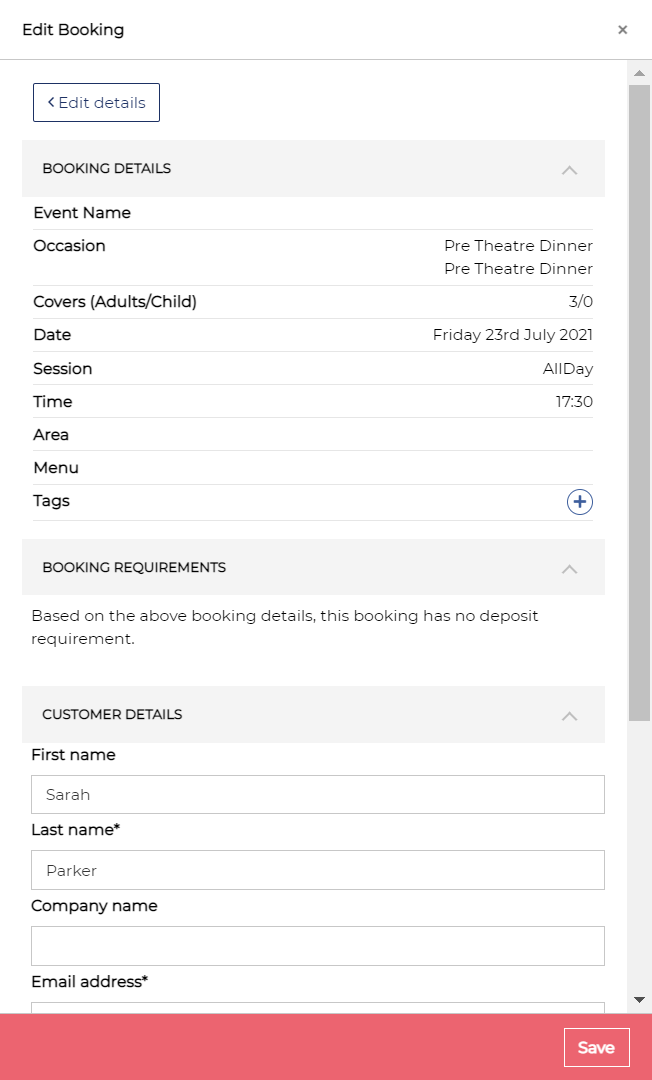
Select the <Edit details button to display the Edit Booking Screen
-
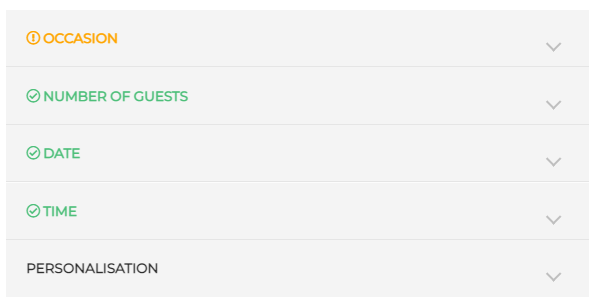
Booking details are displayed grouped into Occasion, Number of Guests, Date, Time and Personalisation
-
Select Occasion to modify the occasion details
-
Select the required occasion from the available list
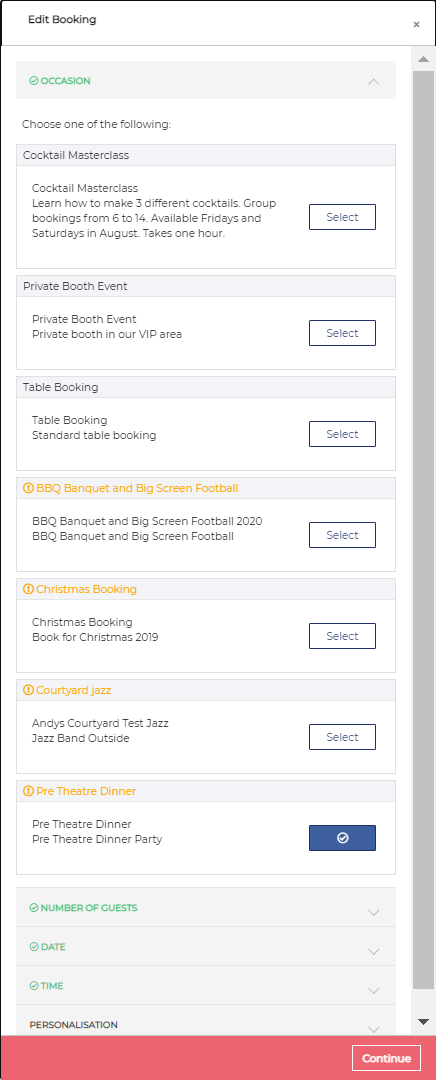
Occasions shown in orange with an exclamation warning have specific restrictions for which the selected booking does not comply.
-
Select the Number of Guests
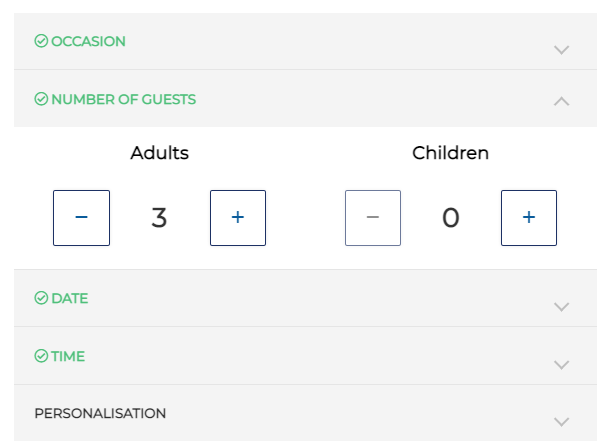
The Number of Guests title is coloured orange until the new numbers are saved against the booking by clicking Next.
You must select Next after adjusting the covers for the updated numbers to be saved against the booking
-
Select the Date

-
Select the Time
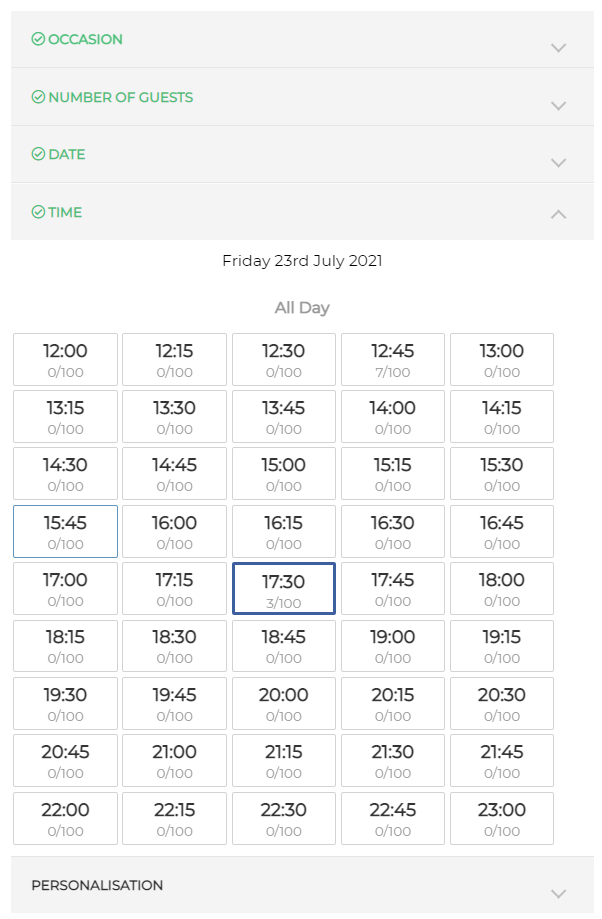
The time will be coloured orange and an exclamation warning shown if the selected occasion is not available at the chosen time, there is no availability in that timeslot or there are no tables available
-
-
Select Personalisation
If a menu or package is not available for this booking, it will be coloured orange and an exclamation warning is displayed. Additionally the titles will highlighted in the same way

Complete your selections for the Area and Extras tab:
-
Select Complete to return to the Edit Booking screen
-
Select Save to record your changes
Confirming a Provisional Booking
When a booking requires a deposit, but a deposit has not been taken, the booking is saved as a provisional booking.
A booking will only become confirmed when the required deposit is paid.
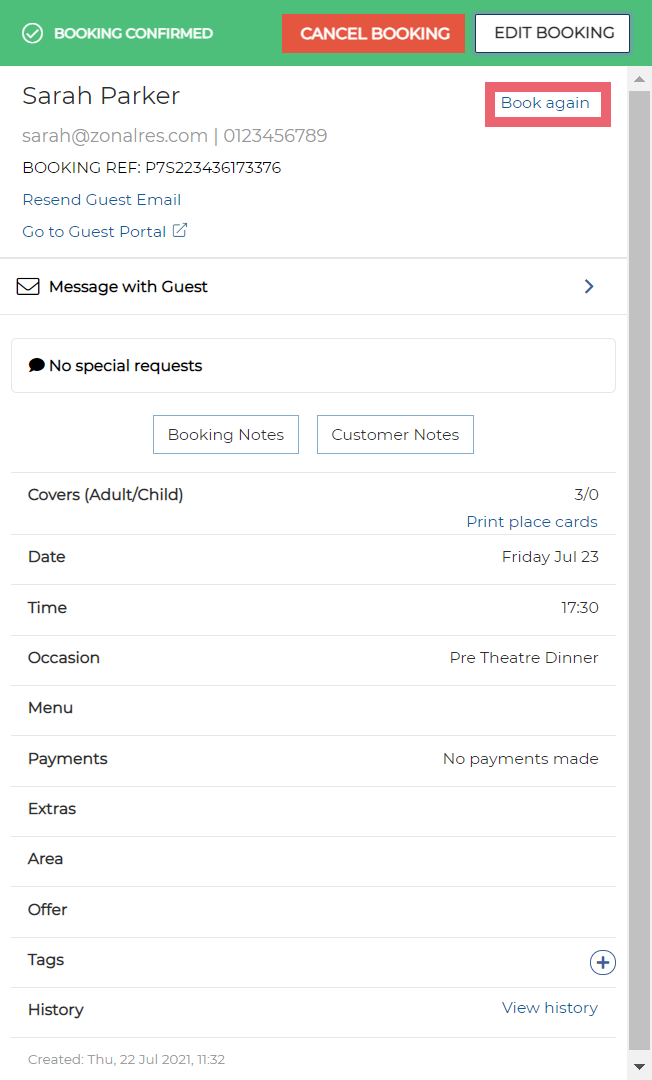
Repeat Guest - Book Again
It is possible to book again for a repeat booker. When you are on the booking details, there is a Book Again link.
Clicking on Book again will take you to the start of the booking journey and will follow all the same steps. Once you have continued through to the guest details section of the booking journey, the guest contact details and any Customer notes will be pre-populated to prevent having to re-enter those details again.
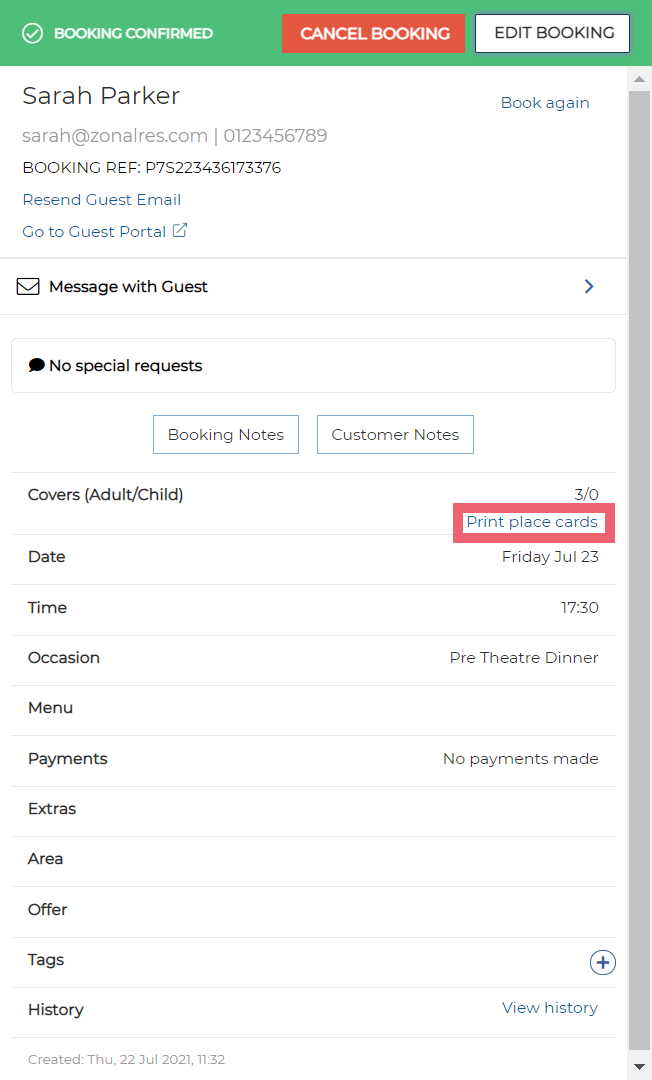
Printing Attendee Place Cards
Events allows hosts to print place cards for every attendee that is part of an event. These place cards can be customised to suit your organisation.
To print Attendee place cards, select Print place cards alongside the Covers entry in the booking details window.
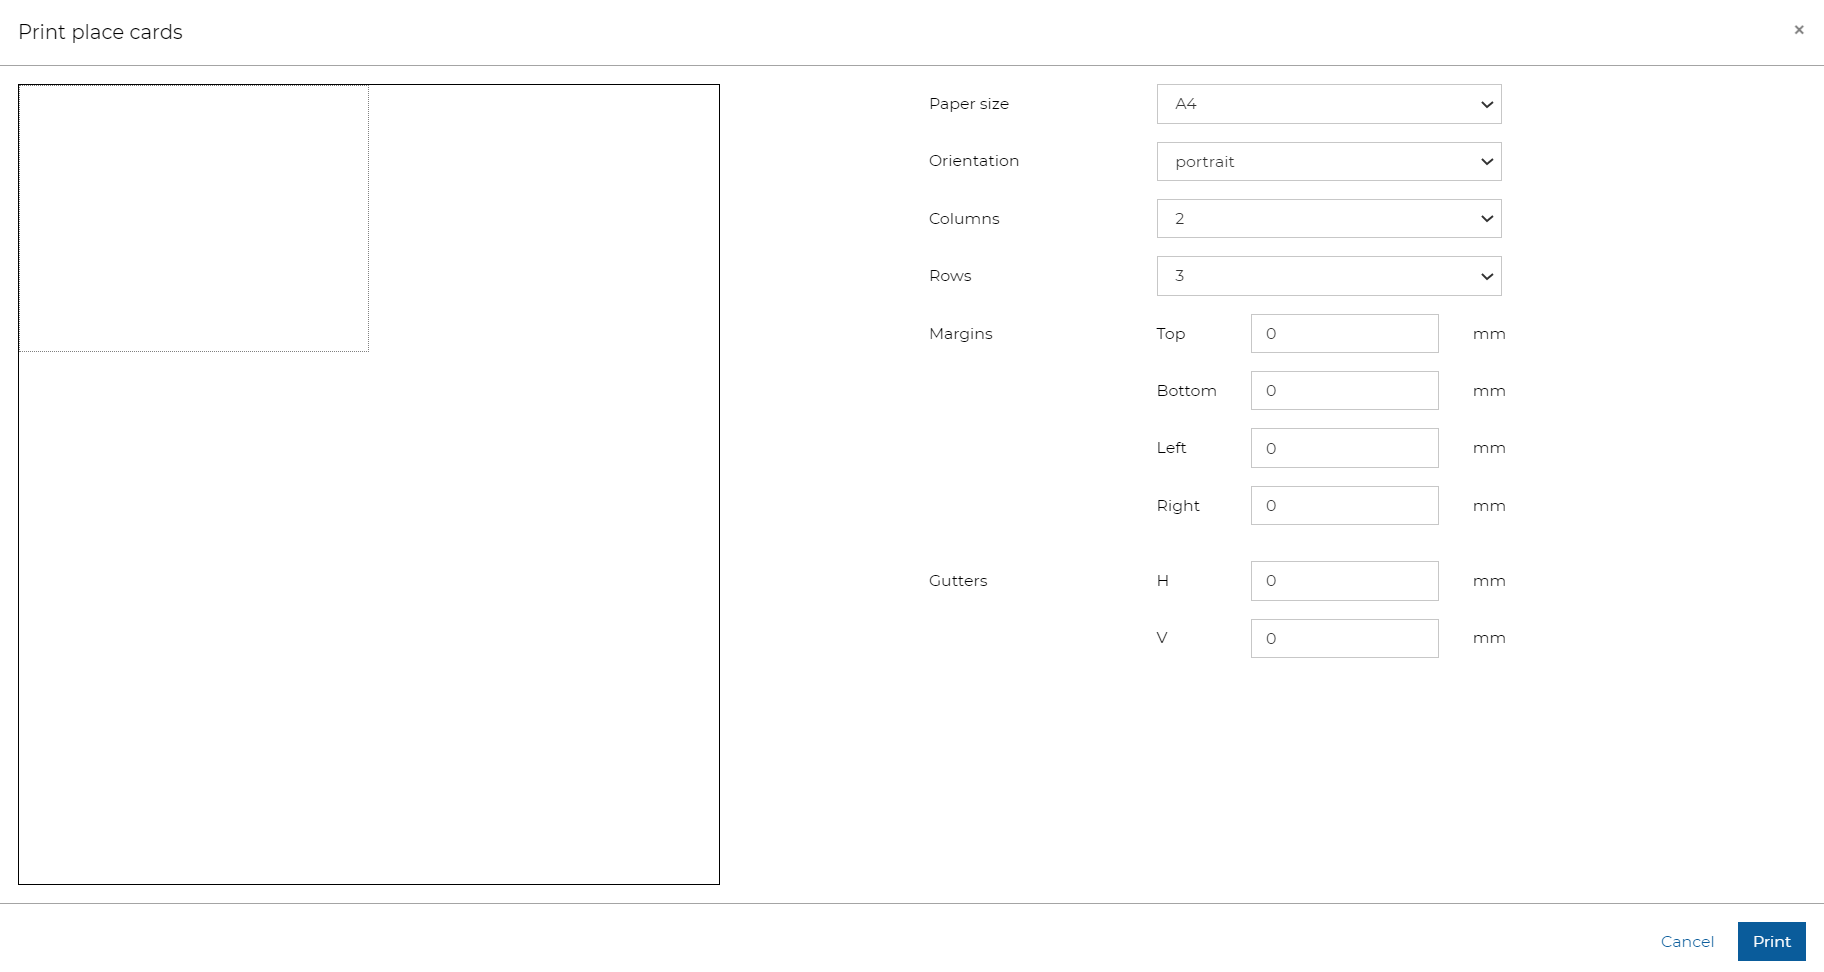
On the Print Place Cards window, modify the size, shape and orientation as required and select Print.
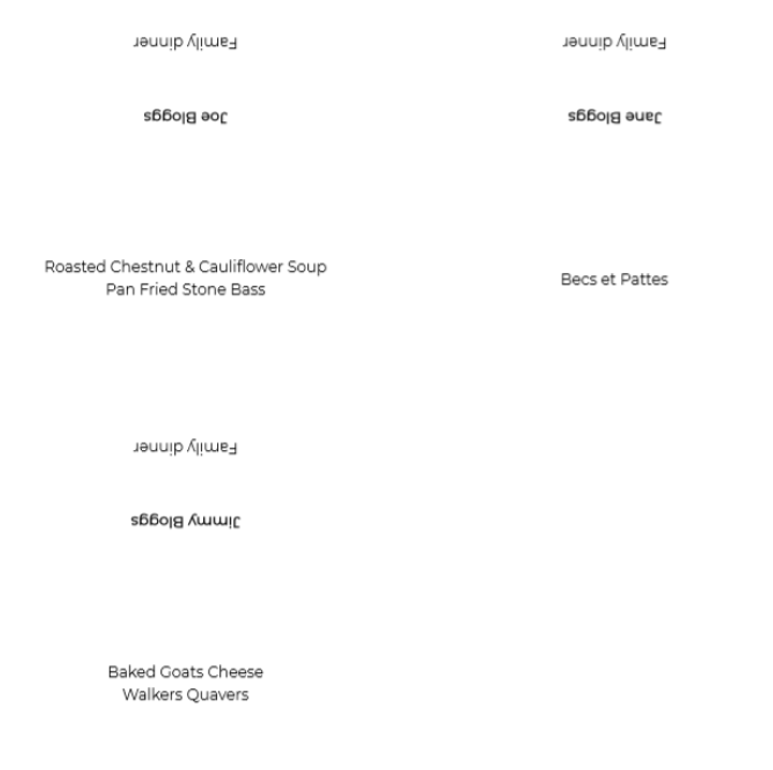
The place cards are printed as defined. Users can then cut out the cards and fold to display the customer’s name and occasion name on one side and the appropriate pre-order selections on the other. For example:
Viewing the Guest Portal
As a Host, it is possible to log into the Guest Portal for any guest booked into your restaurant.
Within the booking details, there is a link to Go to Guest Portal. Clicking on this link will open a new tab with the guest portal log in page. You must enter the Organisers surname to get access and from here you are able to see the details that the guest has access to. This is the same link that is sent to the Guest from the
The guest is able to add attendees, make payment and enter details for pre-authorisation as well as make pre-orders.

Cancelling a Booking
To cancel a booking:
-
Select the guest’s name on the Dashboard or the Bookings screen
The Booking Details window is displayed on the right-hand side of the screen
-
Select Cancel Booking.
You are prompted to confirm the cancellation of the selected booking:
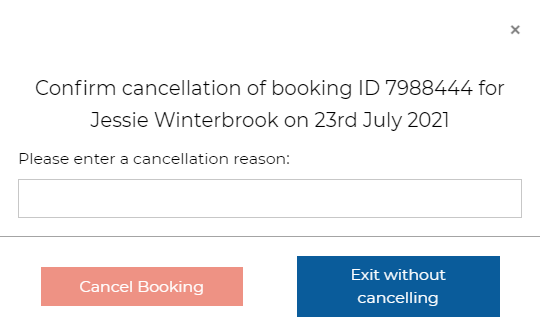
-
Enter a cancellation reason and select Cancel Booking, or select Exit without cancelling to return to the Booking screen.