The Payments section allows configuration of two sub-sections: Payments, and Braintree.
Configuring Refunds
The Refunds tab allows an Estate Admin to enable or disable refunds at the Estate, Company, or Site level. A site can inherit the refund setting from a company, and a company can inherit a refund setting from an estate. Any combination of enabling, disabling, or inheriting refunds can be set across all sites and companies within an estate.
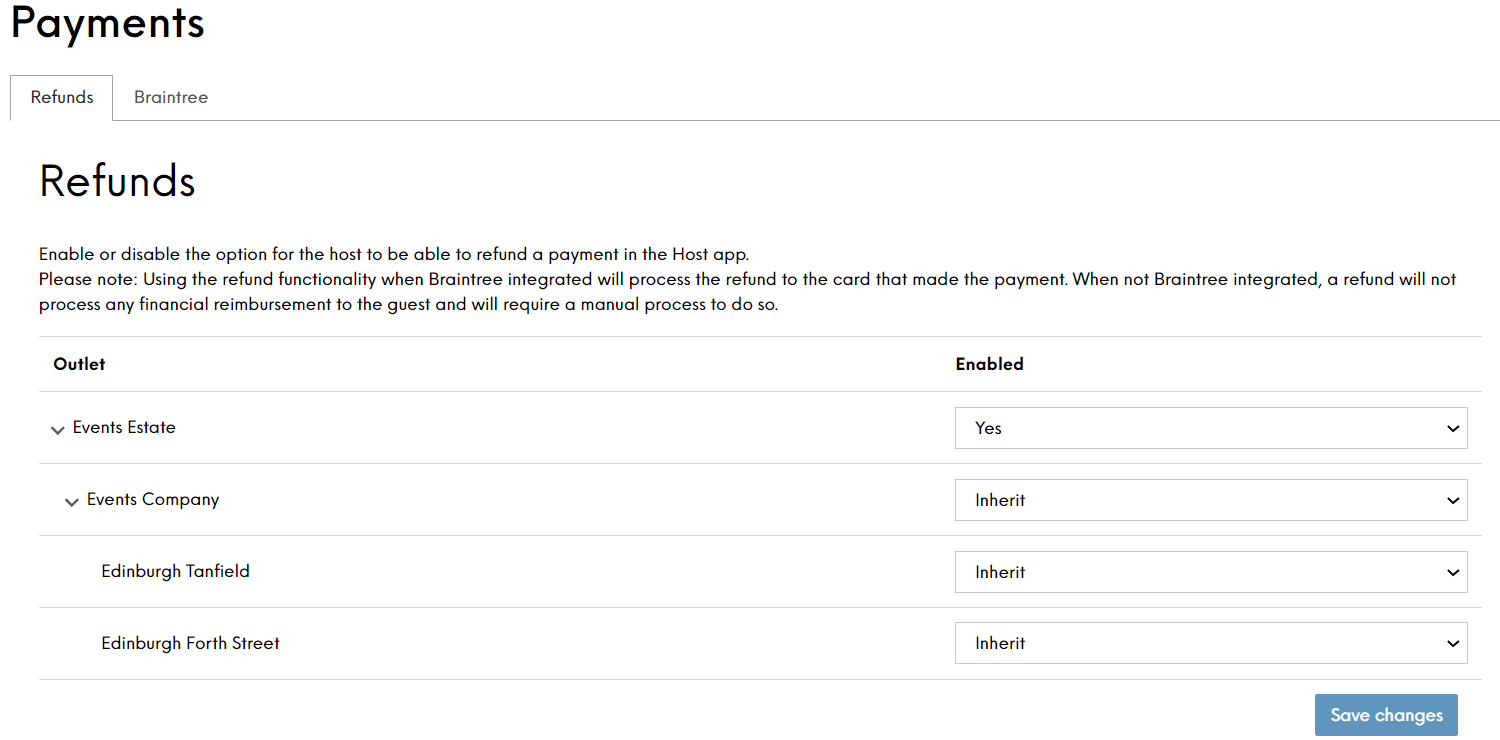
When refunds are disabled, the 'Refund’ link at the bottom of the payments pop-up, within the Events Host app (View booking --> View all payments), will be hidden.
Please note: Using the refund functionality when Braintree integrated will process the refund to the car that made the payment. When not Braintree integrated, a refund will not process any financial reimbursement to the guest and will require a manual process to do so.
Configuring the Braintree Payment Gateway
The Braintree section allows you configure Events to process payments using the Braintree payment gateway.
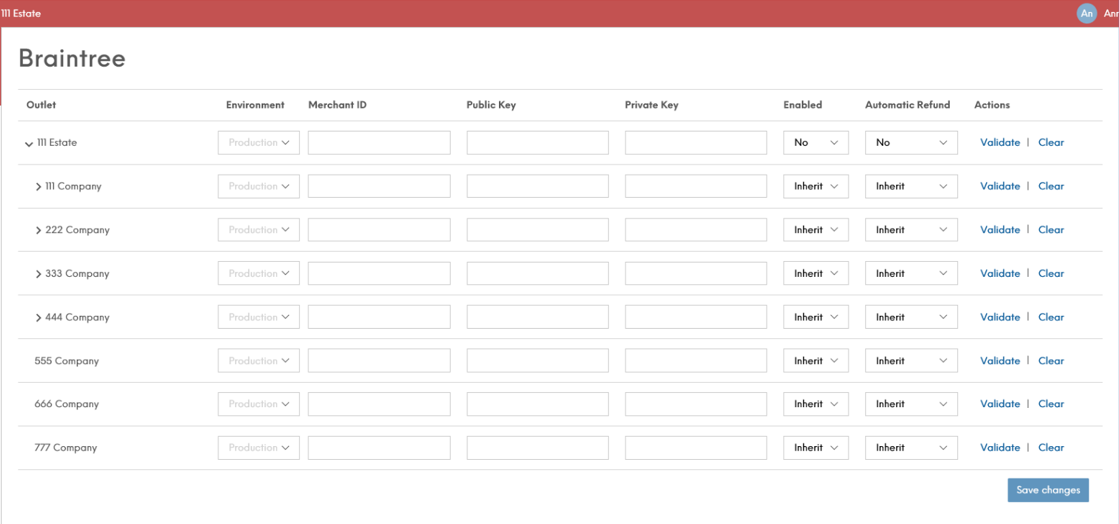
To make it easier to replicate settings for different sites within your estate, you can configure the settings for your estate or company and all sites can subsequently be configured to inherit their settings from the level above. In the example below you can see how all sites within 222 Company have inherited the company settings above:
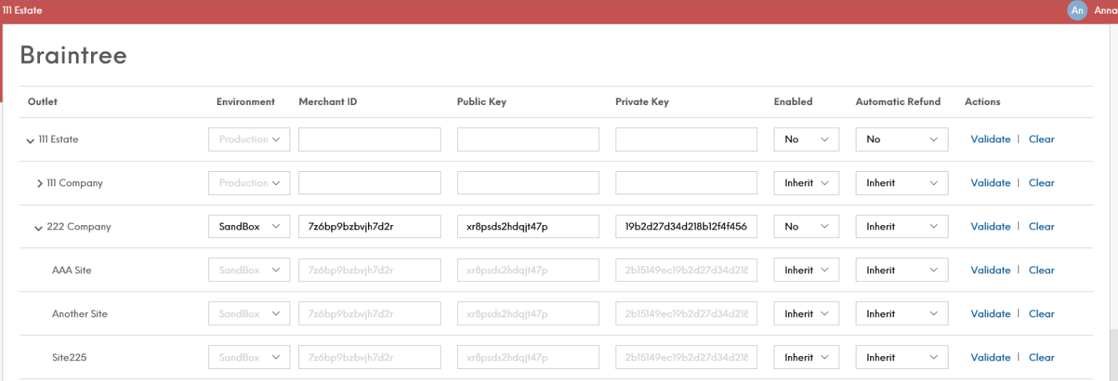
To define different credentials for a company or site, change the Enabled setting to Yes and enter the new Merchant ID, Public Key and Private Key provided by Braintree for that company/site.
When Braintree payments are enabled, Events communicates the Launchpad Site ID and the Aztec Site Reference to Braintree so that Braintree transaction reports can link payments to sites.
launchpad_site_id and aztec_site_reference must be configured as custom fields within your Braintree settings.
For more information about configuring Braintree Custom Fields, please refer to: https://articles.braintreepayments.com/control-panel/custom-fields
Events supports 3D Secure payments for all Braintree payments made through the Guest Portal
To take payments using the Braintree payment gateway:
-
Select Braintree from the left-hand menu.
-
Select the upper-most layer of the hierarchy that will use Braintree, for example a company.
(This could also be set to the whole estate or a single site if required.)
-
Select the required environment from the drop-down list.
Sandbox is a testing environment and no money would change hands. You must change this to Production credentials to use this for your site.
-
Enter the Merchant ID, Public Key and Private Key provided by Braintree.
-
Enable this setting by selecting Yes from the Enabled drop-down list.
If disabled, Events will continue to use the existing payment schemes.
-
Enable Automatic Refunds by selecting Yes from the Automatic Refund drop-down list.
When enabled, if a deposit was paid with a booking and Braintree payments are configured, the deposit will be refunded automatically when the booking is cancelled.
Automatic refunds can only be enabled if Braintree payments are enabled.
-
Select Save Changes when complete.
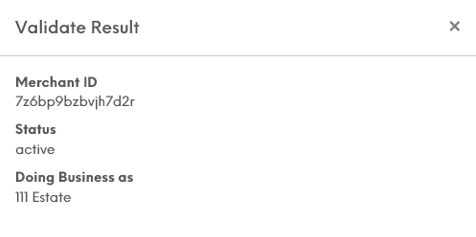
To validate a setting, select Validate alongside an entry.
If successful, the following validation screen is displayed.
If unsuccessful:
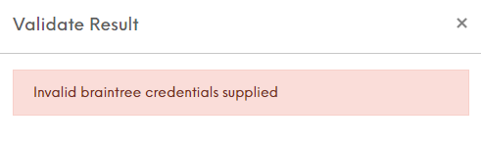
Select Clear on the Braintree screen alongside an entry to delete any settings that have been added. The entry will then return to the default setting inherited from the parent level in the estate hierarchy.