The Areas screen displays all the areas currently defined in Events for your Estate.
You can define any distinguishable public areas at your individual sites. For example, you may have a main bar and restaurant for standard bookings and a 'Top Bar' or 'Function Suite' that you only open during busy periods or for special events.
You can filter directly the areas displayed by typing the name of the area you want to find, or you can filter by company or site to limit the areas that are displayed. This will assist you to find the area that you are looking for much quicker. Please note that company and site names are taken from the Internal Name configured for the site or company in Launchpad. The Internal Name is for your use only and is not displayed to the guest. If you want to change the internal name, please contact your Zonal Account Representative.
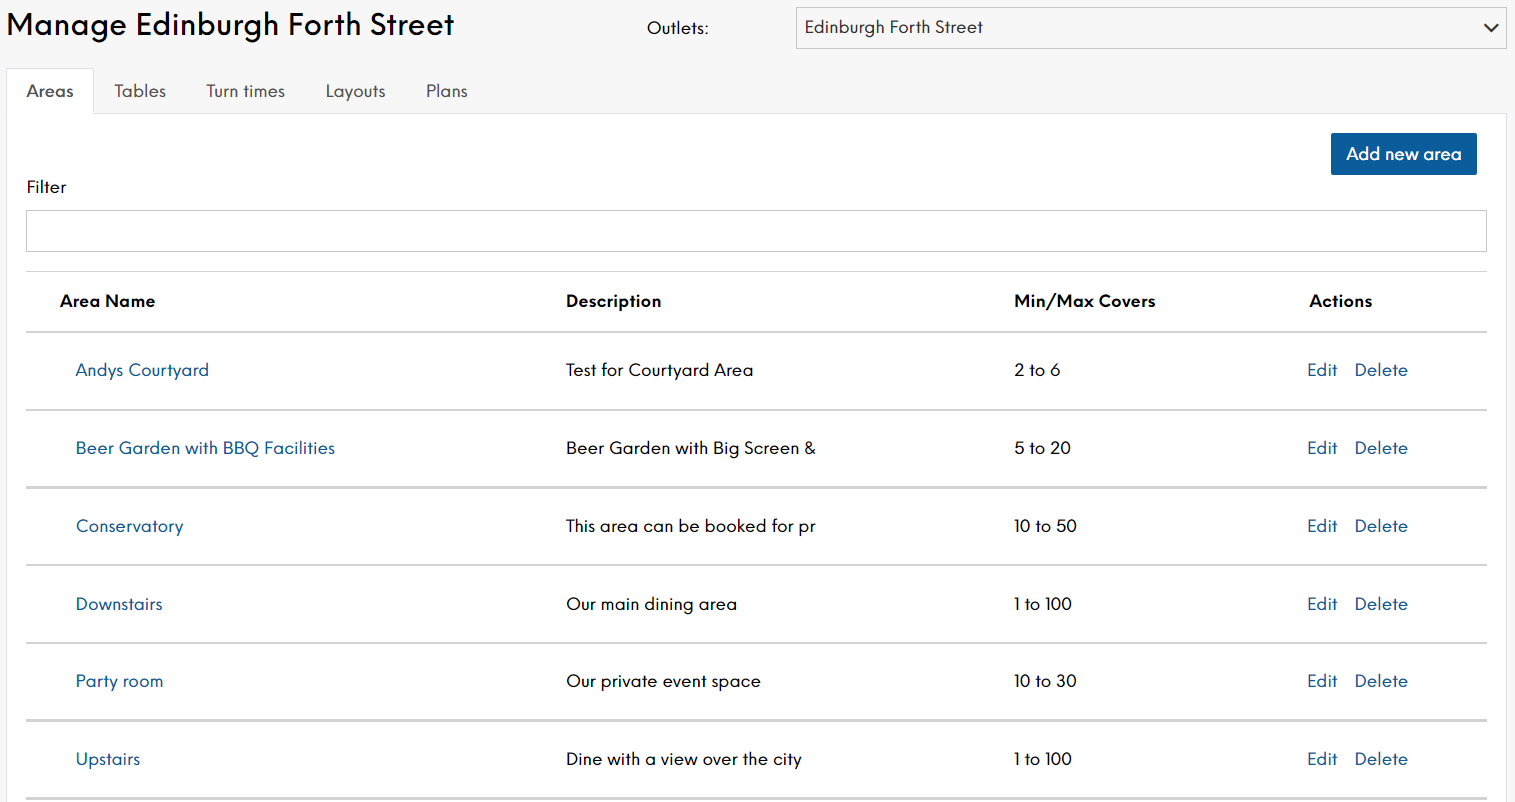
The Area field is not mandatory but adding an area for your sites allows guests to choose where they would prefer to sit and therefore enhance their customer experience. Any area chosen by the guest on their booking journey is only an expression of preference and the allocation of an area remains at the discretion of the host.
To define a new area:
-
Select Add new Area
-
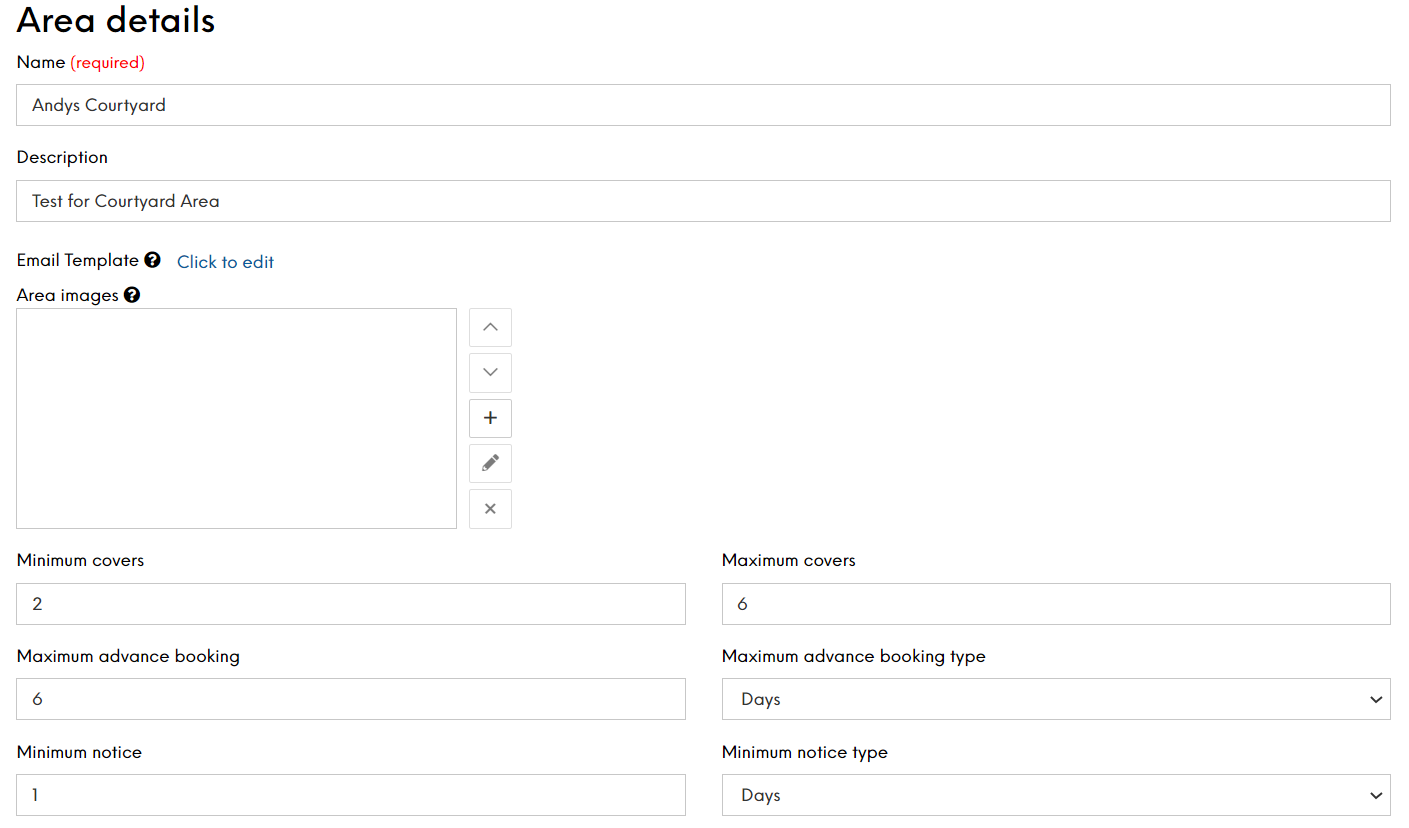
Enter a name for the new area
This name will appear on the guest portal, and is also shown throughout the booking journey and on all email communications
-
Select the site in which the area is located from the drop-down list. All sites are listed alphabetically in the list and you can start typing the site name into the field to navigate quickly. The site name is taken from the Internal Name configured for the site in Launchpad. The Internal Name is for your use only and is not displayed to the guest. For example, this could contain a regional reference or a unique term if the display name is duplicated on the system. If you want to change the site internal name, please contact your Zonal Account Representative.
You can only select one site
-
Define the optional fields as required. The more optional fields you define, the greater the control you have over your new area.
-
Description Enter a description of the area
The description can be used to display additional information on the widget, such as special features or restrictions of the area, for example “This area can be booked for private events for between 10 and 50 people.” The first 30 characters will be displayed on the Areas summary page and is shown throughout the booking journey
-
Area Images Add up to 10 URL links and descriptions to images that will be associated with an area. These images will be returned in the External Events API for you to create a more enticing booking journey for your guests
-
Minimum Covers Enter the minimum number of covers you want to allow in the chosen area
Customers will be unable to make a confirmed booking if the number of covers is below the defined minimum. This field can be used together with the maximum number or on its own
-
Maximum Covers Enter the maximum number of covers you want to allow in the chosen area.
Customers will be unable to make a confirmed booking if the number of covers is above the defined maximum. This field can be used together with the minimum number or on its own
If you do not set the minimum or maximum number of covers, guests will be able to make a booking in the area with any number of covers
-
Maximum Advance Booking Enter the maximum amount of time in advance that a booking can be made. This field can be used together with the minimum notice or on its own
-
Maximum Advance Booking Type Define the measurement of time for the above in terms of years, months, weeks, days, hours or minutes
-
Minimum Notice Enter the minimum amount of time in advance that a booking can be made. This field can be used together with the maximum advance booking time or on its own
-
Minimum Notice Type Define the measurement of time for the above in terms of years, months, weeks, days, hours or minutes.
-
-
Select Save Changes when complete
Your new area will be displayed in the list
Select an area in the list to view all its settings.
While you can delete an area, you must ensure that it is not currently in use before doing so
Select Edit on the Area screen or Edit this Area on the Area Details screen to modify an existing area.
The Edit option allows you to change any of the information already entered and will also show new further options that are required to create a schedule for this area.
Scheduling an Area
Once you have created an area, you have the option to add a schedule. When you edit an area, an additional section is displayed at the bottom of the form where you can enter your scheduling details.